Preparing ZBrush File For Digital Milling
I have worked diligently with this model. For ZBrush users or traditional sculptors entering the digital field, here are some things that I had to do near the end.
Perspective
Be sure that I was viewing this entire project in the perspective view. We traditional sculptors are not used to having to push a button to see in perspective, but these digital programs do. This should be done in the beginning to be sure you are sculpting correctly. This is basic, but check before you output.
Will my cut foam pieces align?
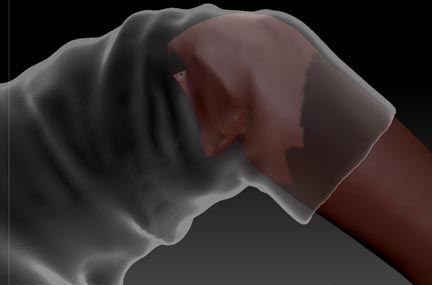
I had to fix the arms, as mentioned in the previous post. I need to fit these arms on the body and they will be milled at a higher resolution. I also plan to use less clay on them. I had sculpted them way under the sweater, instead I cut them off at the sleeve. I did this using Transparency to see through the sleeve.

Preparing Files
I will be sending this as 4 separate files- the base, the body, and the two individual arms. I might also combine them and send them as one file so that Synappsys can see how they go together. Though I do want them milled separately.
Before I can get these pieces ready there is another step I must do. Right now the files are very large for each. ZBrush has something called Decimation Master. Decimation master lets you hold your detail, but brings the file of each of the pieces down considerably
For example:
Before Decimation Master After Decimation Master
34% OF DECIMATION)
Right Arm
Active points 326,954 127,188
Left Arm
Active points 296,078 140,452
Body
Active points 7,751 mil 3,329mil 1,149 mil
Base
Active points 87,202 37,468
I can export the entire project and individual subtools, ie. arms, body and base as individual obj’s and then combine them as one obj . However, ZBrush also has a plugin that allows me to collect for output in the preferred .stl file for digital printing. Which means that I will have a different type of file for the vendor. In the next post I’ll talk about my experimentation with this plug in.

