Teaching Myself And Learning From Others Cont Part 2 of_____
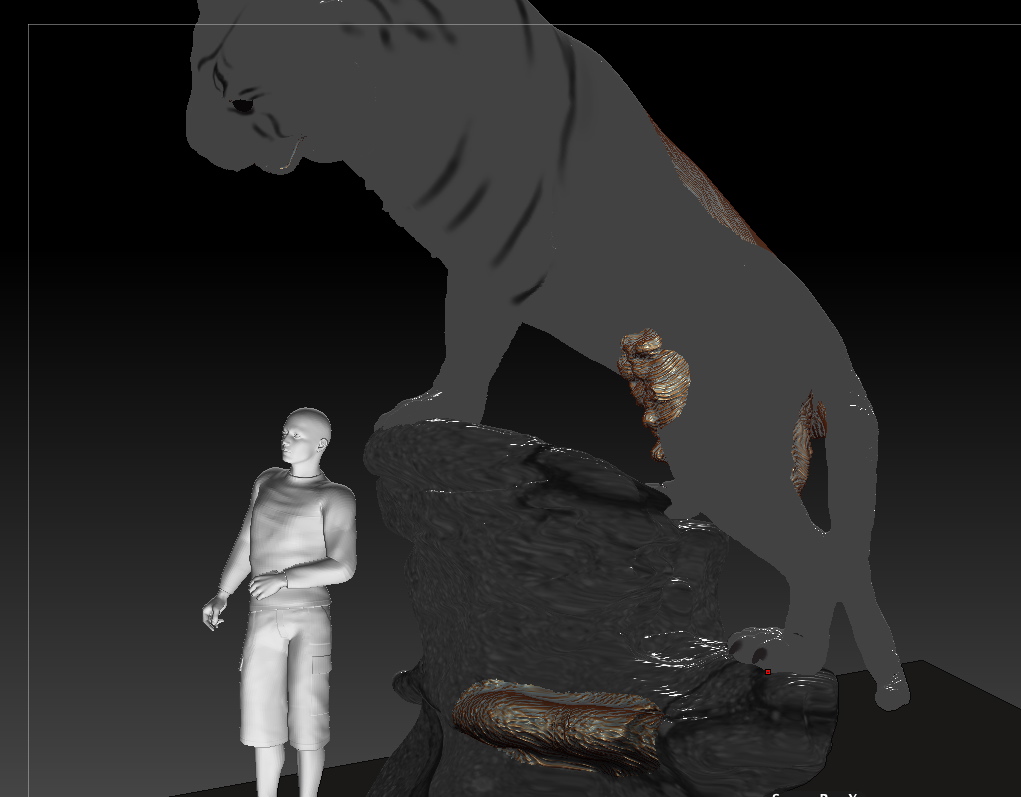
This is a post/tutorial that has been continued from Teaching myself and learning from others part 1. If you are following along, this is a wonderful video tutorial explained by Kevin Salki . You can find the video in post 1. I’m continuing on with my progress of getting this to work in this blog post. (THE SCULPTURE IS NOT FINISHED YET)
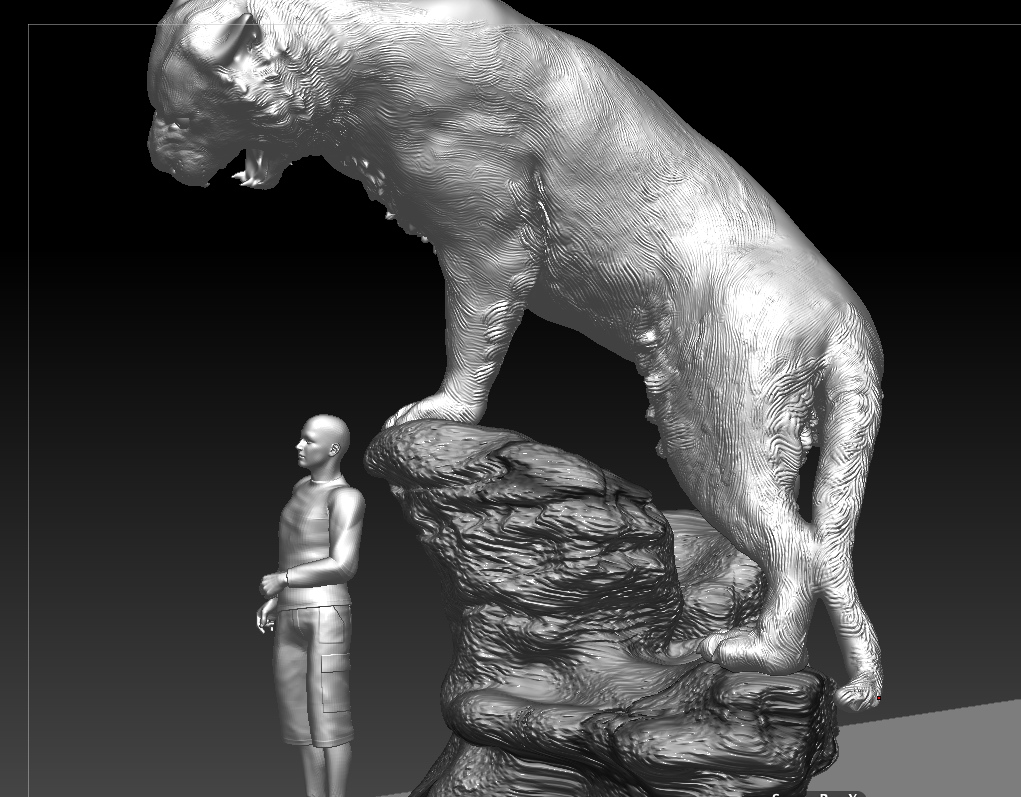
STEP ONE- applying double shader- when I did this I had a mess which looked something like this.
What I discovered was that I just had my lights switched off and my color was set to black. I’m really not sure which of these fixed the problem but I’m on target. My black painting that I did on the tiger, shown in previous post, also seems to have disappeared. It would be nice if it stays gone. DUH! so I fixed that and now mine looks just like the video.
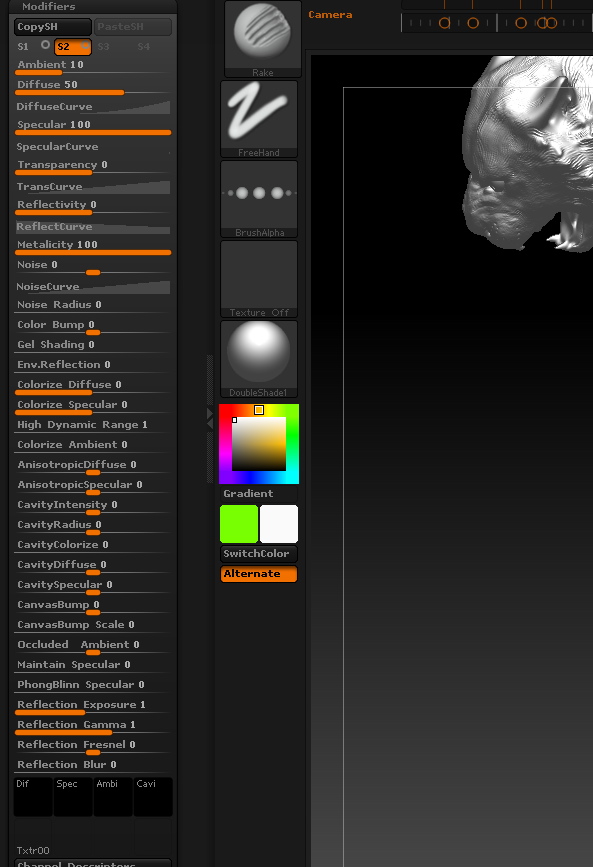
I used subtool master found in the Zplugin menu and now have what Kevin has. ( I am on .41 of his instructional video created especially for my project, the video is located in part 1 of Teaching myself and learning from others part 1. I owe this man a debt of gratitude for walking me through this.)
I’m so glad this is a video and not written because as he proceeds and I see all of the things in the modifiers of materials menu, my eyes glaze over. I am a traditional sculptor entering this digital process a few years back. I still don’t know what half of this stuff does. And I
probably know enough to be very dangerous with ZBrush. When 3D guys talk about things like ambient occlusion or speculators or whatever, well, they might as well be talking Greek. But this is how I learn best, show me and let me try. The terms I hear Kevin say just before 1.36 are “Diffuser,” “Speculator,” and “Cavity.” I have made a mental note and this blog post to remind myself- look this up. Maybe I can figure out what these actually do. But now to follow the video and see what happens.I have picked my base color and indeed it comes up in the little box marked diffused. he sayed that is my base color, so even though I don’t know why they call it diffused, I’m head somewhere.
I adjust my specular as he states, again, no idea what I am doing, nor what specular is but Kevin says “this is what determines how glossy the material looks ” Indeed, I’m seeing this as well. But I think, even when I am doing patination at the foundry I turn to the foundry man and say, “Give me a little more brown, kick it back here, can you do some more highlights there.” Even so, when at the foundry I tell the person doing the patination, hit it with water, because as they apply the chemicals I can’t really tell what it will look like in the end when it is waxed. The water helps me to do that. No, won’t be hitting my Wacom with water, but I guess, I’m doing my own patination. I’m beginning to get a little giddy.
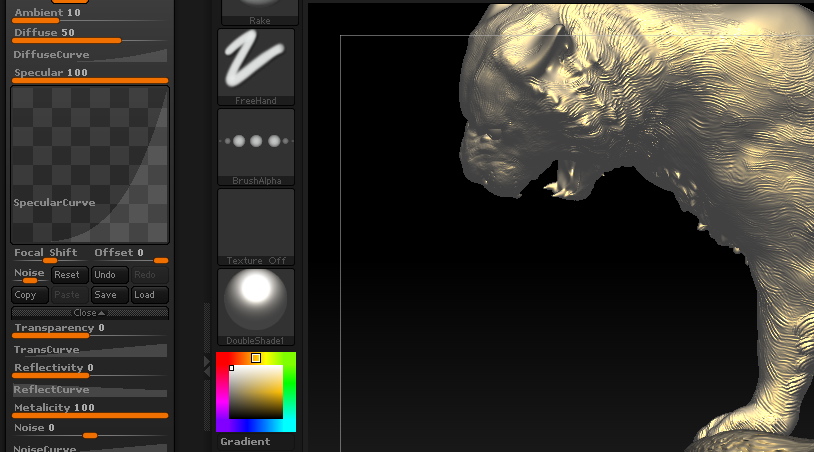
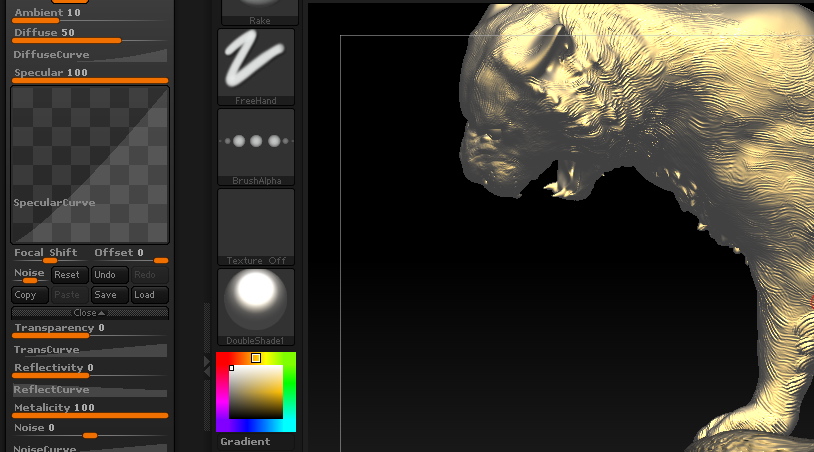
Yes, I’m only at 2:02 of this 14 minute video. And he says to drop down the ambiant and crank up the diffused? Following along master.
Dropping down the ambient makes if feel richer. I like where I am going. The hardest part about watching this video is I can not see the numbers. My ambient is set to 2. I have no idea what the diffused should be set to I did mine at about 44.
On to the “second property of this material.” 2.14 of the video found in the previous post Teaching myself and learning from others part 1.
Here I am stuck! I assume that the S1, S2, S3 and S4 are channels of color that I am mixing to create my bronze material. I think I actually did mine backwards and my S2 was the gold and my S1 is the green. I don’t suppose that matters. Remember, I am in a place I have never been before. So clicking around on things, I realize that the little circles next to S not sure what it does. however, I can’t see the secondary color. I do notice that as I click around on these little dots the color turns off and on, but still my green is not turning on. Perplexed. Little grasshopper runs to the master to see what he says.
Facebook is a wonder and Kevin Salki who has created this video for me, has looked at my screens shot to the right that says “woops” and notices a few things. His reply “Crank your “Colorize Diffuse” to 100 Also, at the top of the properties you can play around with your ambient and diffuse numbers, in the video I set the ambient to 2 and diffuse to 88″
I follow as a little grasshopper should to the ZBrush master, and now I get something like this.
I ask Kevin a few questions.
ME: “Out of curiosity, if I don’t like how these look blended can I go back and change them?”
Kevin: “Yup, nothing is really ever permanent in zbrush, you can readjust the look of your material on the fly. I recommend doing the “mixer” option on the second color rather than the first (how I did it in my video). If you want to have the oxidized look of the green be the dominant color, and the original bronze in the cavities.”
ME: “ok so switch them? Gold as S1 and Green as S2? or is this something that you do in the mixer pallet?”
Kevin: “So after 2:22, I had just finished setting the second color. It really doesn’t matter which one is where, just so long as you remember that the one you do the mixer on will cause the other color to come through more. So if green is on S2 and you use the mix by Cavity option (as in the video) you are telling zbrush that you want the green to be confined to the cavities mainly, therefore the bronze will bleed through as the green is pushed into the cavities of your model.”
Kevin: “Oh, and clicking on the little circles in the S1 and S2 buttons will disable that section. So if you are seeing black, its because you’ve temporarily disabled that part of the material.”
On to the mixing. OR NOT
I tried to create channel 1 and 2 as Kevin said, I had many questions and in the end I ended up making my s1 gold and my s2 green. Still my results don’t look the same as his. Is it a mac/pc thing? Well I still have some sculpting to do on the piece. So, I’ll finish sculpting and try this again later. I will get to the point of presenting in the next day or so. I must. I’ll continue to document my progress with Kevin’s video.
For those watching this blog, after presenting the sculpture as a bronze in zbrush it will be modified and sent to Synappsys digital services. Here Synappsys will enlarge my file and mill it out in foam so that I can create this larger than life-size bronze. There is a blog on a similar project that I did for Prairie View A & M here. The same process is documented in this photo album on my personal facebook page. Soon this tiger project will be documented in a blog.
Stay tuned for part 3 of ?
_______________________________________________
Bridgette Mongeon-Sculptor, Writer and Speaker
Bridgette Mongeon is a sculptor, writer, illustrator and educator as well as a public speaker.
Her blog can be found at https://creativesculpture.com.
On the planning committee for 3DCAMP Houston 2012 http://www.3dcamphouston.com
She is also the owner and creator of the God’s Word Collectible Sculpture series
Follow the artists on twitter twitter.com/Sculptorwriter twitter.com/creategodsword
Listen to The Creative Christian Podcast or the Inspiration/Generation Podcast
Click on Podcast Host Bios for a list of all podcasts.

