Newsboy- Rubber and Fiberglass
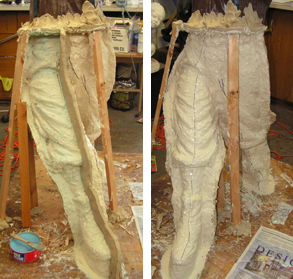
fiberglass mother mold is added
to the mold. It is created in parts.
February 8-14, 2005
Sculptor Bridgette Mongeon has documented the entire process of creating a figurine of a newsboy and a life-size bronze sculpture. Watch the artist work through these posts. In this blog, she has also included information for students and teachers. In the previous post, we learned the first part of the mold making process.
If you are lost and want to go back to the chronological running list of posts, follow this link.
Making molds is grueling work. We have just finished doing the rubber. Now on to the next stage of the mother mold. The days have been long and the nights even longer. Many nights I have worked until 1:00 a.m. I am glad the difficult part of this sculpture is almost over. I am exhausted, and I am finding that I need to rest my hands every few days.
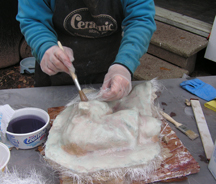
fiberglass. This is called the
mother mold.
The mold is complete now; however, there are a few things for which I am working to make it perfect. Here is a little more about how the process went.
THE PROCESS CONTINUES
To the right you can see the rubber on the front of the mold. After the rubber, the fiberglass mother mold is applied.
Making a fiberglass mother mold is an itchy, smelly process. Remember I have decided to create a fiberglass mother mold because it will store easier and will be lighter. I had to complete the front part of the rubber and create the mother mold section in several pieces. The photo in the upper right shows my marks on the rubber where I am going to make the fiberglass seams.
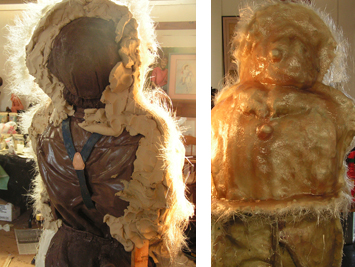
Soon that will harden and the seams will
be taken off so we can do rubber and clay on the back.
When creating the mother mold, sometimes it needs to be divided up into sections, as you can see with the front of the mold. These sections are so that the mother mold can be pulled from the rubber without hurting the wax that will be poured inside.
support out of the sculpture. Then the area will be
sculpted before the artist makes the rubber
mold with a fiberglass mother mold.
I worked on the entire front of the newsboy. Here you can see the fiberglass mother mold from the front and back before the edges are trimmed up.
Once the front of the sculpture was done, it was sturdy enough for me to lay the sculpture down. You might remember there was a pipe armature in the newsboy’s back. This was to hold up the entire sculpture while I sculpted. I could not make the mold around this pipe so we unscrewed the pipe from the base, laid him down and the unscrewed it from his back. Then I filled in the hole before we preceded with the lower half of rubber and mother mold.
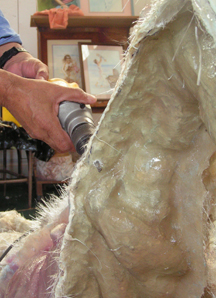
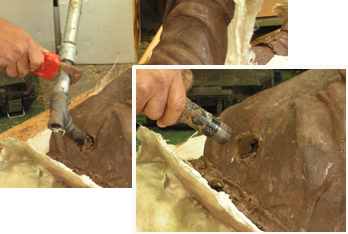
Once all of the rubber was brushed on the sculpture, and then each piece of the mother mold applied over the rubber then we had to drill holes in the seams. That connected the pieces. Later nuts and bolts will hold the sculpture together. These will not only secure the sculpture, holding it together, but will assist in quick demolding. Trying to pull apart the mold for the first time, after all the rubber and fiberglass are done, is a job that requires some muscles. My fancy white suit protects me from the pieces of fiberglass.When all of the pieces are off the original sculpture, the edges are ground down to form a smooth edge and each piece is sanded. The rubber needs to be cleaned before wax can be poured into it. Everything is reassembled for our trip to the foundry and to pour the waxes. The original sculpture is lost in the demolding process.
On to the foundry and pouring the waxes.
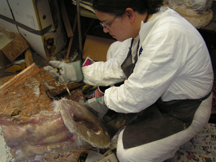
to work in fiberglass.
