Newsboy- The Mold Making Process
pieces and a mold is made.
Clay seams are put up each
side to divide the sculpture in half.
January-31-February 7, 2005
Sculptor Bridgette Mongeon has documented the entire process of creating a figurine of a newsboy and a life-size bronze sculpture. Watch the artist work through these posts. In this blog, she has also included information for students and teachers. In the previous post, we rejoiced that the sculpting is complete.
If you are lost and want to go back to the chronological running list of posts, follow this link.
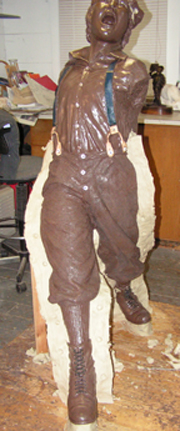
Now that the sculpting is complete, let’s move onto the next portion of this process. The mold-making portion of the sculpture is underway. It is a lot of work and very physical. First, we cut off both of Dusty’s arms. This will enable us to pull the mold off of the sculpture. I also cut off the brim of his hat. I probably could have left it on, but I felt more comfortable cutting it off.
The process of making this mold is similar to the small newsboy sculpture mold. We are making a mold so that we can pour a hollow wax newsboy. To do this we sprayed the sculpture with a sealant, and then with a mold release agent. Layers of rubber are carefully painted on the sculpture. When they are dry, an outer mold called the mother mold is placed over the rubber. It is called a mother mold because it holds the rubber in place. If we just had rubber, then when we pour wax into the mold it would become distorted. The mother mold helps to keep the form.
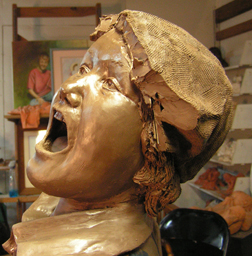
This will make it easier for the
artist to get a good mold of his face.
The head is prepared to go
into the mold making process.
I have documented another mold making process on my web site. The Kipper Mease mold is different than this one. Kipper’s mold was done with a plaster mother mold. This newsboy mold will be done with a fiberglass mother mold. Fiberglass mother molds are difficult to make, but they are lightweight and easy to store.
Once I have the mold, I will take it to the foundry and together we will pour waxes. I still don’t like to let go of the project yet. I will take the waxes back to the studio and work on them as well. When I am sure they are ready, they will go back to the foundry, and then my workload and long days will slow down for a bit. But just a little while. I still have some commissions that I have not been able to finish in the rush of completing the newsboy, and I have two more life size pieces that need to be started in the next few weeks.

THE PROCESS
The sculpture is divided up into sections by what is called “claying up.” The the clay is carefully put on the sculpture. The front of the sculpture is what we are going to focus on first. You can see most of the seams of the lower half in the photo above. It does not; however, show the seam that will divide the torso in half.
Once the claying up process is done, I will coat this first section with coats of rubber. Each layer of rubber must cure to the correct consistency before another layer is put on. There is a total of 4-5 layers of rubber.
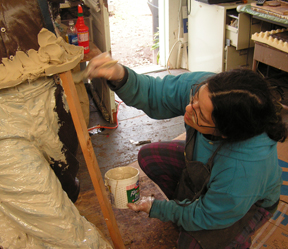
The rubber on the main sculpture is divided up into 4 pieces- front lower torso, front upper torso, back upper torso, and back lower torso. Each front section must be clayed up, and sprayed with mold release. Rubber must be painted on and then finally a section of mother mold applied to the top of that. Once one section is complete, then I can start on another section. It is a long process. While the rubber cures, I will work on other parts of the sculpture. The stick next to the sculpture, in the photo to the right is to help hold up the seam of clay.
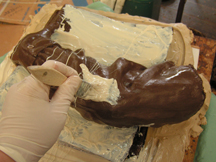
Remember, I have several pieces that I have cut off the sculpture. Each of these needs to be clayed up and then rubber painted on each side. The left arm with the newspapers is shown in the photo to the left. Knowing how to clay up a piece takes a lot of thought and practice. You must be able to think ahead to the next steps that the piece will go through— the wax, dip and casting. Now, let’s move along in our process of making this sculpture into a bronze. On to making a mother mold with fiberglass.
clay. And a mold is made of both
newspaper and arm