In Loving Memory of Patsy… The Armature
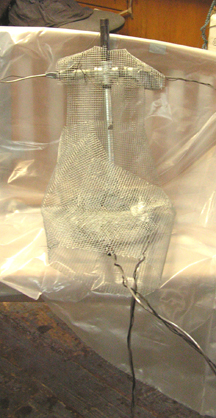
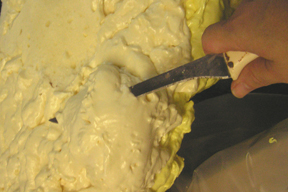
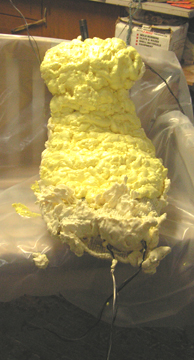
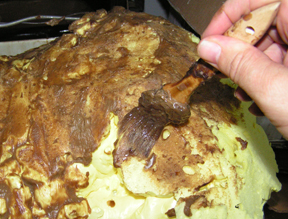
The sculpture begins with the mundane mechanical process of creating an armature, but I cherish and guard my times alone with the sculpture. I often have an apprentice in the studio. I was glad I had alone time with Patsy even if it was just twisting wire and putting together pipe. This is a portion of the sculpture that people will never see. I begin with my armature, made of plumbing pipe and chicken wire. Usually a sculptures armature is mounted, but because Patsy is sitting on the bench I have opted for doing her “free standing”. Once the bodice was wired together I sprayed spray foam inside of the wire. This is the same foam that is used for insulation. If you plan on doing lots of these type of sculpture I would suggest getting a spray gun. You will need to buy the appropriate spray to go with a gun, and I would also suggest getting a cleaner spray. The foam gun allows you to use just as much as you want and it won’t clog up or the can won’t go bad. The spray will give me mass without much weight. I can cut away what I don’t need, and then I’ll cover the foam with foundry wax. This is for no other reason but to keep the grit of the foam out of my clay. I love smooth clay and can’t stand it when it gets gritty.
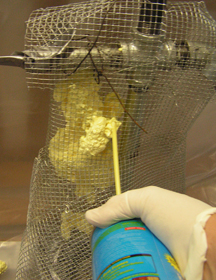
the armature of the memorial sculpture
Do note that some of the foam may need to expand so give it a day or two to get to its full expansion before putting your clay on the foam. Also, keep a spray water bottle handy. As it will help to cure the foam quicker. Always wear rubber gloves. This stuff is a mess.