Measuring Tape in ZBrush
Recently I posted about my need for a measuring tape in ZBrush,. I created an entire post about my need. I have to say, this is not my first time requesting this from ZBrush, but it is the first time that someone replied and said, “hey, they finally gave us one and this is how you use it.” Apparently the transpose line can be made into a measuring tape. The transpose line is the line that comes up when you are trying to move, scale or rotate an object. To create the calibrations of the transpose line find “preferences” in your menu and scroll down to “transpose line” and then indicate your units of measurements.
Thanks to the guys on the Pixologic forum for sharing as well as the ZBrush, group on Facebook. I get all of my answers from these guys.
Thanks also to Pixologic for hearing my request for all of these years. I do find that I actually still have to count the units as I’m working. Don’t make the mistake like I did, If you want 13 feet you need 15 tick marks. I would suggest to set your measurements and then count the units to be sure it is correct. Missing a foot on my sculpture or even a 1/2 a foot would be tragic.
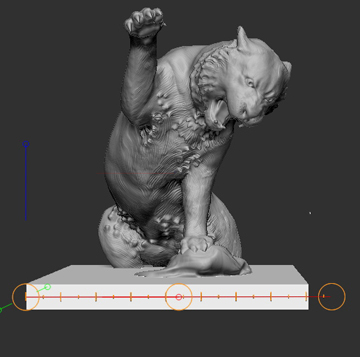
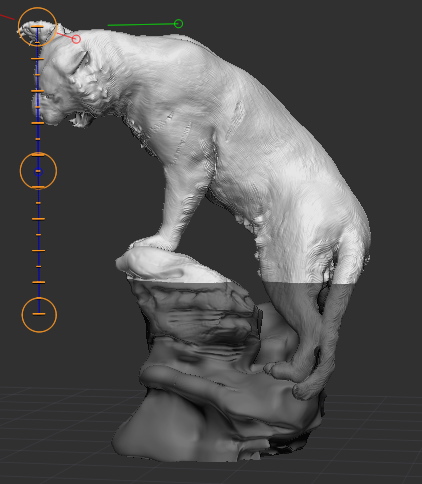
It would be great if all of the measurements actually appeared in a box when you used the transpose line. For example, after using the transpose line I could look ,and see if what I have drawn is actually the amount of feet I need? In the case of the tiger I have decided to sculpt him in two parts and I need to be sure those two parts will fit in the 9 foot clearing of the studio. I’m working through this, and ZBrush, is helping considerably not only in figuring out the perfect division for the tigers parts, but also to know how big to make my base and and how that all fits together. Maybe these measurements appear somewhere that I don’t know about but my further request for Pixolboic would be if these measurements showed up and as I use the transpose tool I could check myself. IE… Ah yes, that is 15′ 3″ and the width then this is……
NOTE: the way I separated my tiger into two subtools
1. I made a mask over the area I wanted to divide ( control, click and drag)
2. I split those polygroups to make individual subtools here is how.
FYI HERE IS THE ANSWER?
Someone suggested I try these calipers. Why have I not heard about Screen Calipers from Ionico sooner? With all of my posts and rantings about a sculptor needing calipers you would have thought this would be brought to my attention sooner. I checked… they work on PC and Mac. Well, I’m going to contact the company to see if I can review these calibers and if they work post some tutorials about how I use them. I’ll let you know.
_______________________________________________

Bridgette Mongeon is a sculptor, writer, illustrator and educator as well as a public speaker.
Her blog can be found at https://creativesculpture.com.
She is the vice chair of the planning committee for 3DCAMP Houston 2012 http://www.3dcamphouston.com
She is also the owner and creator of the God’s Word Collectible Sculpture series http://www.godsword.net
Follow the artists on twitter twitter.com/Sculptorwriter and twitter.com/creategodsword
Listen to The Creative Christian Podcast or the Inspiration/Generation Podcast
Click on Podcast Host Bios for a list of all podcasts.