What is The Foundry Process For The Dick Hathaway Sculpture?

That is a good question, though we have several months before we will be watching the Dick sculpture go through this process. Especially since the date of going to the foundry depends on our raising the $9,000.00 that is needed to cast and ship him.
Each of the sculptures that are going to become a bronze will have to go through this same process of the lost wax method of bronze casting. I’ll go into much more detail with the Dick mold but let’s take a quick look at Lucas.

The first step is making the rubber mold
This job is not easy and after coming off of 2 weeks of very, very long days the two apprentices and myself have sent the Lucas molds off to the foundry.
Let’s look at the Lucas sculpture and its process so you can see what will happen with Dick.
Once the sculpture is approved I have to cut it apart into smaller pieces. Though the Lucas sculpture is only the size of a 5 year old we have cut him apart into eight pieces. The decision of where to cut the Lucas is based on trying to figure out the easiest way to make a mold of him.

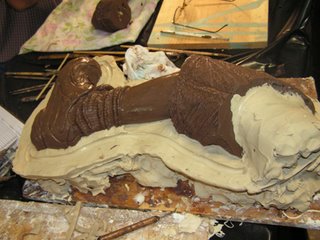
When these pieces are apart I can really see areas that, up until this point, have been difficult for me to work on. Places like under his arms and behind his legs. I love being able to finalize details on these smaller pieces. When the pieces are perfect, or as near perfect as I can get them I need to make a mold of each piece. First I put them on a board and make what will be a seam by separating them with a clay wall. This clay wall becomes a seam after the wax and plaster are applied. The seam gives me two halves so that when we pour a wax in this mold, which is the next step after the mold making process, we will be able to retrieve the wax piece without it breaking. I’ll show some pictures of the Lucas mold making process, but I’ll go into a more detailed description when it comes time to make a mold of Dick.
When the pieces are clayed up with a clay seam I must coat the entire piece very carefully with several coats of rubber that is brushed on.
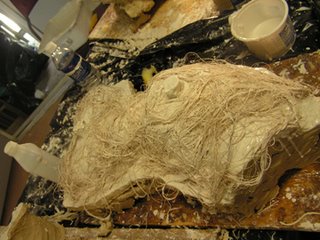
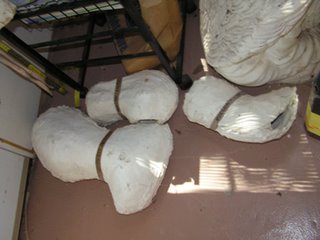
Once this is cured a thin coat of plaster is put over the rubber. Hemp is mixed in with the plaster to give it strength. This plaster mold is called the mother mold. It holds the rubber in place.
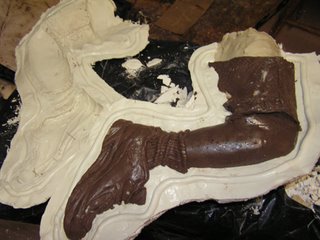
The same process is done with the other side of this piece of sculpture. Of course the clay seam is removed because now I have a rubber seam. If you look carefully at the seam in the first picture I have carved a little gulley in the clay seam. This will make the two pieces match.

Once both sides are done, rubber and then plaster. Flipping the sculpture and then putting rubber and plaster, then the mold can be opened and the original sculpted piece removed. The last photo shows the two halves opened. The gulley created in the seam on the first piece now becomes a key so that the two mold pieces will go together perfectly.
Once the molds are cleaned I send them to the foundry for pouring. I can’t let go of Lucas for too long. I will soon get the wax pieces of Lucas back and be able to finalize some more details.
