Mold Making and Bronze Casting- Part II
Created for Best of Artists and Artisans Website
By Bridgette Mongeon © 2008
THE MOTHER MOLD
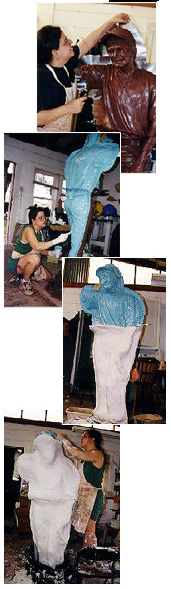
In the previous article Mold Making and Bronze Casting-Part I, we learned about preparing your sculpture for the mold making process and painting rubber on the sculpture. If you want to see a mold being made please refer to the video, The Casting of the Dick Hathaway Memorial. The video has been embedded in the online article Part 1. I will refer to this video often in this article. In Part II, I would like to talk about the process of creating a mother mold. Once this portion of the mold making process is complete, your molds can be cleaned, sent to the foundry, and waxes can be poured into the molds. Your artwork then begins its journey through the foundry process and through the lost wax method of bronze casting.
Mother molds are called mother molds because they hold the rubber in place. Your rubber may have been created in two or more pieces or sometimes one piece with a seam up one side, but a mother mold must be able to be pulled off the artwork, and it will not have the flexibility that rubber has. To be able to take the mother mold off the sculpture, it may entail visually dividing your sculpture up into more sections for the mother mold so that the pieces can be pulled off without any force or prying that may destroy the wax that will be poured into the mold later at the foundry. Drawing with a marker on the cured rubberhelps to define the mother mold sections. You will “clay up” seams, just as with the rubber portion discussed in Part I, claying up the sculpture along these marker lines in preparation for the plaster.
NOTE: You must “clay up” before putting on the mold release, or the Klean Klay will not adhere to the rubber. To make the Klean Klay adhere warm it up in a microwave as in the rubber stage and push it onto the dry rubber. Thicker “clayed up” seams are preferred over thin seams in both the rubber stage as well as making the mother mold seams. There is nothing worse than having a clayed up seam break loose while making the mold.
Mother molds can be made in a variety of different products. Most artist use a type of plaster called Hydrastone. Hydrastone is much stronger than Potter’s Plaster. You may be able to purchase Hydrastone from your art dealer, but most likely it will cost more than getting it from a supplier. I purchase mine from Circle Supply in Houston, Texas. A 100-pound bag of Hydrastone at Circle Supply costs $32.89. I went through three-100 pound bags on the Dick Hathaway sculpture featured in the video.
Mother molds can also be made in fiberglass. If I know I will be creating many pieces in an edition and I will need to obtain many waxes from a mold, I consider the extra effort of using fiberglass. You will be quite surprised how heavy a small mold can be with a mother mold of plaster. Fiberglass has its advantages for larger molds as well, because upon completion the mold is lighter. Fiberglass is, however, I believe, difficult to work with and toxic to use.

The plaster portion of the mold making process is the messiest part. In the past, I have fooled myself into thinking, “Just let the plaster fall on the floor and it will dry and scrape up easily.” This is just not so, and preparation of my space for making the mother mold is just as important as the rubber. It also makes clean up so much easier.
I usually like the rubber to cure a day before putting on the plaster, and often the plaster is done in conjunction with rubber. For example, if a mold is done in two pieces like the leg or arms in the video, I will paint rubber on one side then put the mother mold of plaster on top of that, and then flip the sculpture to do rubber and a mother mold on the other side.
Before beginning to put the plaster on the rubber, you must note there is a process of preparing the rubber so that the mother mold can be pulled off the rubber. I mentioned this in Part I. This step is done in the rubber stage. This part of the process is not shown in the video and is a bit tricky to describe. Pieces of foam, the kind of foam that is in your sofa cushions, have been stuck to the rubber in areas of deep undercuts. Then a skin of painted rubber is put over the foam. The foam offers the “give” that the rubber mold needs to fold back on itself as it is taken off the wax that will be poured into the mold. It also gives a flatter surface with no undercuts for the plaster mother mold to be put on top. I will try to make a video or take detailed photographs of this the next time I make a mold.
Before applying plaster you should cover your rubber with a mold-releasing agent. An inexpensive source for this is simply using shortening such as Crisco or a store brand purchased from your local grocery store. Rub this over the entire surface. Putting your hand inside a plastic bag first helps to coat the rubber without making your hands gooey, an old cooking tip.
I usually have four plastic buckets, one that I am mixing in, one that holds a bit of hemp soaking in water, another that has extra plaster, should I need it, and another for washing my hands.
Mixing plaster is tricky, and you must watch it closely because when it activates there is little time to work. Working on smaller areas is much easier than a very large area. Be prepared to get dirty.
HINT:The Hydrastone makes these containers weak. I figure it must be a chemical reaction. Plus, I will often bang on them with a rubber mallet to get the hardened plaster out. When using the last bit of mixed plaster in the container, or if there is excess, try to scrape to the bottom in the center of the container. Then after the Hydrastone cures in the bottom of the plastic bucket, I can bang on the container freeing the two pieces into the trash can outside my studio and offering me a clean container to use for the next part of the mold. You will have to find just the right spot to bang on the container to loosen the plaster form the container without plunging through and breaking the increasingly brittle plastic. I prefer the rounded edge of the bottom.
HEMP: I purchased a bale of hemp, which will probably last me a lifetime. I might suggest you talk to your foundry or another artist and see if you can purchase some of their hemp from them. Be careful, if you buy a bale and clip those metal straps around the bale, the thing will explode, and you will be trying to figure out where to store all that hemp.
DO NOT MAKE A MOTHER MOLD WITHOUT HEMP. If you break your mother mold you have lost your piece. Hemp increases the strength of your mold, and if you are in a hurry, like I usually am, you are going to want to get this mold pulled and into production as quickly as possible. Molds, just after their completion, can be quite fragile.
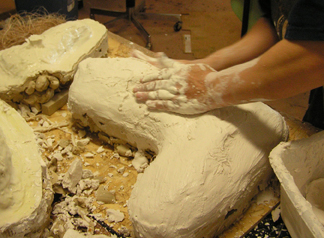
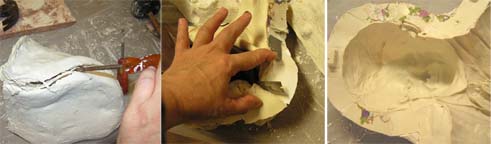
Fill your plastic bucket with water to the amount needed for the amount of Hydrastone mixture you will want to use. I am not sure how to tell you how much to use; this knowledge will come with practice. Always mix the Hydrastone into the water. I start by making mounds of Hydrastone and letting them soak. You can get ratios from your Hydrastone supplier, but I really do this part by sight. Usually I add a bit more Hydrastone as I impatiently wait for the bucket to begin to “kick”. I mix all my plaster by hand and don’t use any mixers. This really helps me know the different stages of the plaster. It is something I do by feel. While the Hydrastone is soaking, I’ll take some of the hemp that has been soaking in water and arrange it over the rubber section that I am about to cover in Hydrastone, being sure to put some on the seam area. Then I will take this hemp off and dip it into the Hydrastone mixture and lay it back on the rubber. As the mixture begins to “kick”, I must work quickly, putting the plaster on the sculpture, forcing it into the hemp and building the areas that I need, including the seams. I strive to make the entire mold an inch thick or less.
When you are finishing the Hydrastone mother mold section and the Hydrastone is curing—you will know this is happening because it becomes increasingly warm, go over the section one last time with a wet hand to “polish” the outside surface of the mold, making it smooth.
HINT: When creating a section of mother mold next to another section of mother mold, I also rub the Crisco or cooking shortening on the edge of the completed Hydrastone piece. This will help in separating the pieces and keep splashes of Hydrastone from being stuck to the already hardened plaster.
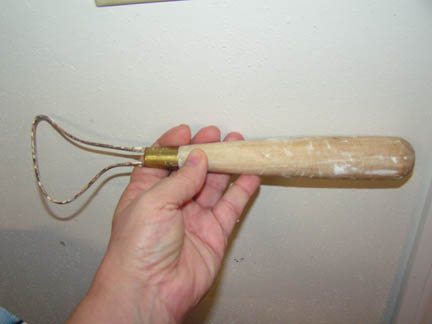
There are a couple of tools that I think are necessary to create the plaster. For example, I love having this large loop tool around when creating my Hydrastone mother mold. It is great when you want to clean up your Hydrastone seams and not make them jagged. This tool also cuts through the Hydrastone, even after it begins to cure, which is helpful, if I feel I have too much Hydrastone in one place.
Once all parts of the plaster are made you will want to separate the mold. Waiting a day or two for the Hydrastone to cure is helpful. It will take longer in high humidity. As the water evaporates from the Hydrastone, it will strengthen and will become a bit lighter.
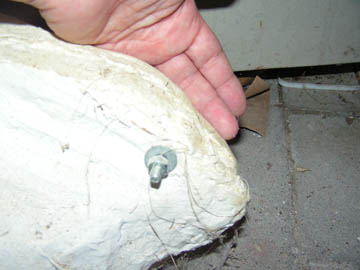
HINT: Small molds are often held together with rubber bands, larger molds may require bolts. Making a seam that comes up at the edge provides room for bolts. These bolt holes can be drilled before pulling apart the mold. Be careful not to jeopardize the rubber underneath. Often there is so much rubber and plaster, it is sometimes hard for me to make out where the sculpture actually lies underneath.
Separating the shell can sometimes feel like an impossible endeavor. I have several screwdrivers that I can shimmy into the seam. Once one is in a seam, I’ll try to move it down a bit and put another in, doing the same thing all of the way down the seam, being careful not to puncture the rubber underneath. More than once I have to struggle with a seam, only to flip the mold over and try another one. As a l ast resort, I may try to scoop out the clay from the open section where the wax will be poured, giving me something to hold on to, and I use this to pry the pieces apart. It takes practice to know when and where to apply pressure and when not to. This part of the process can take a good deal of strength.
NOTE: Be very careful if you are prying one piece of Hydrastone off another. It is easy to shatter a corner or an edge. Go slow and steady, and if you feel frustrated walk away, get lunch, and come back later.
Once the mother mold is separated, you can pull the rubber away from the original art. You will lose the integrity of your original art, but I keep the sections, especially the face. Should the wax come back to me and not look right, it gives me something to compare the wax against. Before sending these molds to the foundry, the rubber will need to be washed both inside an out. This can be done with kitchen soap and a good brush. Sometimes a toothbrush helps to clean small textured areas. When cleaning the inside, be sure that all the clay debris is out of the crevices and details, as this will be picked up by the wax, rendering the wax unusable.
The Crisco should also be washed off the outside of the rubber. Then the rubber is dried and placed back into the mother mold.
HINT: Do not leave the rubber in a heap. Instead let the mother mold do what she is supposed to do, cradle and hold the rubber. Rubber can have a “memory”, and leaving the rubber tossed about outside the mother mold may distort its shape and cause it not to fit back into the mother mold securely.
I would suggest that anyone who is wanting to learn to make molds for his or her own bronze casting, watch the process being done under a master mold maker. Contact a local foundry or artist and ask them if you can intern or apprentice under them to learn this process. They will most likely appreciate your eagerness and the help, especially if you can do it in their time frame. Remember they are on a deadline.
I might also suggest you take your education a bit further and ask the foundry if they will teach you to pour and pull your rubber molds. There is no better education in knowing if you created the mold properly than experiencing how the mold pulls from a wax. Though the process of creating a mold for bronze casting can feel daunting, with a little practice it is possible to begin to create your own molds, and in turn, save yourself a great deal of money in the process of bronze casting.