Working On Preparing An Armature
I have been using zBrush to create an armature to send to Synappsys Digital Services for milling.
This is similar to what I wrote about in Digital Sculpting With Mudbox: Essential Tools and techniques for Artists, and what I have done with the panther project; however, I feel I’m pushing the process a bit more.
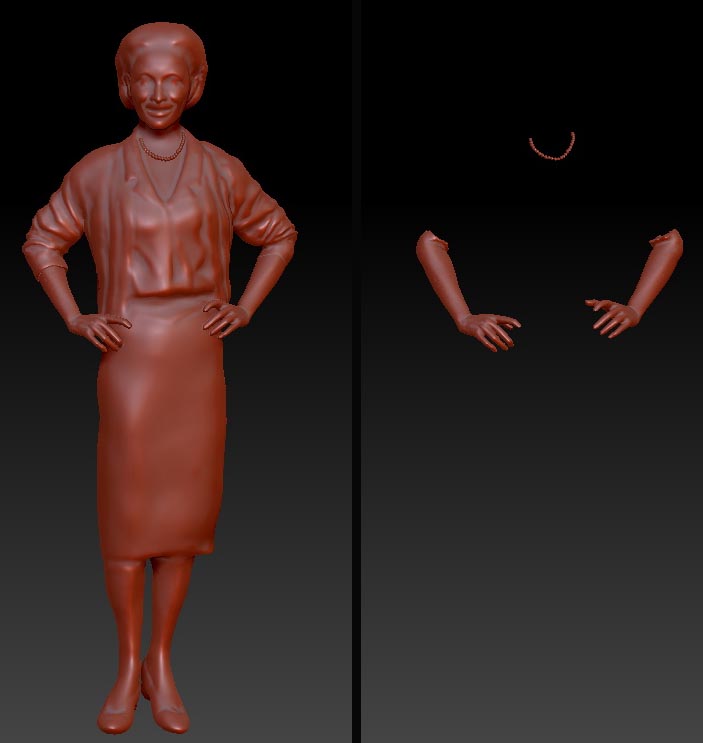
Here is the digital sculpture almost ready for the milling process. I believe I am going to send it to them but would like to separate the arms from the sculpture. The reason for this is that in the digital sculpture if the hands are sent with the body as one file they get lost in the clothing. I would like to determine their placement without losing details. Synappsys will separate them anyway within the process of getting the pieces ready for milling.
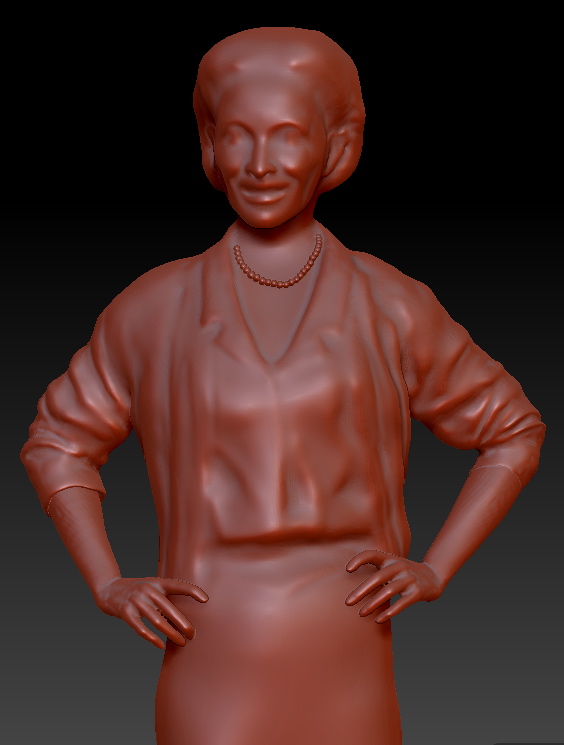
I’m not sure what will happen with the pearls. I doubt these can be done, and might actually be better for me to sculpt them on her. In fact, I’m leaning in that direction. Having them on the sculpture while working digitally has helped me with size and proportions. I have a few more things to do to the sculpture, and am anxious to hear what Synappsys thinks.
I SPOKE WITH SYNAPPSYS
Here are some of the things we discussed. As mentioned in my previous post, this Dynamesh is acting similarly to what Synappsys’ program will do when it lowers resolution. I have been requesting that Synappsys to mill out several heads that show either different resolutions of milling or different reductions. I am hoping to include this in my up and coming book, 3D 2012 digital art in a physical form. This will be a very important visual for artists to understand this entire process.
Some thoughts as Synappsys and I spoke
- The arms are created as what zbrush calls a “sub tool” I can separate them for milling , but I should probably be sure that they are cut and align evenly with the arms. Presently they sit within the sleeve. If they are a clean cut, and can match up, preferably somewhere in the arm where the sweater is, where I will have more design wiggle room, that will be better.
- It is almost paralyzing to try and figure out what size to mill this out at. There are several variables. If I want to add a lot of clay in the traditional studio , I have to allow for that mass. This may mean that I want to reduce the size. I may want to add little clay to the arms and hands, and up to 1″+ amount of clay to areas like the sweater, skirt, hair etc. So, I might have the pieces milled at different sizes.
- But the size problems don’t end with milling. In the traditional process of bronze casting of a life size person, it is known that artwork shrinks. My foundry indicates that I could lose up to an inch in size. But often times, the foundry can make this up as they are welding the many pieces together. Another aspect of casting in bronze is that “some pieces can shrink in the center, or look skinnier,” says Scot Yoast of Art Foundry Houston.
The entire concept is frustrating for an artist who goes through great lengths to sculpt a perfect or near perfect sculpture and have such deformations. My heart gets excited when I think about how digital processes are infiltrating the lost wax method of bronze casting and how this will change in the near future. A subject that I have discussed quite often on this blog, and I will go into great detail in my new book For now, I’m having to work this tra-digi art in any way that I can to get the results I desire.