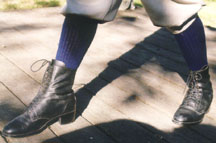
Newsboy Sculpture
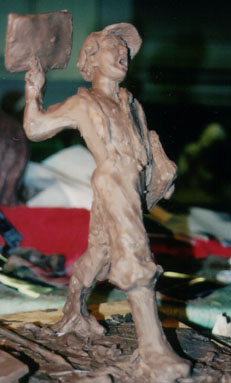
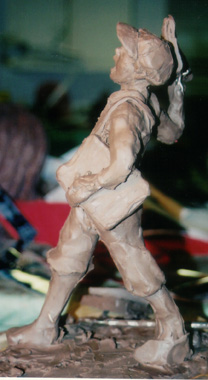
Newsboy-Beginning Of The Large Newsboy Sculpture
November 8th-12th, 2004
Sculptor Bridgette Mongeon documents the creating of a limited edition, bronze figurine and life-size Newsboy sculpture for the Texas Press Association. Bronzes are available for purchase in both sizes.

the armature that will
hold the clay.
This week I started on the life size sculpture of the newsboy. As with the small newsboy, an armature needs to be built. Wire is not strong enough to hold the amount of clay that will be on the sculpture, and weight is often a problem, so the goal in making an armature for the large piece is strength and not too much weight.
The large wooden platform was first constructed. It was necessary to make this strong enough so that if necessary I could stand right on top of it. Next I examined the small wax sculpture. I decided I wanted the pipe to enter the body in the lower back, behind the right leg. It will be a little difficult sculpting on the left leg as it will be close to the pole but I have opted for this placement anyway.
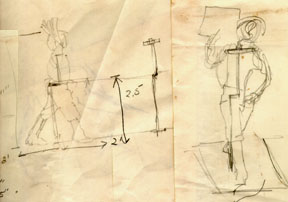
The armature in this large piece consists mainly of 3/4-inch plumbing pipe. I worked with the angles and pipe to configure the torso. If I had a welding machine in the studio I would have preferred to weld the armature together, using the angles that I need.
After figuring out the plumbing pipe I then added wire and chicken wire. In the chicken wire I added spray foam insulation. This stuff is very messy to work with but it really does a great job of adding volume without adding weight. After it dries I cut it away in the shape of the newsboy. I’ll be adding on about an inch or two of clay to this armature. I study the small wax and the large sculpture to be sure I have the correct size and shape.
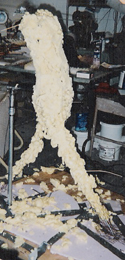
help to give the sculpture
mass without weight.
I have also added some flat foam pieces to the base of the sculpture. I am unsure if this life size piece will have a large base or sit flush with the ground. I would prefer it sit flush with the ground, so that it looks like the newsboy is walking in the grass, but that will depend on the client and the placement and many other variables. I have decided to put the base on the sculpture and if it is not needed I can cut it off in the wax. These flat foam pieces, which are really foam that you use to insulate, work like the spray foam. They add a little volume to the base. I could do the base with the clay but it would take more clay.
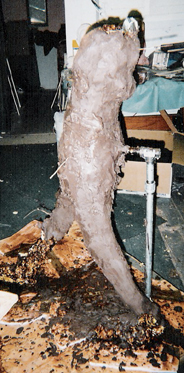
After the foam is cured I carve it to the correct shape. Then my assistant, Miguel, adds a thin layer of wax. This is an extra step that I take to prevent the little pieces of foam shavings from getting into the clay. I am a very tactile sculptor and I hate bits of things in the clay.
Now it is time to put on the clay. It is done the same way as the small sculpture. I heat the clay up in crackpots and add it to the armature in a frosting like manner. I usually have an apprentice do this work. They add the clay enough for me to come in and do the final detail. Working in this wax base clay at this scale is often very physical work. When it is cold the clay gets very stiff. Sometimes I will work with a hair dryer or even a torch to soften it to enable me to work.
I’m working on the head separately and will report on that next week. I have made quite a bit of progress.
STUDENTS AND TEACHERS
I often will continue to do research as I proceed with the project. It helps to keep me motivated and interested, it keeps the passion alive.
When trying to research the amount of money that the young boy would be carrying in his pockets I tried to find out about the cost of a newspaper. Here is an article that introduced to the “Penny Press” The penny press offered lower income citizens an opportunity to read the news.
PBS has a link to a very interesting subject called yellow journalism.
Here is a source that states that the Sun was not the first newspaper to utilize newsboys.
History Buff also had a nice article about newspaper production 1892-1992
And if you do float around on the History Buff web site and read about newspapers, then try their newspaper-collecting quiz.
Newsboy-A Review Of The Process
November 2-8, 2004
Sculptor Bridgette Mongeon has documented the entire process of creating a figurine of a newsboy and a life-size bronze sculpture. Watch the artist work through these posts. In this blog, she has also included information for students and teachers. In the previous post, we learned about preparing the artwork for the foundry.
If you are lost and want to go back to the chronological running list of posts, follow this link.
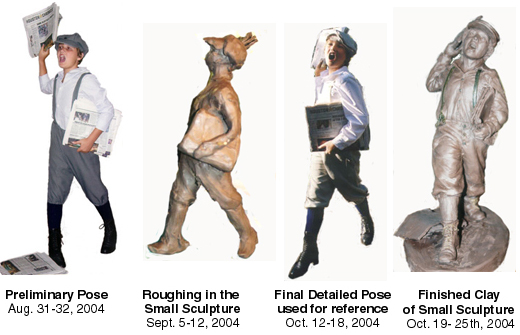
It is been an exciting week. I was so busy the last couple weeks that I did not have the time to really relish in the idea that the newsboy was born. I want to take a little time to go over just how much work there has been and how far we have come in the last three months. The steps in creating an original work of art are never easy.
PRELIMINARY PHOTOS
In August we had the first preliminary photo shoot, where many different photos were taken to come up with a pose for the client to approve.
RESEARCH
There were many months of research. What type of clothes would a newsboy wear how do I get them? What would the newsboy’s action be? Through out the past weeks we have learned about everything from the strike of newsboys, where knickers came from, when a zipper came into being, how to find vintage clothing patterns, as well as how to sew from vintage clothing patterns. At times it was extremely frustrating to try and get all of the details correct and to make sure I had made no mistakes in historical facts. It has been a wonderful adventure of exploration and learning. their newspaper-collecting quiz.
FINAL PHOTOS
After weeks and weeks of research and sewing the original 1920’s outfit, we finally had our 144 photos to work from. Detailed photos are an essential element in getting all of the details correct.
MOLD AND WAX
The details are preserved in the mold and waxes that were created of the newsboy sculpture.
TO THE FOUNDRY
The next step for this small newsboy sculpture is the foundry process.
THE LARGE SCULPTURE
Now it is on to the large sculpture. My assistant and I are in the process of preparing the large armature and I will post photos next week.
FURTHER INFORMATION ABOUT THE WAXES
I did fail to mention a few things about the waxes. Each wax has my signature with the date of completion and a copyright notice ©. The copyright notice is to protect the artwork so that no one can make copies of my art. Copyright is a very important element for those working in the arts. This is how I make my living, if someone where to make copies of my artwork it would be illegal and the copyright notice protects me. Although the Texas Press Association has commissioned me to create this sculpture I have retained the copyright. Therefore I can sell further pieces in the edition as based on my contract with my client.
COPYRIGHTS
Copyrights can be a little confusing, let me explain. I can copyright my newsboy, but I cannot copyright the idea of a newsboy, just my design of the newsboy. Let’s say I painted an Indian I cannot say, ” No other artist can paint an Indian. Or if they do paint an Indian they can not use feathers or war paint, because I used feathers and war paint.” That would be trying to copyright an idea. However if someone reproduced my art exactly as I have done it, that would be copyright infringement.
EDITION NUMBER
The other item that is on the wax is the number in the edition. When you look at a bronze it will usually have the number that the sculpture is in the edition over the number of total pieces in the edition. The two small sculptures that are at the foundry are 1/100 and 2/100. Many collectors prefer the first pieces in the edition. They feel that these pieces have more detail, being that they are the first to come out of the mold. When an edition is sold out, the mold is destroyed. There may also be one other part of a limited edition bronze, the AP or artist proof. This is the first sculpture poured and it is used to compare all of the following sculptures.
Now, watch as the artist goes big. In the next post we get to see the beginning of a life size Newsboy sculpture.
STUDENTS AND TEACHERS
ART AND HISTORY
• Look over the links and the research that we have done. Which part did you find the most interesting? Was it learning about vintage clothing, or about the newsboy strike? Which area intrigued you the most?
• If you would like to learn more about copyrights check out the US copyright website.
• If your parents hired me to sculpt you at the age of three, what pose would you be in and what would you be wearing. What if I were to sculpt your parents at that age what would they be doing and what would they be wearing ? Would their clothes be the same? How about if it were your grandparents?
Newsboy-Preparing The Small Sculpture For The Foundry
Oct 25th-Nov 1 2004
Sculptor Bridgette Mongeon has documented the entire process of creating a figurine of a newsboy and a life-size bronze sculpture. Watch the artist work through these posts. In this blog, she has also included information for students and teachers. In the previous post, we watched the artist Finish The Small Newsboy Sculpture.
If you are lost and want to go back to the chronological running list of posts, follow this link.
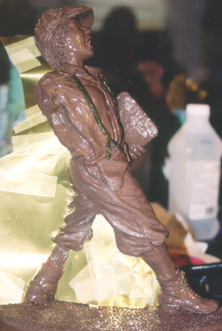
What a week this has been. I was very busy. Once the small sculpture was completely sculpted, I had to prepare it for the foundry. This means making a mold and cleaning up waxes. Let me explain:
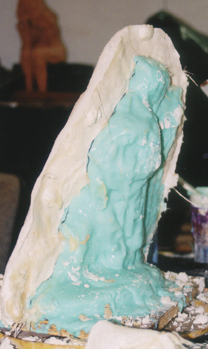
With every limited edition bronze, a mold is made. This mold is created in many steps. First I study the sculpture figuring out how the mold will come off the sculpture or how the wax will be removed. This foresight comes from experience. When I figure this out, I separate those areas with metal shims.
After separating the sculpture, I start to paint the sculpture with rubber. It is important to get the rubber in each crevice and detail without any air bubbles. After the rubber is painted on, a mother mold of plaster is put on the sculpture. This holds the rubber in place. You may notice that I cut off the right arm of the newsboy so that it would help with my mold making process. The paper he is holding is also separate as well as the papers that are on the ground. For each of these, I made separate molds. Once the mold is complete, I take it apart. There is usually no saving the original; it is destroyed in the demolding. (If you are an art student reading this journal, please check back to the main web site. I hope to provide free online classes in mold making, sculpting, and casting. I am working on them now. Or you could sign up for the newsletter, to be sure that you are notified.)
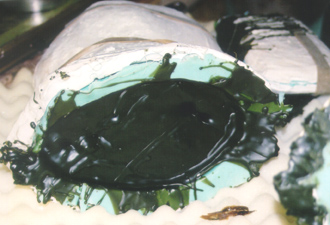
When the mold is complete the wax is poured hollow with three coats of hot wax. For each metal sculpture that you have in an edition, a wax is needed. The small newsboy sculpture is an edition of 100. So, I will eventually pour 100 waxes, but I will only do that as needed, as orders are placed. My goal was to have 4 wax newsboys by Friday, but I had three other projects that I was also finishing up and the dog sculpture that also needed a mold made and then a wax. When the mold is complete the wax is poured hollow with three coats of wax.
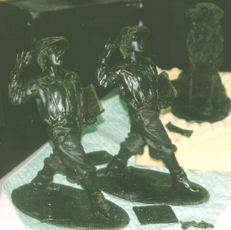
When the wax comes out of the mold, I work on cleaning them as well as putting some extra detail into the wax. By the end of the week, I only had two newsboys and one wax dog. The dog was the other sculpture going to the foundry.
I should mention that not all artists make their own molds and pour waxes. Many send this part to the foundry. I do it for a couple of reasons. Time and convenience- it saves me time to work the waxes in my own studio and take them there, instead of working at the foundry. There are also many artists who don’t work their waxes. I don’t really “like” to work wax, and many times I have apprentices in the studio doing this type of work for me. I do like making sure of the details in this process.
I packed each of the sculptures very carefully. I also packed a third sculpture in the car; it is a portrait bust of Nolan Ryan’s grandchild that I hope to deliver to Round Rock, just north of Austin.
Even working until late at night all week, I could not get everything that I wanted done. By the end of the week I only had two wax newsboys, the dog, and the Nolan Ryan sculpture. I had to abandon the 4th project until my return to the studio.
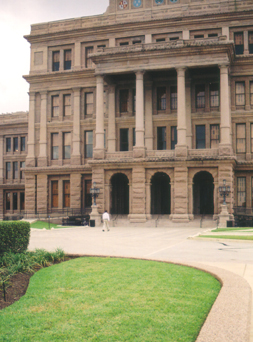
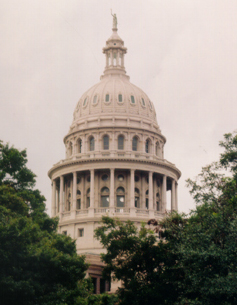
We headed for Austin. Saturday we delivered the sculptures to Ruth Ryan’s office and then went to tour the Capitol building in Austin. I wanted to see the grounds where the life-size sculpture “might” go. Remember, it still has to pass legislation to be put on the capitol grounds. There are several sculptures on the grounds. I took some photos and had the opportunity to tour the capitol building. I don’t have any say as to where the sculpture should be placed, but I thought this grassy area on the north side would be perfect. As I watched the people coming in and out of the capitol building, I thought, “this is where a newsboy would stand to sell his papers.”
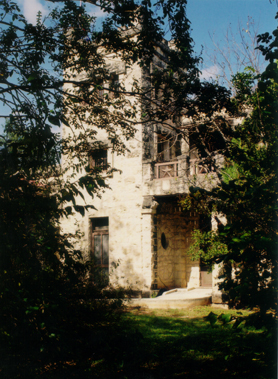
While in Austin I also visited the Elizabet Ney museum. Elizabet Ney was a sculptor 1833-1907. She lived and worked in Texas, just before the time period of our newsboy. She has two sculptures in the state capitol building, Stephen Austin and Sam Houston. Her studio, the museum, is just north of this downtown area. It was a great treat for me to see her work.
Next week I will get started on sculpting the life-size sculpture. The trip to the capitol, watching the small newsboys go off to the foundry, and visiting Elizabet Ney’s museum all have increased my inspiration and anticipation for next week’s work.
Before we go on to the life-size sculpture, let’s do a Review of the Process.
TO PURCHASE THE SMALL SCULPTURE
The cost of the small bronze newsboy sculpture mounted on a wooden base is $1,350. If you would like to purchase a sculpture please fill in the contact form. A deposit of 1/2 or $675. is required. The balance will be due upon notification that the sculpture is ready for delivery from the foundry. You can send your check to:
Bridgette Mongeon, PO BOX 10562, Houston, Texas 77206. Or you can pay by e mail through pay pal.
STUDENTS AND TEACHERS
• How did Elizabet Ney have an effect on the history or art education in Texas? Search the Elizabet Ney links for a clue.
• It was unheard of for a women to be a sculptor in the time period of Elizabet Ney. She was greatly admired by many in Texas. In many ways, she paved the way for other women sculptors.
• Elizabet Ney lived on a plantation called Liendo, outside of Hempstead, Texas. What effect did General Custer have on the Liendo plantation?
• If our newsboy is set in the period of 1929, who was the governor in Texas at that time? Here is a hint.
Newsboy- The Finished Small Sculpture
October 19th-25th 2004-
Sculptor Bridgette Mongeon has documented the entire process of creating a figurine of a newsboy and a life-size bronze sculpture. Watch the artist work through these posts. In this blog, she has also included information for students and teachers. In the previous post, we watched her sew a vintage outfit.
If you are lost and want to go back to the chronological running list of posts, follow this link.
It has been a very busy week, and I know that all of the details of the work this week will take a lot of room to record in this journal. I hesitate about putting in all of the sculpture details, but I do have art students who are looking at the web journal, so I have decided to elaborate.
The work on the small sculpture is progressing this week; I have put my client on call for this weekend or Monday. It will be imperative that I receive approval as soon as the sculpture is finished. We are planning on going to the foundry next Friday, and there is much to do to get the sculpture ready.
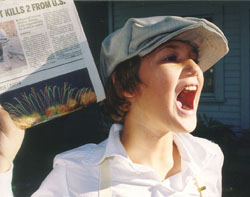
There were some final details that needed to be decided on. One was the masthead of the newspaper that the little boy is caring. It has been decided that it will say Texas Press Messenger. This is the paper of the Texas Press Association. In all of the reference photos, Dusty is holding a Houston Chronicle newspaper. There was really no other reason for this other than I live in Houston, Texas, and our local paper is the Houston Chronicle, so it was easy for me to get it as a prop.
All week I have been culling through the 144 photos. Each time I work on a piece of the sculpture I search for all of the photos that showed that body part. People wonder in awe at what I do and how on earth I do it. It is very simple – I’m a copycat. I just copy the photos that I have taken. Cutting away and adding to the sculpture until it looks the same as the photos that I have taken. It is a long process.
DETAILS
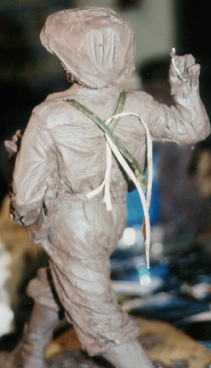
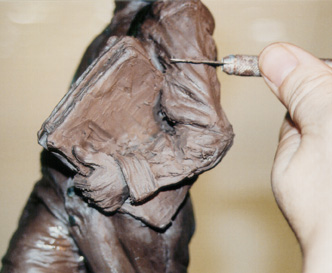
When working on the suspenders, pants, and shirt I needed to be sure I had the suspenders correct. Notice the suspenders pull on the pants and push the shirt in. This creates what is called “a point of radiation for the fold” or where the fold begins.
I did not want to use clay suspenders on this little piece. I needed something that would be visually different for me to work around. I also didn’t want to use clay because I did not want it to mush into the folds. I needed something that would act like suspenders. I walked around the studio looking for something that was the right size to help me with this area. I opted for the elastic that was on a paper facemask. I pinned the elastic in place and then worked on the shirt and pants, all the intricate folds that attached or came in contact with those areas.
Later I removed the elastic and replaced it with hard wax suspenders. I could have ultimately kept the elastic on the sculpture and they would have worked through the mold process, similar to the “real” clothes subject that I mentioned in the last newsletter. However I needed to sculpt on the suspenders and needed something more substantial. After I was able to get the folds in the pants and the shirt, I removed the elastic suspenders and replaced them with hard wax suspenders. For his buttons I rolled out little tiny pieces of hard wax into a snake and then cut out buttons with a hot exacto knife. There were little
SHOES
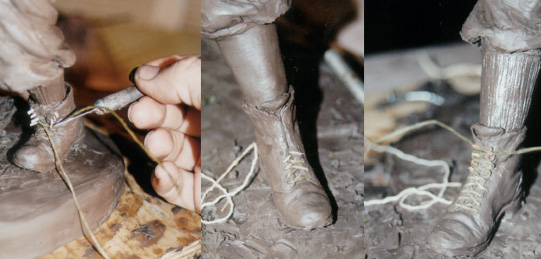
I loved the shoes. They were so much fun. For the laces I pulled apart a piece of small braided string, dipped it in wax and pushed that into the clay. The detail of the string laces will hold in the mold process. I hesitated in how to get the upper laces correct. The lower laces where no problem because they went into holes, though it was a little difficult trying to figure out which hole it would go into and which hole the string would come out of. Remember all of this was done with very small pieces of string that measured about 1/4 of an inch or less. The top of the shoe had little brads that the shoelace went around. I ended up sticking small pieces of shaved toothpicks in the shoe, around those pieces of wood, lacing up the shoe, leaving enough to tie a bow. I then covered the pieces of toothpick with clay to resemble brads.
This type of detailed work seems tedious to most, but I find it quite challenging. It is especially nice when my husband came in and said, ” look at those shoes, they look so real, like they could come right off his feet.”
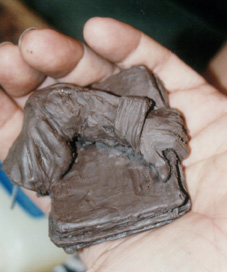
I love doing this type of detail. It probably stems from my total fascination with miniatures. Whether it be dollhouses or model airplanes and tanks, I love miniatures.
When I talked with Mike Hodges at the Texas Press, he said that he could not notice the difference in the coins in Dusty’s pockets. A trained eye can. Look at how Dusty’s right pocket and side of his pants sag or are weighed down.
At a couple different points I had to cut the arms off. It is too difficult to focus on his fingers and the paper with the arm attached to him. I will put it back on him with toothpicks, or I may leave the right arm off as it goes into the mold making process.
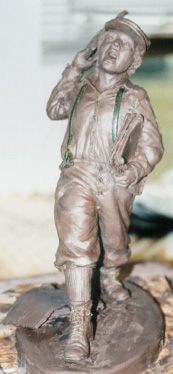
I jump around on the sculpture quite a bit, working on different areas. I guess it keeps it interesting for me. Soon there will come a point when I will turn the sculpture to proceed to the next area and find I have come full circle, and there is nothing else to do. I’ll be finished.
FACE
I so want to redo Dusty’s mouth, but I am running out of time. It looks good they way it is. I may keep it this way and just modify the large sculpture. Dusty’s hat is totally different from the first photo sitting and I had to redo that as well. His hair is also a bit longer from the first sitting. I like this better and the added extra curls.
APPROVAL
Saturday Wanda Garner Cash, President of the Texas Press Association, came to the studio to approve the sculpture. There were a few things that needed to be done yet, like fixing his right hand, sculpting the paper and smoothing some areas, but the sculpture was done enough to get an approval.
It is good to have the client’s approval so that I can leave the appendages off if I need to. I was not worried about getting the approval; the sculpture looks really good and has a great feel to it. I am very pleased.
So, now what? Where does the artist go from here? She must Prepare the Small Sculpture for The Foundry.
STUDENTS AND TEACHERS
Art
If you would like to learn how to draw folds you can focus on models in the class, and photos of people. Knowing how to draw people’s clothes can add depth and realism to your drawing. Here is an on-line course that I found where Patrick Shettleworth describes the process. Although this web site is working with comic art and computer graphics skills, it is a nice resource and will help you to start thinking about folds.
Newsboy-Sewing A Vintage Outfit
October 11-18 2004
Sculptor Bridgette Mongeon has documented the entire process of creating a figurine of a newsboy and a life-size bronze sculpture. Watch the artist work through these posts. In this blog, she has also included information for students and teachers. In the previous post, we learned a little about sculpting tricks.
If you are lost and want to go back to the chronological running list of posts, follow this link.
THIS WEEK
Ready, get set… GO!
Well that is what it feels like at the end of this week. I have waited for so long for the new outfit and the final photos.
Next week I get to sculpt! A few things like eating, sleeping resting and my weary hands will only halt the fervor of sculpting. Yes, in the past, I have sculpted so much that my hands have needed a rest.
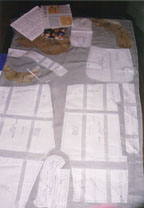
At the beginning of this week I did get all of the patterns from Vintage Pattern Lending Library. I had purchased my material last week but when laying out the shirt I was short 6″ of material- back to the Joanne’s fabric shop. Then the pattern came for the knickers, which was sent with an entire suit including jacket and vest. You must remember these patterns had no instructions. So after cutting everything apart I had patterns lying all over my home. At one point I was walking from kitchen to den, back and forth mumbling, and looking kind of lost, “pocket b, where would this pocket go?” It was like putting a large puzzle together. Once these pieces were cut apart I had to try and figure out how they went together.
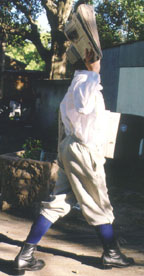
And remember that all of those pieces needed to be sized up to a size 12, before I could even begin. I had cut apart each piece in the appropriate spot, hoping I was making it big enough and hoping that I was cutting the joining pattern piece in a spot so they would all still fit together again.
Finally, all of the pieces were ready and then my sewing machine would not work. So it had to spend the day in the repair shop. I’ll tell you when I finally got to sewing those pieces I was elated! I did have a couple of extra pattern pieces left over. My husband said” isn’t that like taking a car apart and having a few pieces left over?” I was not worried.
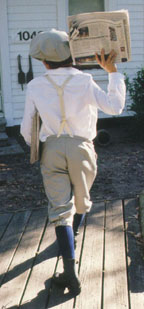
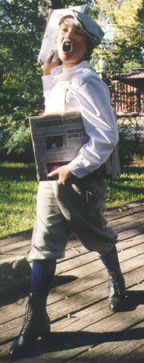
The next step was to secure a time with Dusty, which I began to try and do on Monday, even though I didn’t really finish the sewing until Thursday. Dusty is very busy, between soccer and school photos and all sorts of other after school activities. When I was able to steal him away for a few hours on Friday I knew it was all coming together. The outfit worked out fine, a few details I can change in the sculpting but the reference material is great. You may notice the cap is a bit different from the original sitting. We also have our suspenders and the knickers have buckles. I would have liked the knickers a bit more poofy, but if I really feel it is necessary I can do that in clay.
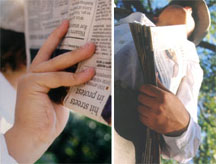
I am not just taking photos of Dusty from one view but all around him, and close up photos of things like shoes, folds, fingers etc. I even stand on a chair and shoot as well as crawling around underneath him. You can never have too many reference photos. After 144 photos I think I can start.
Oh yes, I almost forgot. We stopped and got some change for Dusty’s pocket. I wasn’t sure if it would show up in the pose, but I was willing to try. I do wish I knew how much a newspaper cost in 1929. Anyone want to guess? I think in the movie Newsies they talk about their “take” for the day. I’ll have to pay closer attention. The change did weigh down the right side of Dusty’s pants. I may take artistic liberty and make the change a bit more apparent in the final sculpture. I also took some more photos of his face. I may have to change his mouth a bit in the small sculpture to show more teeth. Next week I’ll start to build the armature for the large sculpture while working on the small sculpture. I’ll be working on both simultaneously.
Saturday I had to teach a sculpture class all day at the studio. The photos were there and of course the little Dusty sculpture was there. A few times I broke away and put some clay on the sculpture. It felt so good, so familiar. I just can’t wait for next week.
I also sketched some ideas for the large armature. You remember I mentioned a few weeks ago that the armature is an important element to the sculpture. This life size armature will be made of metal pipe and I want it to enter the life size Dusty sculpture in his lower back. It will then come a bit forward and go up. Keep posted and you will see this process in the next few weeks.

Deadlines
When taking a look at my calendar I have set a tentative date with the foundry for October 29th. That is two weeks away. In that time I must
• finish the small sculpture
• have it approved
• make a mold
• pour two waxes.
It will be a very busy week.
Orders must be placed this next week
The small sculpture is going to be created in a limited edition bronze. If you would like to order one of the first bronzes of the small newsboy sculpture please do so in the next week. If you are interested in ordering one for yourself or to honor someone in the newspaper industry, please contact the artist.
We have come a long way. Let’s continue on watching how this project moves forward. Now the artist can proceed to Finishing The Small Newsboy Sculpture.
STUDENTS AND TEACHERS
History
As I became aware of Dusty’s busy schedule I wondered what my newsboy would have done in his leisure time? What games would he have played with? A web site called Ask Ruthie had some comments on young people’s toys as well as on their games.
There were some board games at this time period but many people were too poor to buy them. Snakes and Ladders started in England in 1890 and turned into Shoots and Ladders and Monopoly was patented in 1904 by Lizzzie J Magie.
The Yo Yo was around and became popular from word of mouth and competitions. Here is a story about the history of the Yo Yo. Or you can also go to the official Duncan Yo Yo web site and check out their you tube video.
Art
Look at the original photo sitting from The September 2nd meeting, can you see how the pose and the costume have changed?
Newsboy- Sculpting Trick and More Research
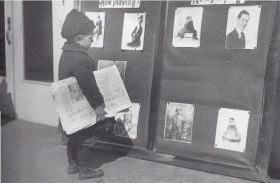
Oct 4th-11th, 2004- THIS WEEK
Sculptor Bridgette Mongeon has documented the entire process of creating a figurine of a newsboy and a life-size bronze sculpture. Watch the artist work through these posts. In this blog, she has also included information for students and teachers. In the previous post, we learned a little about The Creative Process.
If you are lost and want to go back to the chronological running list of posts, follow this link.
I wish I had more news to report this week. I am still waiting for the knickers pattern from Vintage Pattern lending Library. I do have the shirt pattern that I am working on. I have been sizing it up from the original 1920’s pattern size 8 that they had to Dusty’s size 12. I am working from the directions that I received from Amazon Dry Goods. Sizing up is not as hard as I expected. I’m basically cutting the pattern in specific areas to enlarge it. Of course the proof will be in the finished sewing. I expect to be sewing for the next few days and once done, I will frantically secure my second sitting with Dusty for those long awaited photos.
JUDGE
I have been busy this weekend once again participating in education and with young people. I have been a judge with Culture Shapers for quite a few years now. I judged the sculpture category this weekend. When first prize, for a student’s art contest, is $5,000. you want to be very sure to do your very best. Culture Shapers is a great organization and I am very proud to be associated with them.
SCULPTING TRICKS
If ever you are looking at a bronze sculpture and you think, “My this looks so realistic, the sculptor has put in every detail in the clothing”. You might want to take a closer look. You may actually be looking at real clothes. Some sculptors will sculpt an entire person and then take real clothes and put them on the figure. The clothes are dipped or coated in wax to give them some stiffness and the sculptor shapes the folds. Then a mold is made of the entire sculpture. The final sculpture is in bronze but the sculptor has not sculpted the clothes. Some artists think this is cheating.
There are even some sculptors that will take a mannequin and then put clothes on the mannequin and then make a mold and cast the sculpture in bronze. If you are wondering why some sculptures look stiff, the sculptor may have used a mannequin.
Let’s move on to the next post. The sewing pattern has arrived and the steps are revealed in Sewing A Vintage Outfit From An Old Pattern.
STUDENTS AND TEACHERS
• Have you ever been creating and felt like you have come to a wall? How did you get past it?
• What do you think about the sculpture tricks? Are they acceptable or unacceptable?
Newsboy – The Creative Process
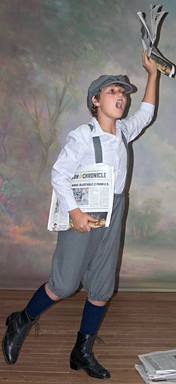
September 27th-October 3rd, 2004
Sculptor Bridgette Mongeon has documented the entire process of creating a figurine of a newsboy and a life-size bronze sculpture. Watch the artist work through these posts. In this blog, she has also included information for students and teachers. In the previous post, we watched her sew a vintage pattern for knickers.
If you are lost and want to go back to the chronological running list of posts, follow this link.
ARTICLE
This months Houston Tribune has an article about the newsboy sculpture written by yours truly. It was fun article to write, because I was able to recall my experience as a papergirl.
Happy National Newspaper week—October 3-9
International Newspaper Carrier Day—October 9th
You can read a little about National Newspaper week and Newspaper Carrier Day on the web. You might also want to learn how to fold a pressman’s hat out of newspaper.
In 1960 the International Circulation Managers Association developed a Newspaper Carriers’ hall of fame. It is now run through Newspapers Association of America. You can see a list of the inductees at this web site. I checked out the list of the inductees. It was interesting to see who was a newspaper boy or girl. The inductees that interested me were: “Red” Skelton, a comedian that I use to watch when I was a child (incidentally, he is my favorite); John Wayne, who starred in so many western movies that he has become part of the history of westerns on television (I loved watching the old westerns); and Dr. Norman Vincent Peale, I have read several of his books, and I just love them. But, these inductees are not the only newspaper carriers from history, just the ones inducted into this hall of fame.
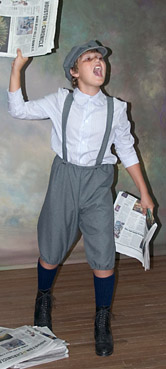
THIS WEEK’S WORK
I have not sculpted on the newsboy all week. I am still waiting for my reference photos. I did purchase material for the pattern that is coming from Vintage Pattern Lending Library (VPLL). The anticipation of getting to work on both the small sculpture and the large one is almost more than I can bear. However, I have noticed that the waiting is a part of the creative process.
Over the years, scientists have categorized the creative process into 5 sections—first insight, saturation, incubation, illumination, and implementation. There is a lot of information on this on the web. It is a fascinating subject.
As the last few weeks of these journals have shown, I have been in the saturation stage, and now I enter the incubation stage. I find incubation important for sculpting, because when I do finally get to the activity of sculpting I am energized. I am sure many will see that the actual sculpting, once begun, will go extremely fast. I will work with fervor and a great deal of passion. I am not sure how, but when everything is in place somehow that passion transfers to the clay.
While I wait, I still think about Dusty. I think about his twist, the way his legs were, how his ears stuck out over his hat, and many other nuances. I have determined the newsboy cap is not correct in the preliminary photos and I have found a pattern to make a different cap as well.
I have also spent time trying to inform teachers, students, and homeschoolers about this website. Using this web site as an educational tool has done a great deal to increase my passion for the sculpture. The newsboy represents so much more now; he represents the education and increased self-esteem of young people.
It is Friday evening and I just spoke with Janyce Engan, one of the owners at the VPLL. The patterns are on their way! Unfortunately they are in a size 8 and I need a 12. So Janyce suggested I call Amazon Dry Goods. This company has a small booklet on how to size up patterns. I think I can do it on my own but have decided to order this helpful pamphlet. Amazon Dry Goods is a wonderful resource. They also have catalogues of old patterns but more than that they have catalogues of accessories, parasols, hats, shoes etc. They also have toys and games, including paper dolls (I loved paper dolls). It is a great resource to have for period costumes.
While I had Janyce on the phone I just couldn’t help but ask her more questions about clothing throughout history. I asked her the question I posed a few weeks ago. Why did the ladies’ patterns have a waist of 26? She reminded me that a girl wore a corset from the age of 10 or 11 and continued to do so throughout their life. These bound the waist. She said she even has one pattern where the waist is 26 and the hips are 44.
Janyce said VPLL has 5,000 patterns from 1840-1949. Their customers are theater people, antique car collectors (who want to dress in the time period of their car), ballroom dancers, docents for museums, and many others.
I asked her about the boys clothing. She reminded me that for the first few years of life boys were dressed like girls. As the boys aged their length of pants was an indication of maturity. She pointed out that in the production of The Music Man, which was set in 1912, there is a song titled “You Got Trouble”, with a line that says “the minute your son leaves the house does he rebuckle his knickerbockers below the knee?” Boys wanted their knickers long to show that they were grown up, so they would buckle them below the knee.
For a little more of history…
Patterns came into existence in about 1860. James McCalls and Ebenezer Butterick began producing patterns around 1867. The sewing machine could only be afforded by the wealthy; so most garments were made by hand. I asked Janyce if the markings on the pattern would be confusing. She said VPLL scans in the patterns. They are not changed at all; however, the verbiage is upgraded to terms that someone who has knowledge of patterns would understand. For example Plait is an old form of the language for pleat.
I have toyed with the idea of sending these patterns off to a seamstress when they arrive; however, I do want to have creative input in their creation, and I think that this will most likely happen by my taking control of the sewing.
Now that we have learned about the creative process, let’s move on to the next blog that documents the process about Sculpting Tricks and More Research.
STUDENTS AND TEACHERS
• Read the article that I wrote about being a paper girl. What was I trying to save money for?
• In the history of the sewing machine, who was the first person to receive a patent on the sewing machine?
• In the 1850’s Isaac Singer built the first commercially successful sewing machine. Have you ever seen the name Singer on a sewing machine?
• Why did Elias Howe sue Isaac Singer? Did he win the lawsuit?
• Walter Hunt invented the safety pin. Do you know what else he built?
Newsboy-A Pattern For Knickers!
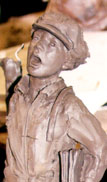
September 18-26
Sculptor Bridgette Mongeon has documented the entire process of creating a figurine of a newsboy and a life-size bronze sculpture. Watch the artist work through these posts. In this blog, she has also included information for students and teachers. In the previous post the artist talked about More Research on Clothes and the Sculpting of the Newsboy.
If you are lost and want to go back to the chronological running list of posts, follow this link.
ARTICLES
I was thrilled to receive the two articles printed by the Texas Press Association, this week. The article printed in the Messenger titled EXTRA! EXTRA! TPA revives newsboy in commemorative statue and Texas Press Association’s presidents’ column Newsboy sculpture celebrates our history.
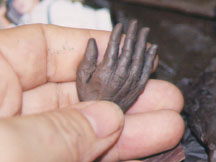
PRICES ON SCULPTURES
This newsboy sculpture will be made into a limited edition bronze in both a small tabletop size edition of 100 and a life size edition of 15. The cost of the life-size Newsboy is *$20,000. There is an additional fee of $2,000 if you desire the bronze newspaper to reflect your newspaper’s history. A small newsboy is also available making a great gift for anyone in the newspaper industry. It is a limited edition of 100. The size of the bronze is approximately 12” tall mounted on a 2” wooden base with brass plaque. The cost of the small bronze newsboy is $1,350. Contact the artist if you are interested.
SCULPTURE PROGRESS
I have made quite a bit of progress on the small sculpture. And I am so happy with how it is coming. It is more than just how it looks, it is how it feels. The sculpture feels good and somehow that comes across to others. This element of sculpting cannot be taught. I am not even sure how to bring this element into a sculpture. It seems that sometimes it happens and sometimes it does not. I am sure it has a great deal to do with how I feel while I am sculpting and the passion for the piece. This sculpture has much going for it in both areas.
I was sad to put it away for a few days, but I am running out of things to do without my reference photos. This week I was able to finish Dusty’s face. I also cut out and sculpted some miniature newspapers.
Then I roughed in Dusty’s hands. To determine the size of a hand, I used the face that I sculpted. A hand is usually the size of the face. If you put the base of the palm of your hand against your chin, most likely your middle finger will meet your hairline. Artists use these type of measurements all the time, when sculpting, painting or drawing.
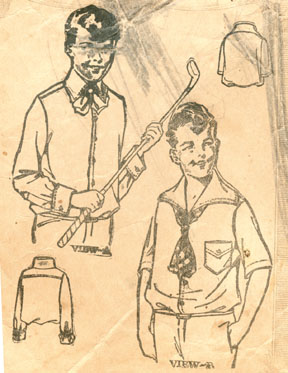
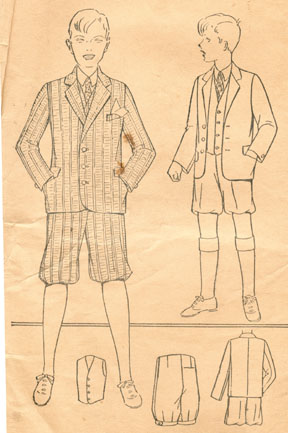
I was more than anxious to hear from Vintage Pattern Lending Library and I finally did on Thursday evening. They sent me the photos shown below. The shirt and knickers are patterns from the 1920’s. Unfortunately the patterns are in size 8, so there will be some adjusting. Vintage Pattern Lending Library can enlarge the patterns for me but I would have to wait until October 1 to receive them. My schedule with Texas Press Association would allow for this, but I cannot bear to be away from the newsboy for that long. I have requested they send me the patterns and I will see what I can do. I guess I’ll be pulling out my sewing machine next week.
Let’s move on with this project. In the next post we will learn a little bit about The Creative Process.
STUDENTS AND TEACHERS
Art
As mentioned above, artists use all sorts of measurements in their drawing, painting and sculpting. Here are a few that you can try yourself.
• Your eyes are in the middle of your head. Take a pencil and measure from your chin to your eyes, then take that measurement and compare it from your eyes to the top of your head. This is a good thing to remember when drawing a face and it is regular error that beginning drawing students make.
• This measurement shows the placement of the ear. Take a measurement from your chin to your eyes, yes the same measurement as above, but this time turn your pencil horizontally. The distance from the corner of your eye and the back of your ear should be the same as from your chin to the eye in the front. Isn’t that cool!
• A perfectly proportioned adult person is 8 1/2 heads high. Artist use the “head” measurement often. Use the illustration of the boy with the suit, the one facing you. Put your pencil lead tip at the top of his head and drop your thumb down to his chin. Now you have the size of his head. Keep moving that measurement down the boy until you find how many heads high he is. Measure yourself, your parents, your siblings how many heads high are they?
• Have you ever seen an artist with their hand out straight and one eye closed, maybe in a movie or something? They are measuring. You can do this as well. Take your pencil, as in the measuring step above, put the point of it at the top of something that you want to measure. Let’s say your doghouse in the distance. Now slowly move your thumb down to the bottom of the doghouse. What you have now is the size of your doghouse. The tip of your pencil, is the top of the dog house and your thumb is the bottom. “So, what good is that?” you ask. Well… don’t move your thumb, but take your pencil over to your own house. Just like measuring how many heads high the boy on this page is, you can measure how many doghouses will fit in the height of your own house. This measuring tool helps artist to be sure they have things in proportion. If you have already drawn the doghouse, you can now draw your own house and be pretty sure that you have it in proportion to everything else. Just like when I sculpt, it is all about comparisons, comparing the doghouse to the big house. Or, in the case of my sculpture, comparing one photo from one angle with the sculpture to another photo from another angle with the sculpture. With the measuring trick that I have just mentioned, you must not bend your elbow otherwise you will change your measurement. Keep your arm straight and look through one eye. All you need now is a canvas and paint and people will look at you and say, “My, they are a master artist!”
Newsboy-More Research and Progress on Small Newsboy
September 11th-17th, 2004
Sculptor Bridgette Mongeon has documented the entire process of creating a figurine of a newsboy and a life-size bronze sculpture. Watch the artist work through these posts. In this blog, she has also included information for students and teachers. In the previous post, we a little about the Sculpting of the Small Newsboy
If you are lost and want to go back to the chronological running list of posts, follow this link.
What an incredible week this was. Here I am, Friday afternoon, trying to type all that happened this week. The last few weeks I woke early each Saturday, because I just couldn’t wait to post the new photos and the progress on the sculpture. It’s late Friday, and I decided I better get going on the update. It is kind of hard to type on the computer while at my studio. My hands and fingers are sticky with the clay.
RESEARCH
I wish I had photos from today’s work on the newsboy, but those will have to wait until next week. I am sure you will still see some progress on the sculpture from photos taken at the beginning of the week. In all honesty, I have not been able to sculpt much on the newsboy this week. Instead, my days have been busy with changing the Texas Press section of the website to include a teacher and students’ section. Some schools are beginning to utilize this web site as an educational tool for students. I would appreciate help in getting the word out to other schools. I will continue to add a teacher and students’ section each week.
I have also been very busy doing the research on the sculpture. I put a great deal of effort into defining the final outfit and finding the suspenders. Though I would like the kind of suspenders with leather at the bottom-you know, the kind that Pa wears on Little House on the Prairie? I love that show. I did find some suspenders that will do. These are the ones with the buttons, and that was the most important thing. The way these suspenders attach to the pants, compared to the imitation button in the first photo sitting is different. Because it is different, it will make the tension on the pants different, and that changes the folds. But, I have suspenders that will work, thanks to Way We Wore Vintage Clothing. This is such a cool place to visit, and I highly recommend this vintage clothing shop to those visiting Houston. I discussed the newsboy project with Pam, the owner. She had quite a bit to share. I learned that one of the reasons why I cannot find “vintage” clothing for this project is that boys wore out their clothes. That makes sense. Girls and ladies clothing can be found, because they were so dainty in their clothing, but boys just wore out their clothes. Pam and I also talked about buttons on the boy’s 1929 clothing. She told me that looking at zippers and buttons is the way she dates clothing, and in 1929 the boys pants would have buttons. My research on the history of the zipper did prove that this is correct.
So, I was still perplexed with how these knickers should look. One of my sculpture students, a retired doctor, said he wore knickers when he was a young man. He said they ballooned much more than the one in the preliminary photo, and he agreed that they had clasps at the knees. I appreciated the first hand information.
Now, back to the Internet. What did we ever do before we had the Internet? I must have e mailed 20-30 different people, everyone from vintage clothing people, to vintage pattern people to college professors and historians. I received an e-mail from someone in the middle of the week suggesting I rent the video Newsies to see some of the outfits. I ordered it right away. Newsies is a Disney musical created a few years back. It depicts the 1899 strike of the newsboys. To my dismay, most of the older boys were wearing long pants, but a few did have knicker and almost everyone wore suspenders! I loved having the movie because it added to the passion for this piece and once again reaffirmed to me just what important things kids can do.
Thursday I received an e-mail from the Vintage Pattern Lending Library It said:
Hello Bridgett!
Sorry for the delay; we’ve been a bit busy. As it happens, we do have a book with a complete boys’ outfit, including knickers, from about 1925 which sounds like what you are looking for. Let us get back to you in a day or two with more details; we will have to draft it out of the book if you need a full-sized pattern. Hope this is helpful – your project sounds fascinating!
Best wishes,
Chaz Engan VPLL
When I received the e-mail, I screamed! Maybe my search is over. It will be something to see, this vintage pattern. Though I love to sew, I rarely do, and I would not consider myself a pro. I wonder what the pattern will look like, if it will be marked differently from patterns of today. Their site also says:
Some of the items in the VPLL archives might be the only originals in existence.
After this weeks search, I believe it. I never really thought about all of this until receiving this commission, but I am sure glad that someone has taken the initiative to preserve this part of our history. My newsboy hat is off to you VPLL!
By the way, while looking at all of these old patterns for women, I wish I could take some time to sew some for myself. I can’t help but wonder-were people smaller back then? Most of the women’s patterns are women with a size 26 waist. 26!
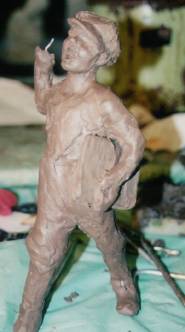
So, while I wait for this final outfit, I can still work on Dusty’s face on the small sculpture. That is what I have been doing for the last 24 hours. It felt good to get back to the clay, but as I feared the face grew a little bigger than the body so I made him slightly bigger than 10″. It was much easier to manipulate the roughed in body than it would be to fix an almost complete face. I wish you could see today’s photos, they will be posted next week. The sculpture has so much life to it, the turn, the step, the face, the tip of the head. In one photo, Dusty’s hat was just a bit off to the side, not much, but a bit, and I thought, OH MY, THAT IS GREAT! It was one of those happy accidents.
Even though I don’t have the last photos for reference of the figure, I can also start to prepare the large armature. As I said, this pose is great, and working it out small gives me the opportunity to see how the large armature should be constructed.
This weekend, after putting up these recent updates, I think I will pop some popcorn, watch Newsies, and maybe start a scrapbook for Dusty.
Let’s move on to the next section of this documentation. Follow along as the artist decides to make a period outfit and finds A Sewing Pattern for Knickers and Sculpting Continues.
STUDENTS AND TEACHERS
History
• There was a sales campaign for the zipper in children’s clothing in 1939. Can you search the history of the zipper link above, and tell me what items the zipper was used for before it was used on pants?
• There is a copy of the newsboy strike printed in the New York Times, July 21, 1899. Kids your age were able to change the minds of very powerful people.
“Friens and feller workers. Dis is a time which tries de hearts of men. Dis is de time when we’se got to stick together like glue…. We know wot we wants and we’ll git it even if we is blind.”
The New York Tribune quoted Kid Blink’s speech to 2,000 strikers:
Newsboy- The Sculpting
September 8-10, 2004
Sculptor Bridgette Mongeon has documented the entire process of creating a figurine of a newsboy and a life-size bronze sculpture. Watch the artist work through these posts. In this blog, she has also included information for students and teachers. In the previous post, we learned about the beginning of the sculpture.
If you are lost and want to go back to the chronological running list of posts, follow this link.
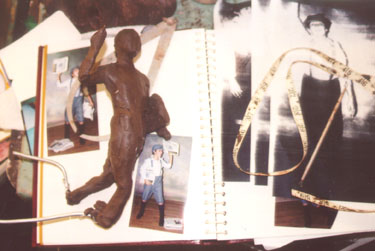
Even without the final photographs with the new outfit, there is enough reference in the first photos to put together a roughed in version of the clay on the small the sculpture. I am excited about doing this because I will be able to see the form in three dimensions.
Sometimes, during different presentations I have a friend create a 3D version of the sculpture in the computer. With a little help from a program called Poser and Photoshop, he can simulate what a sculpture might look like and we can view it from several directions. There is an example of one of this process using 3D models on this YouTube post. You will notice with the Ellie sculpture; however, that the sculpture was modified as we went along. The computer rendition is nice, but there is nothing like seeing it in clay. Then, it is my fingers that manipulate the sculpture, giving a twist here, a turn there. It’s then that the fermenting of the creativity that has been withheld for so long can come forth. There is a tremendous feeling that is associated with creativity.
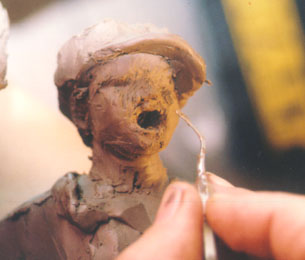
The process of putting the clay to the sculpture is taking some time. Mostly because sculpting the newsboy is my treat. I’ll work on commission A and B for a few hours, and after I do that, I will reward myself by working on the newsboy for a while.
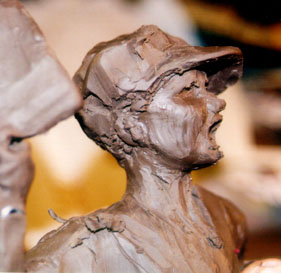
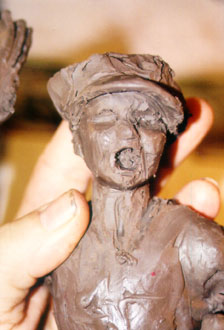
SCULPTING THE FACE
I have the general shape of the body finished, and I am very pleased. Whatever has not been worked out in the design, will work itself out as I proceed. I begin to focus on the face.Working on a one inch face of someone is no easy task. There will be a point when I will work on the face with pins and sharp knife blades, anything that will allow me to get the details that I want. My job today is to get the basic shape and to make sure it is in proportion to the body. This is essential and sometimes can prove to be a difficult undertaking. Once again, a fraction of an inch on something this size translates into something much larger when life-size. It all must look like it goes together. I force myself not to just look at the face but keep looking at the entire sculpture. I remember times when I was first sculpting when I would forget to do this and work on the head as a separate entity. I would have it perfect, and then put it with the body and find that it is off, not by much, but enough to have to start all over.
Let’s go on to the next step and learn about More Research on Clothes and Sculpting of the Newsboy.
STUDENTS AND TEACHERS
Art and Math
• On the previous page I talked about the scale of the sculpture and that the scale was two inches to one foot. The size of the finished small sculpture will be approximately ten inches. Approximately how tall is the real Dusty? If I changed the scale of the small sculpture to be three inches equals one foot how tall will the small figure be?
• What does 3D mean?
• How did the computer generated 3D figure of Ellie, in the link from above, change in comparison with the sculpted figure?

