Articles
How Does Faith Reflect In Sculpture?
I greatly enjoyed writing this months article for Best of Artist and Artisans title Sculpture- A Reflection of Faith. I can’t help but wonder if these artists feel more of a creative pull because their artwork revolves around a spiritual message. See for yourself.
Mother’s Day- Letting Go
Mother’s day might not be a happy day for all women. In fact, there may be some women who are, for whatever reason, estranged from their children or their may be children estranged from their mothers. For these people, watching happy families on Mother’s day can be quite painful. There is no doubt that the pain that is felt through and by these broken relationships or the injustices caused one to another is real. But this Mother’s day, begin to give yourself the gift of letting go. Let go of the pain, the anger, and the resentment, and begin to pray for forgiveness.
This is not an easy task. Withholding anger concerning your expectations of someone turns into resentment. Holding on to resentment makes you feel justified. However, there is documentation stating that resentment and unforgiveness can make you physically sick. It could even shorten your life. Resentment can cause depression, change blood pressure, and heart rate. Resentment releases stress hormones and maintaining that resentment can cause permanent physiological damage. In short, holding on to resentment causes more damage to you than the person you are angry at.
It is difficult to forgive someone who does not admit they are wrong or who has not asked to be forgiven. Pray that God softens your heart, and if you can pray for nothing else pray that God gives you what I call the “want tos.” “Lord help me to ‘want to’ forgive,” and try to remember when you too needed forgiveness.
Often the chance of reconciliation grows dimmer as the distance grows greater. At times it might feel like it is just easier not to try. If you are the person that needs forgiveness approach the one that you have hurt in a humble manor. Pray often to God to forgive you and to heal the relationship as you continue to try to reconcile. Also, forgive yourself. Barbara Ingersoll, known as Gram in our Inspirations/Generations podcast, said it took years for her to forgive herself for what she had done to her children. You must learn to forgive yourself as well.
Forgiveness can still happen after the death of a loved one. Once again pray that God heal the relationship. Nothing is too big for God. He can heal even through death. This will allow you to let go, and in turn it will give space in your heart for other blessings.
Let all bitterness and wrath and anger and clamor and slander be put away from you, with all malice, and be kind to one another, tenderhearted, forgiving one another, as God in Christ forgave you.
Eph 4:31-32
Copyright 2009
Mongeon is a writer, sculptor, and speaker https://creativesculpture.com
An Interview With Sculptor Camille Allen
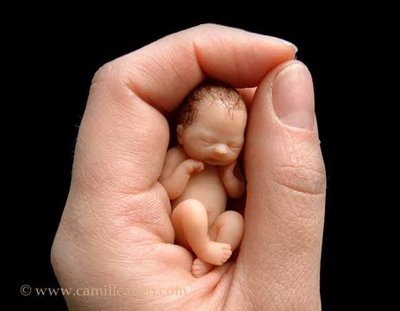
I interviewed Camille Allen for my February Column on Best of Artists and Artisans. Her work is amazing and something to really check out.
Sculpture- A Reflection of Faith
Created for Best of Artists and Artisans Website
By Bridgette Mongeon © 2009
We are in the middle of what some would call a holy season of Lent, leading up to Passover, and then Easter Sunday. This solemn time of reflection in faith caused me to seek sculpture that does the same. In this month’s article we will showcase the work of traditional “liturgical art,” as well as not so traditional art based on the faith or with a message of faith. When reviewing different artists it is important for me to hear the description of the art. A titled work and descriptions add life to the piece, gives it meaning and creates a rapport between viewer, art, and artist. Equally, there is an urgency in my discovery of the process of each individual artist. I want to know more about their own faith. What drives them to spend so many hours creating these images? Is it of necessity that they driven to create? Do they feel a message must be conveyed? Is there a spiritual dance between them and the Great Creator as they mingle passion, art and faith? Here are the answers of five passionate and spiritual artists.
ArtistAngela Johnson
www.ajsculptures.com
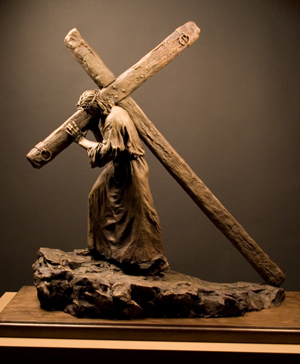
Art quietly speaks volumes. At this Easter time it gives me joy to share my pieces, Because of Love and Lazarus, Come Forth. The most fascinating aspect of art for me is what can be communicated from the artist to the viewer. Every artistic decision of compositional design is determined with the desire to share a perspective,
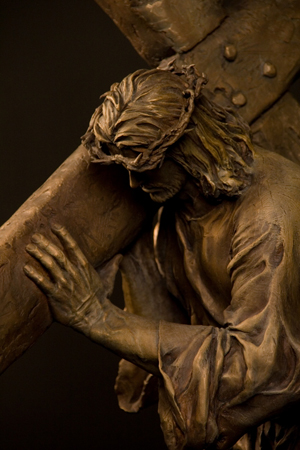
belief or quality about the subject being created. In the sculpture, Because of Love, it was my desire to portray the incomprehensible act of love of Jesus Christ is suffering the weight of the sins of the world. The majesty and power of His love is portrayed and embedded in this work. The strain of His muscles, His bearing being strong, yet submissive to the will of His Father are meant to draw the viewer into contemplation of His Great, Infinite sacrifice of Love.
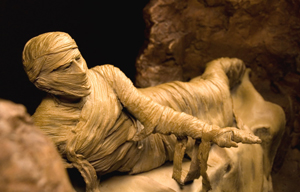
Lazarus, Come Forth sculpturally depicts the miracle of Jesus raising Lazarus from the dead. The biblical account states that Lazarus had been in the grave four days. Beyond all the miracles Jesus Christ had already performed was this yet greater impossibility of raising someone from the dead long after their spirit had left the realm of earth. I think a great deal about the reaction of Mary and Martha as they struggle in amazement and disbelief as they see their brother who was one dead, alive again. When we pray and ask God to grant a blessing or we personally witness a miracle what is our reaction? How grateful and changed are we as we experience the power of God? Do we give God the glory or dismiss it as an unexplainable coincidence?
Artist
William Leslie
www.PaperSunLightsculpture.com
At the heart of existence there shines a light; Ner Tamid, the flame of the Divine’s ever radiant Presence. This light, which emanates from the inside out, expresses the timeless ideals towards which all individuals and nations strive; Wisdom, Love, and Justice.
Wisdom is the knowledge of the true nature of the human condition and the Sacred Mystery; Love is found in the deep concern for the well being of all living things, especially the least advantaged and most vulnerable; and Justice is the manifestation of Wisdom and Love in action, the right ordering of society such that the dignity of all is cherished and protected.
These three virtues are expressed in the three upward aspiring fingers of the flame in this representation of Ner Tamid. Their unity and interdependence is signified by the manner in which the three fingers twist around each other after emerging from a common base.
It is the wish of the artist that this expression of the Eternal Flame inspire every individual and all nations to be exemplary lights to guide humanity through the dark night of these bewildering times, and to remind us of the undying presence of the Divine.
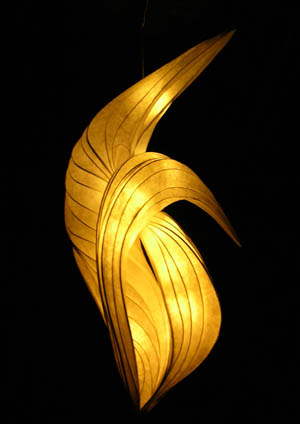
The aesthetic appeal of my lightsculptures is evocative of what we find beautiful in natural forms; the swirl of texture in marble or wood grain, the evolving folds in flowers or lichen, the patterns left in windswept or sea swept sand. Everywhere we look we see that nature prefers to move in graceful trails, or to organize itself in beautiful patterns.
I began thirty years ago calling my work “lanterns” or “artistic light fixtures.” Gradually my work has evolved to become more sculptural, less functional. While my clients (ranging from homes to businesses, hospitals to restaurants) are often seeking a source of illumination for an occupied space, they also desire something that stands alone as a work of art whether the light is on or off. It is this wish to grow beyond the functional, to create truly beautiful illuminated sculptural forms that motivates my efforts now.
Ner Tamid resides in Unitarian Universalist Fellowship in Vista, CA.
ArtistNancy Winship Milliken
www.nancymilliken.com
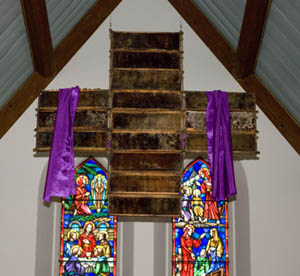
Out of Many, One, dimensions variable upon installation (cross is 51”x51”x2”), wood, beeswax, honey, muslin, steel, 2008.
The piece is constructed out of honey frames from a bee hive. It has the balance of the Red Cross symbol as it hangs suspended from the ceiling. There is a waxed muslin catch-pan filled with honey underneath and waxed muslin is draped over the extended arms of the cross. There is a lovely sweet smell of wax and honey and a depth of natural color of the old honeycomb.
Out of Many, One, II, dimensions variable upon installation (cross is 51”x51”x2”), wood, beeswax, steel, polyester, 2009. The piece is similar to the above Out of Many, One description except without the catch-pan of honey and the material draped is interchangeable, purple for lent, red and black as needed. This cross now installed at Calvary Church in Stonington, Connecticut, will come down for Easter and be replaced with a cross that I have made out of the same frame construction, filled with white flowers.
The Lamb, installation size variable,( 7’, 10’, or 15’) wool, felt, polyester, 2009. The wool has been kept in the raw, so the smell of lanolin and animal is vaguely familiar, ancient, visceral. The wool is needle felted into a felt substrate, using an old technique employed by homesteaders all over the world. The subtle colors and design of the wool, the texture and smell present in contrast to the purple polyester shine adds intrigue and contemplation.
Artist Statement
Art for me is where science and the spiritual connect. For these above mentioned pieces the concepts of sacrifice and service were always front and center. Out of Many, One, is titled for both the collaborative work ethic and social constructs of the honeybee colony and our national motto, E Pluribus Unum, found on the seal of the United States and on our dollar bill. The bees work for the benefit the whole colony, even giving their lives in defense of their productive hive. With the recent colony collapse disorder that the nation’s bees have been experiencing, I believe the materials that I have chosen to be symbolic of not only humanitarian behaviors, but also reflective of our environmental impact on the honeybee.
In choosing the symbol of the cross, and in particular the Red Cross, I am referencing the humanitarian gesture of service to others with disregard to country borders, skin color, sexual orientation, wealth or religion. Anyone who has experienced a natural disaster, a manmade calamity, or even succumbed to the power of water while swimming knows the calming effect of the Red Cross symbol flying on a flag meaning help is near. It is powerful and instills the feeling of hope as well as symbolizing sacrifice and service. The lamb has historically been a symbol of sacrifice. The method of attaching the fiber by pushing the wool into the felt with a long needle is laborious and a nod to the essential work of the homesteader. The contrasting shiny purple material representative of the color for Lent and the practice of doing without highlights the natural and authentic smell and texture of the wool.
As a last note about these pieces: They personally symbolize the faith I have in my art. I made a change in my career two years ago and I need to have faith in the unknown, the unseen, the future. By using untraditional materials unconventionally in my art, I am entering un-chartered territory. These traditional symbols are a reminder, a flag, of faith in my art.
Artist
Robert Winkler
www.robertwinklerscupture.com
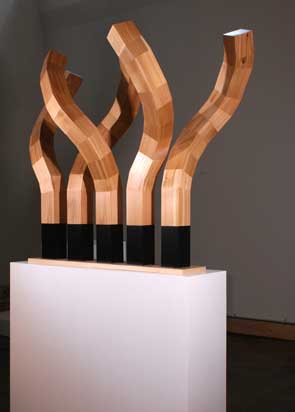
People often ask Robert Winkler what inspired one or another of his sculptures.
But, the more relevant question for Winkler is “what do his abstract forms inspire in the viewer?”—particularly in the case of Look Homeward, Angles. Like all of his works, it is deeply spiritual, humble in its simplicity and lack of ornamentation —with a minimal flow that allows the imagination to soar unimpeded.
In Look Homeward, Angles, his graceful-gravity challenging forms seem to resist the downward pull of the Earth and reach heavenward.
In a recent series of interior sculptures, Grow Up, the prayerful attitudes and upward reach of the twisted forms are both a paean to ephemeral beauty and a moving metaphor for the human struggle to transcend.
Since the early ‘90’s, Robert Winkler has been manipulating volume, mass and balance to create a sense of movement. His interior works make use of surprising combinations of materials, such as aluminum, steel, hand-laid papers, vellum, tempered masonite, and cedar. His large-scale outdoor works are primarily constructed of cedar, an organic material whose surface changes over time. Above all, it is his ability to find infinite variation within a limited number of shapes that sets him apart. Without so much as a single curved cut of wood, he achieves serpentine, animated forms through the use of incremental gradations. It is a discipline that offers no hiding place for error, demanding meticulous workmanship.
Artist
Sean Matthews
www.flickr.com/photos/seansaltars
My first experience with sculpture dates back to childhood. As a boy, Sunday Mass was the least exciting hour of the week and I often found myself daydreaming. I can think back to a reoccurring daydream of the Church spontaneously bursting into flames during a Sunday morning celebration. While the congregation was frantically storming the doors for safety, I was calmly carrying large marble sculptures of the Holy Family out from the fire. I remember thinking how I would be the hero who saved works of art from a burning church.
From time to time, I still find myself daydreaming during Mass. One Sunday, about six years ago, after my first semester of graduate school, I made a discovery that changed my process of object making. During Mass, while we were solemnly kneeling, I noticed a predominant object for what seemed to be the first time. I looked around the congregation and saw how all eyes were focused on the priest and the ritual he was performing around the altar. I remember looking at the altar as if it were a piece of minimal sculpture anchored in the center of a highly conceptual, performance piece. I was immediately inspired, and my mind began to race with ideas. This was a defining moment for me as an artist.
From the beginning of civilization, in every culture around the world, sacred articles, such as altars, shrines, and sanctuaries have been used to connect us spiritually to a place outside the physical world. I have found the altar to be a unique tool that can take almost any form so long as it has been consecrated to a significant purpose. The spiritual object symbolizes religious or secular memories and acts as a focal point where one prays, contemplates, or meditates.
I see the altar as a vehicle that drives a thought or a prayer into an intangible world. It makes an imperceptible connection between the participant and a memory. It is the tool that connects us to a thought, emotion, or a recollection, making visible that which is invisible. An altar can be specific to a location, or small enough to fit in one’s hand. It can be personal or for others, and is possibly the only devotional object that can connect all people, around the world, from the beginning of time through to the present.
My body of work revolves around the altar and its infinite forms. I explore the similarities between the altar and the object, and ask the viewer to determine the difference between the two. Form and craftsmanship is very important to my concepts because I believe that beauty in art is an extension of God. Mark Rothko writes, “The artist m
ust have sufficient means at his command to achieve his objective so that his work becomes convincingly communicative.”
My latest work is inspired by a Sicilian tradition called St. Joseph Altars. The focus of St Joseph Altars is baked goods and fruit. Breads are baked in symbolic forms such as carpenter tools and tools of the Passion; every food item on the altar has a special meaning. Because this tradition is practiced during Lent, meats are not included on the table. I have appropriated the idea of building an altar to a saint, but instead of paying homage to Saint Joseph, I am communicating my gratitude to Saint Luke, the patron of sculptors. In this body of work, small sculptures replace food. The materials I use are found objects and recycled wood and steel. My purpose for using these materials is to symbolize the Resurrection.
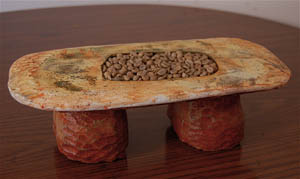
Altar XV
Plastic, cement and coffee beans,
Microlithic Altar
Wood and steal
A Bean Picker’s Altar
Wood, steel, coffee beans, coffee bean bag
All written work is copyrighted and cannot be used, whole or in part,
without the written consent of the author.
New Article- Milling- An Additional Tool of Advanced Technology For the Traditional Sculptor
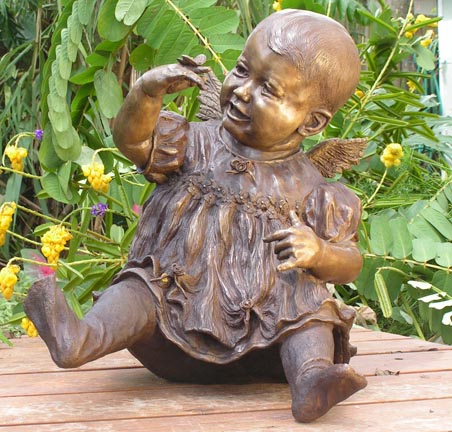
Created for Best of Artists and Artisans website
By Bridgette Mongeon © 2008
In this column’s May 2008 article, “Using the Computer and Poser in the Sculpture Studio,” I spoke about using the computer program Poser and Daz 3D to create my presentations for a sculpture called Jenna. I’d like to expand on that process to further assist the traditional artists utilizing technology in the studio. Some sculptors are utilizing digital scanning and milling to help enlarge their sculptures. I will expand on scanning in a later article, as there is quite a bit of information to relay about digital scanning. For this article we will focus on milling in foam.
If you remember with the sculpture of Jenna, both Poser and Daz 3D figures were combined to create several different visuals for the client to look at and approve. From there we took the computer generated 3D pose and sent it to Blue Genie Art Industries in Austin, Texas, for milling. First we made sure that the mesh, the underlying structure in a 3D computer model that gives it its shape and form, was watertight. This means that there are no holes in the mesh. Blue Genie Art Industries can examine files for an artist and provided this service as well.
Blue Genie Art Industries then took the Poser file provided and sent it to the (CNC) Computer Numerical Controlled milling machine. Here the CNC milling machine uses drill bits that move back and forth along the foam, carving out a foam replica of the 3d model that is in the computer.
Artists Taking Action
Created for Best of Artists and Artisans web site
By Bridgette Mongeon © 2008
Recently I received an e-mail in my inbox that caused me to clean my clay filled hands and take action. It was from sculptor Boaz Vaadia in Brooklyn, NY, expressing urgency in supporting the Artist deduction bill S. 548 and HR 1524. The e-mail included links to Americans for the Arts. This is a wonderful organization that is working for each of us. According to their website:
Americans for the Arts is the nation’s leading nonprofit organization for advancing the arts in America. With 45 years of service, we are dedicated to representing and serving local communities and creating opportunities for every American to participate in and appreciate all forms of the arts.
This bill S. 548 and HR 1524 is described on the Americans for the Arts policy and advocacy page, but let me sum it up in this article.
Since 1969 those working in the arts have not been allowed to deduct the fair market value of their artwork when donating it. The bill “would allow creators of original works to deduct the fair-market value of self-created works given to and retained by a nonprofit institution.” Currently, those working in the arts can only deduct what it cost to create it. Here is some more information from the Americans for the Arts website that indicates the importance of this bill and how immediate the effect of the 1969 legislation was.
- The Museum of Modern Art in New York received 321 gifts from artists in the three years prior to 1969; in the three years after 1969 the museum received 28 works of art from artists—a decrease of more than 90 percent.
- The biggest loser was the Library of Congress, which annually received 15 to 20 large gifts of manuscripts from authors. In the four years after 1969, it received one gift.
- Dr. James Billington, Librarian of Congress, says, “The restoration of this tax deduction would vastly benefit our manuscript and music holdings, and remove the single major impediment to developing the Library’s graphic art holdings. [The] bill would also benefit local public and research libraries. When this tax deduction was allowed in the past, many urban and rural libraries profited from the donation of manuscripts and other memorabilia from authors and composers who wanted their creative output to be available for research in their local communities.”
H.R. 1524 and S. 548 are identical to legislation that the Senate has passed five times in the past few years, but that has not been reviewed by the House.
This bill affects every creative person, not just sculptors. Please take note.
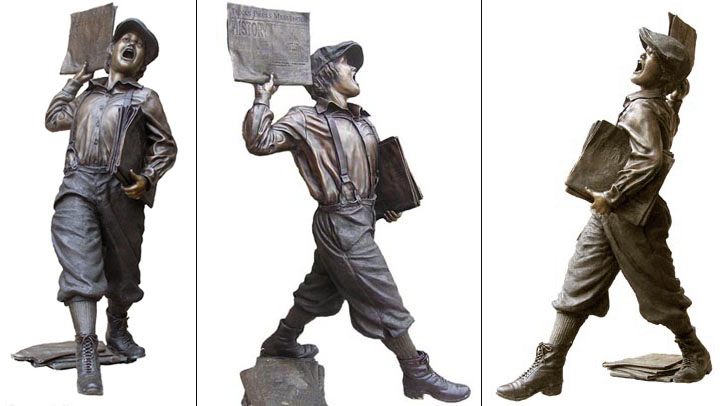
Since I learn best by example, here is one for you to ponder. I have created a life-size newsboy sculpture. There are 10 in the edition of the life size sculpture and they sell for $23,000. I have sold two in the edition. One for the Texas Press Association, who commissioned me to create the piece, the second for the Tabor City Tribune. It costs me approximately $6,000 to pour the newsboy in bronze. I have worked hard to develop a reputation as an artist and to sell the remaining in the edition spending hours on press releases about “Carving newspaper headlines in history,” documenting the process on my website and in an online video number one , and number two. I spent many hours and a great deal of money in mailings and marketing. It would make my heart skip a beat if I could somehow get one of these newsboys into the Albright Knox Art Gallery in my home town of Buffalo, New York. If somehow I could find the funds to pour the sculpture and donate it, and if they accepted the piece, I could only deduct the $6,000- the cost of pouring this sculpture as my tax deduction and not the entire $23,000 That is a loss of $17,000 of income for my sculpture and my pocket book. However, if someone else bought the sculpture and donated it, they could deduct the entire $23,000.
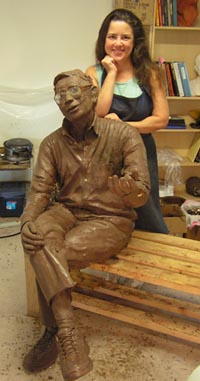
Another example is a piece I am currently working on of Richard Hathaway of Vermont College Union Institute and Goddard College. I am donating my labor and part of the casting costs, a total of approximately $25,000. The City of Montpelier has donated the cost of casting the sculpture. It will be installed this year at the TW Wood Gallery in Montpelier, Vermont. My taxable deduction for a year and a half worth of work $0.00.
I contacted the executive director of the St. Louis Volunteer Lawyer and Accountants for the Arts. “Unfortunately, I often deliver bad news to artists: they can only claim the cost of their materials when they donate a work of art to a nonprofit organization, while a collector can claim the fair market value. The proposed legislation, which includes some caveats, would allow some artists to receive an equitable tax deduction. It’s been on the table before, but it looks like it has some momentum this year, so artists should take a moment to contact their legislators,” states Sue Greenberg.
The Americans for the Arts website makes it quite easy to get involved. By going to the artist’s action center you can fill in your zip code and see if your senator supports the bill. There is a simple form for you to e-mail to your representative or print out a letter with your request for support.
I know it is difficult to take time away from our creativity to become politically involved. It is however, very important to our livelihood. Thank you for your support and your actions.
Here is an update on some of my Creative Endeavors!
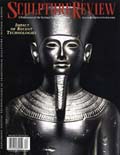
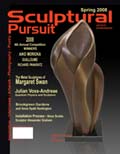
Recent articles written by Ms. Mongeon
“Exploring Digital Technologies as Applied to Traditional Sculpting.” Sculpture Review. (Winter 2007) 30.
“The American.” Sculpture Review. (Winter 2007) 32.“Artful Business-The Basics of Designing your Website.” Sculptural Pursuit. Vol. 7 No. 1. (Spring 2008) 50. March 2004
All written work is copyrighted and cannot be used, whole or in part,
without the written consent of the author.
New Article- Best of Artists & Artisans
There is a new article posted at the Best of Artists and Artisans blog titled
Mold Making and Bronze Casting-Part I . For those interested I have listed suppliers and materials. The article goes along with the recent video created of the Richard Hathaway Memorial Sculpture.
A Review of New Technology For The Traditional Studio at the SIGGRAPH Convention
Writings by Ms. Mongeon
Created for Best of Artists and Artisans web site
By Bridgette Mongeon © 2008
Using technology in a traditional art studio can, at first, feel like cheating or it may bring a fear that the technology can somehow overtake the craft and creativity. I mentioned these fears and my introduction to this topic in a recent article titled Exploring Digital Technologies as Applied to Traditional Sculpting– Sculpture Review Winter 2007. In the article, I explored incorporating digital scanning and milling in the traditional sculpting studio. My research alleviated my original concerns and fears as I realized that digital enlargement, though a little intimidating at first, can be combined with traditional techniques offering another tool to use in my creative process, a tool that has the added benefit of providing me with more time to create.
I continued my research into utilizing technology in the traditional art studio while attending the 2008 Siggraph Convention this past August. Siggraph is short for Special Interest Group on Graphics and Interactive Techniques.
I once considered Siggraph as a convention for those working in graphics since it relates to illustration or computer generated special affects for movies. I have watched with curiosity over the years as the technology that has been introduced at Siggraph has infiltrated the 3D world outside the computer and into traditional sculpture studio. Those at Siggraph also seemed to be embracing the idea of bringing technology into the art studio. Three prime areas, besides the main floor of exhibitors, displayed this same exploration.
THE STUDIO
The Studio section hosted six established and emerging resident artists, along with hands on participation for learning and creating in 2d, 3d, and 4d (fourth dimension is time.) Though The Studio contained quite a bit of resources, two visiting artists captured my attention.
Matt Shlian calls himself a paper engineer, creating elaborate sculptures through the use of folded paper, which is not to be confused with true origami because he cuts and glues. My intrigue with the art was that many of the forms generate movement, changing shape with the interaction of the viewer.
It is interesting to point out that many of the artists I researched who were working with technology in their art also crossed over into the area of science. A segment of Matt’s website states this.
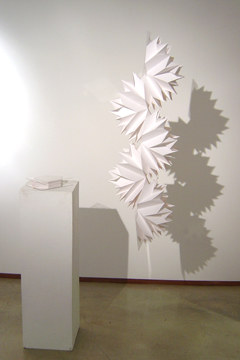
“As a paper engineer my work is rooted in print media, book arts and commercial design. Beginning with an initial fold, a single action causes a transfer of energy to subsequent folds, which ultimately manifest in drawings and three-dimensional forms. I use my engineering skills to create kinetic sculpture, which have lead to collaborations with scientists at the University of Michigan. We work on the nanoscale, translating paper structures to micro origami. Our investigations extend to visualizing cellular division and solar cell development. Researchers see paper engineering as a metaphor for scientific principals; I see their inquiry as basis for artistic inspiration.”
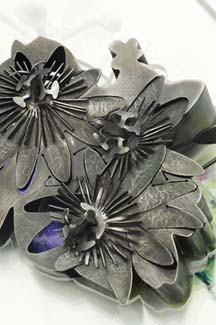
Another person that caught my eye was metal smith and jeweler, Sondra Sherman. I told Sondra that my goal as media at Siggraph was to find artists who were bringing technology into their studio, and she made sure that I knew that her present designs were created by hand, but that learning about the technology that would apply to her art studio was also her goal while at Siggraph. “I believe artists in craft media are always curious about means or materials which might enhance or facilitate their creative expression and which seduces the viewer to engage with the work. I am not interested in the ‘novelty for its own sake’ quality, which the use of technology might bring to my artwork. I am interested in how I might use the attention given to novel forms/materials to attract the viewer to consider what I might be trying to express with that form, as they would with work created in any media or by any means.”
SLOW ART
Slow Art was a juried exhibition. Artists were asked to “reconsider the paradigm of speed and instead consider the concept of “slow art.”’ The questions that were raised— how do you employ speed afforded by technology, how does it affect the work, and the process of creating slow art?
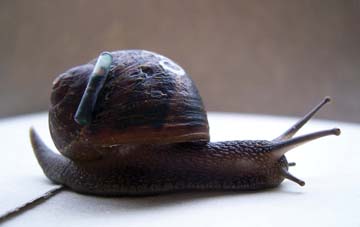
There were a variety of pieces of art in this section that peeked my interest. One of mention was an interactive piece that is the literal description of slow, titled —RealSnailMail. In this exhibit you send an e-mail on a designated computer in the slow art exhibit. It is then sent to a server in the UK. Here the e-mail is in a holding pattern along with the many other e-mails as it waits for a snail equipped with a transmitter in a tank at Bournemouth University, UK, to slide into range of a hot spot that can pick up your message. It then must move to another area of the tank to send it.
I could not help but wonder just how long my snail mail would take to get to a person. I emailed Bournemouth University in the UK using the regular fast e-mail and they quickly replied. “We have done a bit of calculating this morning. As of the 8th of Sept. 2008 we have 8,977 emails waiting. Based on this, if you sent an email today, it would take 24 years, 217 days before it gets to the front of the queue. It then may take a further 69.87 days (average snail transfer time) before being forwarded to its final destination. Therefore, a RealSnailMail sent today should arrive approximately by Thursday 16th of June 2033. Please note times may differ dependent on snail behavior and usage.” Now I am wondering how many people will have their same e-mail address twenty-four years from now.
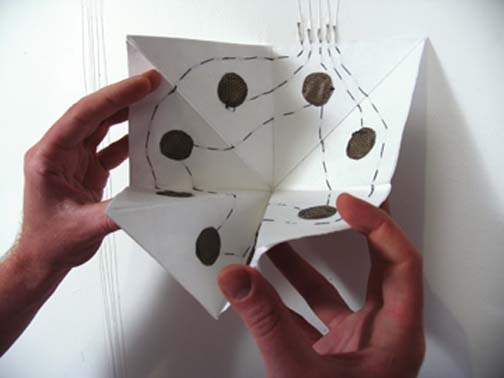
Interaction seemed to be the theme through the entire Siggraph convention. The question was, which sense was going to be stimulated or interacted with, by the art or new technology? Another one of my favorites in the Slow Art integrated vision, touch, and sound. Joo Youn Paek’s Fold Loud was a visual of large sections of tapestry incorporating origami shapes that could be folded, and in doing so, they opened circuits made of conductive material creating harmonic vocal sound.
It was difficult to truly appreciate the Taoist principles intended with this soothing art while standing in a noisy convention hall, and I was glad to see you could hear the work by visiting the Fold Loud website. I loved the opportunity to interact and touch the sculpture and while doing so to also create my own meditation.
DESIGN AND COMPUTATION
The third area depicting art and technology was the Design and Computation section of Siggraph. Here artists, designers, architects, and mathematicians created artwork, images and structures utilizing technology in both design and digital fabrication.
I had many favorites. The two pieces I choose to focus on were not figurative at all but instead were once again patterns and shapes.
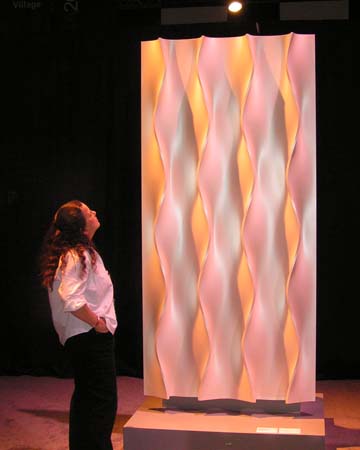
It might seem strange to see the work of a traditional veteran sculpture like Erwin Hauer in the technology exhibit at Siggraph. Hauer created works of modernism that began in 1950 and can be found, not only in museums and collections but also in architecture. The patterns in Hauer’s work held the same intrigue that Shlians paper cutting held for me in The Studio section of Siggraph. Each modular constructivism sculpture of looping forms change as the viewer interacts with the piece, light bouncing off form, shadows moving and blending, creating an entirely different piece of artwork from every angle.
A book of Hauer’s work titled CONTINUA was published in 2004, but it is said that by that time of publishing many of the existing screens had disappeared or were in disrepair, and the laborious task of making molds and casting these screens had not taken place in nearly 40 years. In 2003 computer technologist Enrique Rosado began working with Hauer creating digital files of Hauer’s original work, CONTINUA. Utilizing the new technology of digital files and Computer Numerically Controlled (CNC) milling machines, the team is working to recreate the works of this master.
The journey of translating the designs into the new technology was not easy for Rosado. He found what I have found in my research; often you must push the technology to do what you need it to do, and then wait until it can catch up and become affordable. In a wonderful magazine article about Hauer’s work in Metropolimag.com it states, “These subtleties of balance and proportion were difficult to translate into the software. ‘The computer wants to do what it wants to do,’ Rosado says. ‘And if you’re fastidious, you really have to beat it into submission.”’
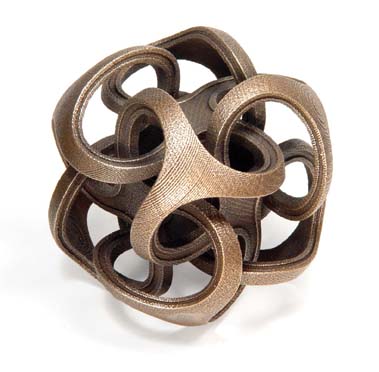
My other choice in Design and Computation was actually a student of Hauer. Bathsheba Grossman says that she was an undergraduate at Yale studying math when she first saw Hauer’s work. It was life changing; this is what she wanted to do. After graduating with a degree in math she went on to study sculpture at University of Pennsyvania. Bathsheba transfers math and science into wonderful sculptures utilizes 3D printing in metal and 3D laser etching as the output. She reports that her “traditional” studio has been reduced drastically, as she creates most of her work in the computer. It is because the complexity of her work cannot really be done any other way. She creates in a space that is inaccessible to traditional forms. Immersed in technology, for years she has watched as some traditional artists like jewelers begin to gravitate to working on screen instead of through tiny loops. It is not without its sacrifice, as she admits there is a tactile experience that is the reward of creating manually.
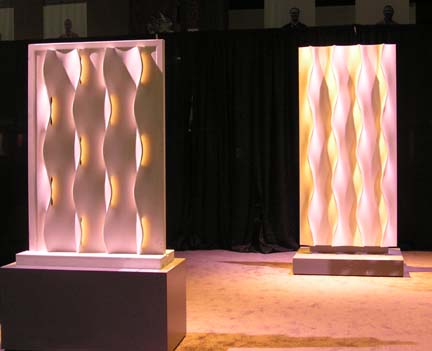
She waits patiently for technology to catch up to her needs as an artist. I learned that the “rough” texture created in the very intriguing process of digital printing in metal is a result of the technology and not part of her design. She is waiting for technology to improve. For those artists pursuing technology in the studio, it may sometimes feel like it progresses at the pace of RealSnailMail.
There were many more discoveries that I have found at Siggraph, which I hope to share in this column in the coming months, along with some wonderful tutorials on the advances in digital technologies as it pertains to the traditional artist. I myself have decided to embrace the technology and share it with as many creative people as I know. Maybe this will increase the snail’s pace and create the demand for the advances in technology that will assist us in our future creations. Though technology is improving and it will help us; in closing I would like to leave you with a quote from Hauer,
“It is an important token reminder for the younger generation and their tutors, that above and beyond the abundance of electronic marvels, the human vision and imagination remains the most important element and that its nurture should not be replaced by excessive reliance on devices.”
Mold Making and Bronze Casting- Part II
Created for Best of Artists and Artisans Website
By Bridgette Mongeon © 2008

THE MOTHER MOLD
In the previous article Mold Making and Bronze Casting-Part I, we learned about preparing your sculpture for the mold making process and painting rubber on the sculpture. If you want to see a mold being made please refer to the video, The Casting of the Dick Hathaway Memorial. The video has been embedded in the online article Part 1. I will refer to this video often in this article. In Part II, I would like to talk about the process of creating a mother mold. Once this portion of the mold making process is complete, your molds can be cleaned, sent to the foundry, and waxes can be poured into the molds. Your artwork then begins its journey through the foundry process and through the lost wax method of bronze casting.
Mother molds are called mother molds because they hold the rubber in place. Your rubber may have been created in two or more pieces or sometimes one piece with a seam up one side, but a mother mold must be able to be pulled off the artwork, and it will not have the flexibility that rubber has. To be able to take the mother mold off the sculpture, it may entail visually dividing your sculpture up into more sections for the mother mold so that the pieces can be pulled off without any force or prying that may destroy the wax that will be poured into the mold later at the foundry. Drawing with a marker on the cured rubberhelps to define the mother mold sections. You will “clay up” seams, just as with the rubber portion discussed in Part I, claying up the sculpture along these marker lines in preparation for the plaster.
NOTE: You must “clay up” before putting on the mold release, or the Klean Klay will not adhere to the rubber. To make the Klean Klay adhere warm it up in a microwave as in the rubber stage and push it onto the dry rubber. Thicker “clayed up” seams are preferred over thin seams in both the rubber stage as well as making the mother mold seams. There is nothing worse than having a clayed up seam break loose while making the mold.
Mother molds can be made in a variety of different products. Most artist use a type of plaster called Hydrastone. Hydrastone is much stronger than Potter’s Plaster. You may be able to purchase Hydrastone from your art dealer, but most likely it will cost more than getting it from a supplier. I purchase mine from Circle Supply in Houston, Texas. A 100-pound bag of Hydrastone at Circle Supply costs $32.89. I went through three-100 pound bags on the Dick Hathaway sculpture featured in the video.
Mother molds can also be made in fiberglass. If I know I will be creating many pieces in an edition and I will need to obtain many waxes from a mold, I consider the extra effort of using fiberglass. You will be quite surprised how heavy a small mold can be with a mother mold of plaster. Fiberglass has its advantages for larger molds as well, because upon completion the mold is lighter. Fiberglass is, however, I believe, difficult to work with and toxic to use.
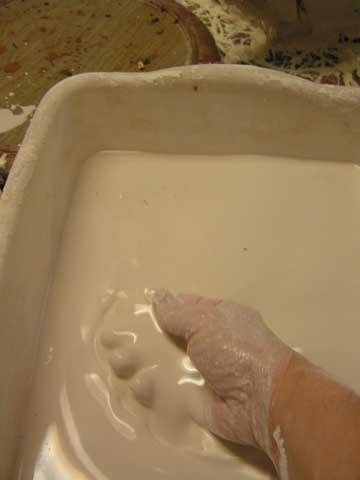
The plaster portion of the mold making process is the messiest part. In the past, I have fooled myself into thinking, “Just let the plaster fall on the floor and it will dry and scrape up easily.” This is just not so, and preparation of my space for making the mother mold is just as important as the rubber. It also makes clean up so much easier.
I usually like the rubber to cure a day before putting on the plaster, and often the plaster is done in conjunction with rubber. For example, if a mold is done in two pieces like the leg or arms in the video, I will paint rubber on one side then put the mother mold of plaster on top of that, and then flip the sculpture to do rubber and a mother mold on the other side.
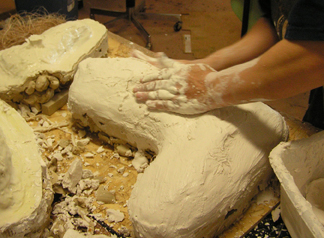
Before beginning to put the plaster on the rubber, you must note there is a process of preparing the rubber so that the mother mold can be pulled off the rubber. I mentioned this in Part I. This step is done in the rubber stage. This part of the process is not shown in the video and is a bit tricky to describe. Pieces of foam, the kind of foam that is in your sofa cushions, have been stuck to the rubber in areas of deep undercuts. Then a skin of painted rubber is put over the foam. The foam offers the “give” that the rubber mold needs to fold back on itself as it is taken off the wax that will be poured into the mold. It also gives a flatter surface with no undercuts for the plaster mother mold to be put on top. I will try to make a video or take detailed photographs of this the next time I make a mold.
Before applying plaster you should cover your rubber with a mold-releasing agent. An inexpensive source for this is simply using shortening such as Crisco or a store brand purchased from your local grocery store. Rub this over the entire surface. Putting your hand inside a plastic bag first helps to coat the rubber without making your hands gooey, an old cooking tip.

I usually have four plastic buckets, one that I am mixing in, one that holds a bit of hemp soaking in water, another that has extra plaster, should I need it, and another for washing my hands.
Mixing plaster is tricky, and you must watch it closely because when it activates there is little time to work. Working on smaller areas is much easier than a very large area. Be prepared to get dirty.
HINT:The Hydrastone makes these containers weak. I figure it must be a chemical reaction. Plus, I will often bang on them with a rubber mallet to get the hardened plaster out. When using the last bit of mixed plaster in the container, or if there is excess, try to scrape to the bottom in the center of the container. Then after the Hydrastone cures in the bottom of the plastic bucket, I can bang on the container freeing the two pieces into the trash can outside my studio and offering me a clean container to use for the next part of the mold. You will have to find just the right spot to bang on the container to loosen the plaster form the container without plunging through and breaking the increasingly brittle plastic. I prefer the rounded edge of the bottom.
HEMP: I purchased a bale of hemp, which will probably last me a lifetime. I might suggest you talk to your foundry or another artist and see if you can purchase some of their hemp from them. Be careful, if you buy a bale and clip those metal straps around the bale, the thing will explode, and you will be trying to figure out where to store all that hemp.
DO NOT MAKE A MOTHER MOLD WITHOUT HEMP. If you break your mother mold you have lost your piece. Hemp increases the strength of your mold, and if you are in a hurry, like I usually am, you are going to want to get this mold pulled and into production as quickly as possible. Molds, just after their completion, can be quite fragile.

Fill your plastic bucket with water to the amount needed for the amount of Hydrastone mixture you will want to use. I am not sure how to tell you how much to use; this knowledge will come with practice. Always mix the Hydrastone into the water. I start by making mounds of Hydrastone and letting them soak. You can get ratios from your Hydrastone supplier, but I really do this part by sight. Usually I add a bit more Hydrastone as I impatiently wait for the bucket to begin to “kick”. I mix all my plaster by hand and don’t use any mixers. This really helps me know the different stages of the plaster. It is something I do by feel. While the Hydrastone is soaking, I’ll take some of the hemp that has been soaking in water and arrange it over the rubber section that I am about to cover in Hydrastone, being sure to put some on the seam area. Then I will take this hemp off and dip it into the Hydrastone mixture and lay it back on the rubber. As the mixture begins to “kick”, I must work quickly, putting the plaster on the sculpture, forcing it into the hemp and building the areas that I need, including the seams. I strive to make the entire mold an inch thick or less.
When you are finishing the Hydrastone mother mold section and the Hydrastone is curing—you will know this is happening because it becomes increasingly warm, go over the section one last time with a wet hand to “polish” the outside surface of the mold, making it smooth.
HINT: When creating a section of mother mold next to another section of mother mold, I also rub the Crisco or cooking shortening on the edge of the completed Hydrastone piece. This will help in separating the pieces and keep splashes of Hydrastone from being stuck to the already hardened plaster.
There are a couple of tools that I think are necessary to create the plaster. For example, I love having this large loop tool around when creating my Hydrastone mother mold. It is great when you want to clean up your Hydrastone seams and not make them jagged. This tool also cuts through the Hydrastone, even after it begins to cure, which is helpful, if I feel I have too much Hydrastone in one place.
Once all parts of the plaster are made you will want to separate the mold. Waiting a day or two for the Hydrastone to cure is helpful. It will take longer in high humidity. As the water evaporates from the Hydrastone, it will strengthen and will become a bit lighter.
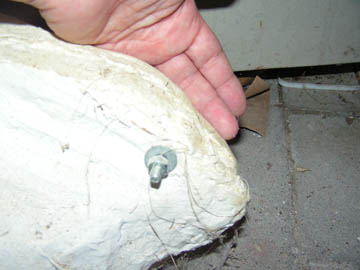
HINT: Small molds are often held together with rubber bands, larger molds may require bolts. Making a seam that comes up at the edge provides room for bolts. These bolt holes can be drilled before pulling apart the mold. Be careful not to jeopardize the rubber underneath. Often there is so much rubber and plaster, it is sometimes hard for me to make out where the sculpture actually lies underneath.
Separating the shell can sometimes feel like an impossible endeavor. I have several screwdrivers that I can shimmy into the seam. Once one is in a seam, I’ll try to move it down a bit and put another in, doing the same thing all of the way down the seam, being careful not to puncture the rubber underneath. More than once I have to struggle with a seam, only to flip the mold over and try another one. As a l ast resort, I may try to scoop out the clay from the open section where the wax will be poured, giving me something to hold on to, and I use this to pry the pieces apart. It takes practice to know when and where to apply pressure and when not to. This part of the process can take a good deal of strength.
NOTE: Be very careful if you are prying one piece of Hydrastone off another. It is easy to shatter a corner or an edge. Go slow and steady, and if you feel frustrated walk away, get lunch, and come back later.
Once the mother mold is separated, you can pull the rubber away from the original art. You will lose the integrity of your original art, but I keep the sections, especially the face. Should the wax come back to me and not look right, it gives me something to compare the wax against. Before sending these molds to the foundry, the rubber will need to be washed both inside an out. This can be done with kitchen soap and a good brush. Sometimes a toothbrush helps to clean small textured areas. When cleaning the inside, be sure that all the clay debris is out of the crevices and details, as this will be picked up by the wax, rendering the wax unusable.
The Crisco should also be washed off the outside of the rubber. Then the rubber is dried and placed back into the mother mold.
HINT: Do not leave the rubber in a heap. Instead let the mother mold do what she is supposed to do, cradle and hold the rubber. Rubber can have a “memory”, and leaving the rubber tossed about outside the mother mold may distort its shape and cause it not to fit back into the mother mold securely.
I would suggest that anyone who is wanting to learn to make molds for his or her own bronze casting, watch the process being done under a master mold maker. Contact a local foundry or artist and ask them if you can intern or apprentice under them to learn this process. They will most likely appreciate your eagerness and the help, especially if you can do it in their time frame. Remember they are on a deadline.
I might also suggest you take your education a bit further and ask the foundry if they will teach you to pour and pull your rubber molds. There is no better education in knowing if you created the mold properly than experiencing how the mold pulls from a wax. Though the process of creating a mold for bronze casting can feel daunting, with a little practice it is possible to begin to create your own molds, and in turn, save yourself a great deal of money in the process of bronze casting.
Writing An Article About This
I’m writing an article about this subject right now. I thought I would post this video to explain the topic. VIDEO NO LONGER AVAILABLE
It is about something called the Orphan Works Bill. This bill is not supported by most artists and will really be detrimental to our lively hood. I can hardly believe that it is being considered. If anyone reads this and would like to help please e-mailyour senator and tell the you do not support the Bill S.2913
