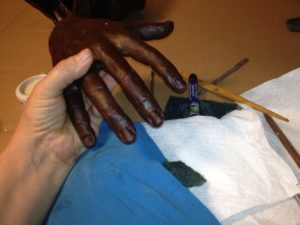
Pieces Of Prayer In Different Stages
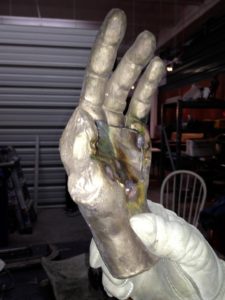
I visit the foundry weekly checking on things. This weekend I worked on the waxes of the rocking chair when returning to the foundry the praying man is in pieces and stages throughout the area. Here is what I have seen over the last couple of weeks.
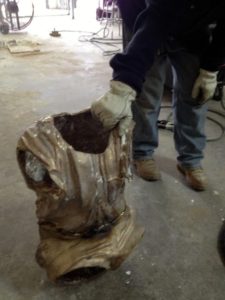
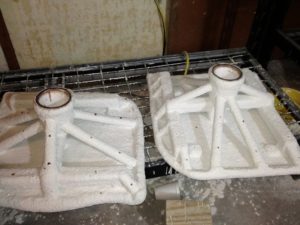
gates, and dip and sits
awaiting the pour of bronze.
The Burn Out And The Pour
The many pieces of the praying man will go through this next stage of the foundry process. First let’s recap. These are the steps that have taken place so far.
- Sculpting
- Mold making
- Wax
- Cleaning of Waxes
- Gating up
- Dipping
Gating Up And A Dip
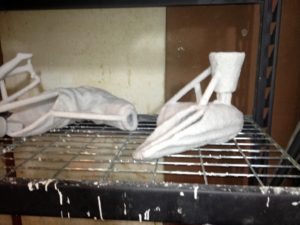
on a shelf.They must be dipped many times.
I’m going to the foundry weekly to check on things and make sure things are looking good and that we are progressing on the sculpture. This week I saw that many of the waxes of the praying man were gated up. This means that wax rods were put in place for the gases to escape. Pouring cups were added as well. Then each of these pieces are dipped, many, many times. Depending on the humidity this can take several days. Other molds are having wax brushed in them. Still others are almost ready for a metal pour. The many pieces of the sculpture are in various stages of the foundry process.
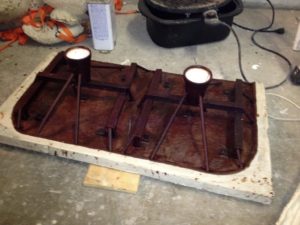
sits in their molds while they awaiting the dipping.
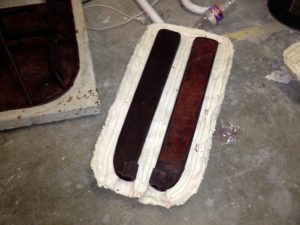
of the chair are waiting my approval.
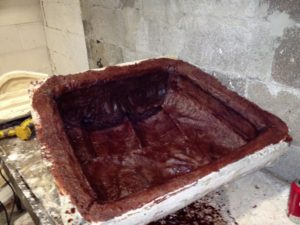
many coats of wax.
You May Lose Your Copyrights And Not Even Know It
I wrote this post a while back and it was brought to my attention again as I saw a post by the Association of Medical Illustrators. I can’t say I have new information to post on this subject. If others find links and want to send them I would be happy to add them to this posts update. I am so busy I can’t research it. But for any artist, writer etc who makes money from their work this is a HUGE deal! Please pay attention. Here is the old article from my blog.
_____________________________
I know that the digital world is changing how we read and how we distribute books. I have a few problems with this. The first one is… my general mistrust of Google. Why should this lovable company who changes their artwork every day to make my searching enjoyable, be mistrusted?
I think they are getting too big for their britches.
Left and right artists are making waves about what Google is trying to do. According to my research they are infringing on the rights of artists and photographers as indicated in this recent article By Larry Neumeister
“Artists Sue Google Over Copyright Infringement.” They are also the backers behind the Orphans Work Act. If you do not know about this and are an artist, you absolutely must learn. I mean it. Stop what you are doing and research this. What happens with this will change your income for the rest of your life. I have written about it before in an article for Best of Artists and Artisans, and there are links in the article for further information. If we are not careful, Google will become the God and keeper of all.
In a nutshell, Google wants to take the books that are out of print and make them available. Sounds real sweet, but watch out for that wolves teeth. As my southern friend says, “Katy bar the door.”
First of all, if I write a book, and it is out of print, what gives them the rights to reproduce that book without permission? They are also proposing that this be done with artwork, have a depository of artwork that people can come and browse and use. If artists do not claim their artwork and step up and say, “No, you can not use it, or this belongs to me,” then well tough poop for you. This puts the burden of copyright ownership on the artists. As it stands right now, artwork is copyrighted the moment it is created. I don’t have to search for my artwork all over the place. I don’t have to go to a Goggle provided website and pay to have my work protected and say it is mine. It is mine. PERIOD! For more information on this please read the article that I wrote for Best of Artists and Artisans 2008.
I may be lulled to enter blindly into the idea of digital books lovingly created and made affordable and accessible through Google, but I have a genuine mistrust of them. And what is sad is that I feel like they are my own child. I nurtured them. I still do. They are a part of my everyday life. Yet, they have too much control.
I am never one to spread discontent. However, in this case, I will stand on my soap box, behind my artists table and computer. I’ll give a very suspicious glance at Google as the writer/artist in me speaks, no shouts loudly. “ARTISTS AND WRITERS BEWARE! There is a wolf in sheep’s clothing!”
So what are your thoughts?
______________________________________________________________________________

Bridgette Mongeon is a sculptor, writer and educator as well as a public speaker. Her blog can be found at https://creativesculpture.com. She is also the owner and creator of the God’s Word Collectible Sculpture series Follow the artists on twitter twitter.com/Sculptorwriter twitter.com/creategodsword Facebook http://www.facebook.com/bridgette.mongeon Listen to The Creative Christian Podcast or the Inspiration/Generation Podcast Click on Podcast Host Bios for a listing of all podcasts Listen to the Art and Technology Podcast
Measuring Tape in ZBrush
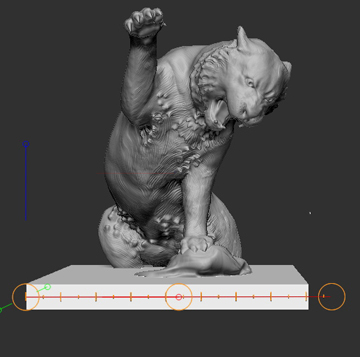
Recently I posted about my need for a measuring tape in ZBrush,. I created an entire post about my need. I have to say, this is not my first time requesting this from ZBrush, but it is the first time that someone replied and said, “hey, they finally gave us one and this is how you use it.” Apparently the transpose line can be made into a measuring tape. The transpose line is the line that comes up when you are trying to move, scale or rotate an object. To create the calibrations of the transpose line find “preferences” in your menu and scroll down to “transpose line” and then indicate your units of measurements.
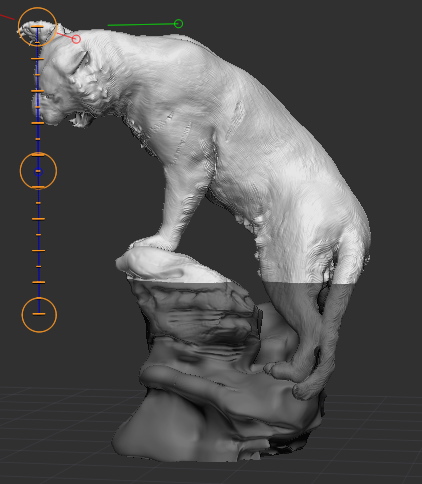
Thanks to the guys on the Pixologic forum for sharing as well as the ZBrush, group on Facebook. I get all of my answers from these guys.
Thanks also to Pixologic for hearing my request for all of these years. I do find that I actually still have to count the units as I’m working. Don’t make the mistake like I did, If you want 13 feet you need 15 tick marks. I would suggest to set your measurements and then count the units to be sure it is correct. Missing a foot on my sculpture or even a 1/2 a foot would be tragic.
It would be great if all of the measurements actually appeared in a box when you used the transpose line. For example, after using the transpose line I could look ,and see if what I have drawn is actually the amount of feet I need? In the case of the tiger I have decided to sculpt him in two parts and I need to be sure those two parts will fit in the 9 foot clearing of the studio. I’m working through this, and ZBrush, is helping considerably not only in figuring out the perfect division for the tigers parts, but also to know how big to make my base and and how that all fits together. Maybe these measurements appear somewhere that I don’t know about but my further request for Pixolboic would be if these measurements showed up and as I use the transpose tool I could check myself. IE… Ah yes, that is 15′ 3″ and the width then this is……
NOTE: the way I separated my tiger into two subtools
1. I made a mask over the area I wanted to divide ( control, click and drag)
2. I split those polygroups to make individual subtools here is how.
FYI HERE IS THE ANSWER?
Someone suggested I try these calipers. Why have I not heard about Screen Calipers from Ionico sooner? With all of my posts and rantings about a sculptor needing calipers you would have thought this would be brought to my attention sooner. I checked… they work on PC and Mac. Well, I’m going to contact the company to see if I can review these calibers and if they work post some tutorials about how I use them. I’ll let you know.
_______________________________________________
Bridgette Mongeon is a sculptor, writer, illustrator and educator as well as a public speaker.
Her blog can be found at https://creativesculpture.com.
She is the vice chair of the planning committee for 3DCAMP Houston 2012 http://www.3dcamphouston.com
She is also the owner and creator of the God’s Word Collectible Sculpture series http://www.godsword.net
Follow the artists on twitter twitter.com/Sculptorwriter and twitter.com/creategodsword
Listen to The Creative Christian Podcast or the Inspiration/Generation Podcast
Click on Podcast Host Bios for a list of all podcasts.
The Bible
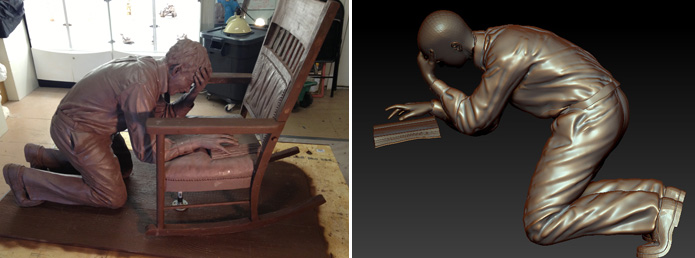
The last and final piece to be complete for the praying man is the bible and seat. The biggest hold up with this was the text that was to be created in the bible. Usually I hand carve the text; however, this was three verses and quite a bit of text. After much deliberation I had the text created as a rubber stamp that is reversed, the type is indented into the rubber. I completed sculpting the bible and then put this stamp inside the pages, claying up to the edges.Then we made a mold of the seat and bible. THE FINAL MOLD IS COMPLETE! Everything will now go to wax and metal.
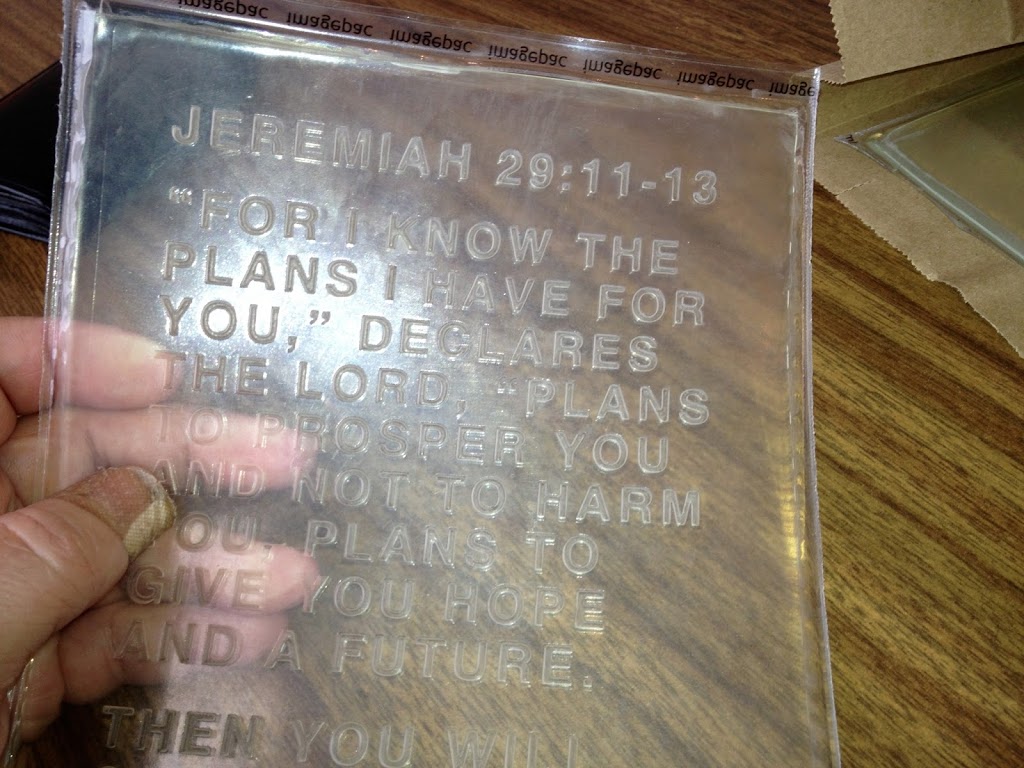
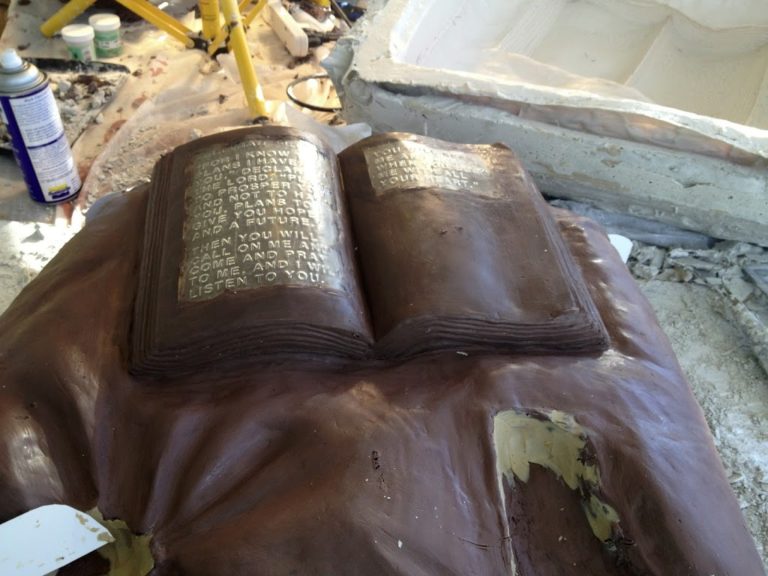
pages. Here is the seat after the mold was made.
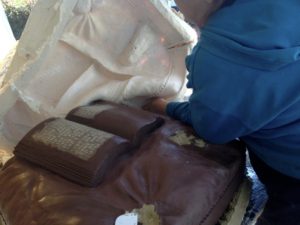
clean the studio and get ready for the next project.
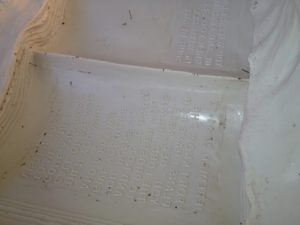
The text on the bible looks great!
Waxes—Gating Up
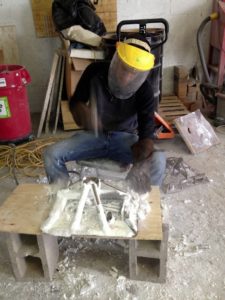
Once the waxes are poured and cleaned the foundry will gate them up. Gating is adding wax channels to the wax pieces so that gases can escape. A pour cup is also added to the wax.
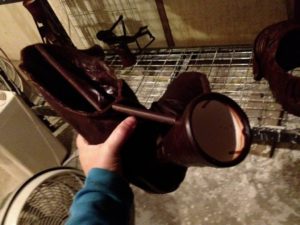
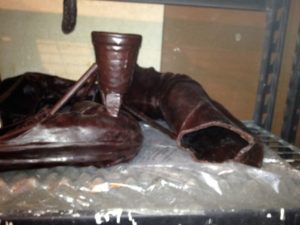
Today I went to the foundry to check on more waxes and saw that a good deal of the praying man has been gated up.
Planning
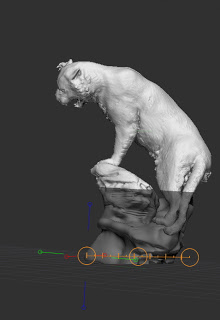
It is safer for my interns and myself and
means that we are not held up by finding
warehouse space for a 15 foot tiger.
Now that we have the green light on the tiger I am spending a good deal of time planning. We are calling vendors and securing our schedule, and ordering materials. There was a bit of delay in getting the green light so we have to start over in this planning stage.
Besides planning vendors we are also planning the armature. Planning an armature is an important element to any sculpture. I always tell students, “if you armature is bad it can ruin your entire sculpture. ” Just imagine you are working on a large sculpture and all of a sudden it begins to fall over. In the case of the tiger, it could actually hurt someone.
An armature is what is inside the sculpture to hold it up while we are working on it. It takes a bit of engineering and a bit of history to know exactly what to do when building an armature. While I plan I send my plans off to others for them to look at and weigh in.
The main body of the cat will be milled out in foam. The foam, when it is together will probably weigh in at about 160 lbs. We will be adding wax on top of this as well as clay. This may add approximately another 300+ lbs to the piece. That is a lot of weight to be so high in the air.
The rocks are another element that has to be created. This will most likely be sculpted out of a different type of foam and then covered in clay.
We are still figuring the best way to sculpt this tiger. The artist in me says let’s put him together and work on him, which means I need a warehouse that is about 15 feet and have to move my entire studio. I like the idea of being able to see him all together. It also means I’m sculpting very height in the air, on ladders and scaffolding.
Another thought is to sculpt him in two pieces The first piece will be the rocks and his tail and back legs. The second piece will be the upper half. This way it is much safer for myself and my interns. I’m leaning in this direction. Though we will have the basic shape of foam and tiger put together before we separate these two pieces. So we will be able to see the design as a whole.
More to come. Meanwhile we are finishing up our last project and moving things around getting ready for the tiger while the vendors are getting our foam ready. Time before we receive foam should be about 3 weeks.
I Really Need A Measuring Tape in ZBrush or Mudbox
When I started in ZBrush and Mudbox years ago, the computer graphics world ( CG) would often say, “Why do you want to get things out of the computer?” I felt like I was just told I had purple spots on my face. I am a traditional sculptor who uses digital process to create sculpture in the physical form. I have a variety of things that I do that incorporate both traditional and digital or what I call tra-digi art. I know my use of these digital processes is not the way others use them, but it is how I make my living. Oh, and by the way, if you ever want to bring me in to lecture on this subject I would be happy to do so.
When I was at the ZBrush booth at SIGGRAPH last year I saw that someone mentioned that others were translating their designs into the real world. So, I’m not alone.
PIXOLOGIC>>>>GIVE ME A MEASURING TAPE.. PLEASE!
Over the years I have found one thing is a constant – I need a measuring tape! The hard part about this is that in the computer your sculpture is not really any size. It lives in a virtual world with virtual coordinates. However, to get this virtual sculpture to live in a real world I need to compare it to the real world. Over the years this problem has come up again and again.
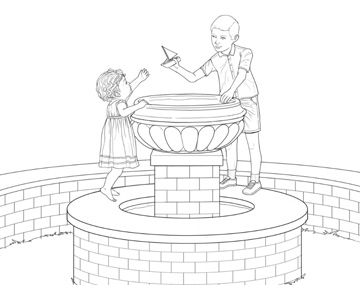
I would still need to create this digitally.
PRESENTATIONS- Comparison to what is there.
This usually happens when I’m working out the design, For example the landscape architect gives me blue prints and I need to come up with something. In the case of the fountain I could go and take pictures of what was created on the job site. The client wanted two children, and I was to incorporate the fountain base, and another piece that would sit on top. I would have loved to create this in ZBrush, but I opted for a simple sketch because of the limitations of measuring.
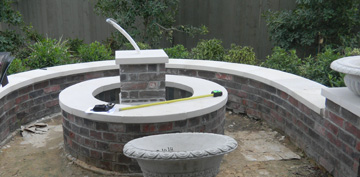
CAN I SHIP IT?
I know that someone working in the computer may not be thinking about shipping their final product. But I ship bronze sculptures all of the time. In many cases this is something I work out in the design process. If I can figure out how to modify the sculpture sometimes, it can save thousands of dollars. For example, I modified the design of the floor of the sculpture of the praying man to be able to fit the width of my van and still be life-size. I was able to do this in the sculpting process when in my traditional studio but there are other times I need this as well. Shipping the Tiger sculpture from my studio in Houston, Texas to Louisiana is a massive investment 7,000- 10,000. The tiger will have to ship on its side. However, I need to be sure that it can do so and fit on the flat bed trailer with packing.
MILLING?
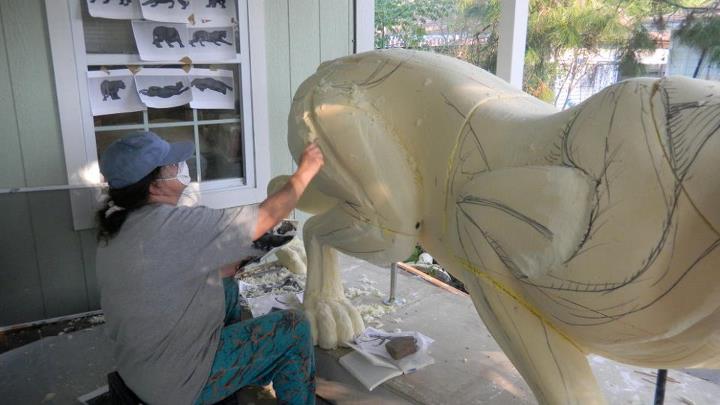
Most of my sculptures, once created and revised in the computer are enlarged digitally in foam. This takes the place of doing the traditional armature of welding and pointing up as done in the past. Synappsys Digital Services does most of my enlarging. They figure out the mass if I give them the height, but it is often necessary to figure measurements out in the design. In
Often in the design stage it would help to be able to say, if it is this height,
what is the width at this place in the sculpture.
the case of the Tiger sculpture I lowered the head and the arm of the tiger, mostly because I could not find a warehouse big enough to allow me to sculpt that size piece. Subtracting a foot, by lowering the hand/head helped the design, but also give me a little more room to work. I would not have known to do that had I not measured in advance.
ARMATURE?
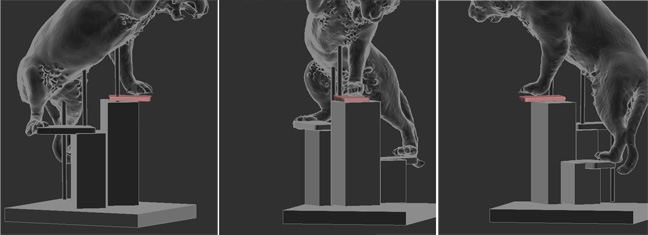
I’m taking time to write this post as I work diligently on trying to figure out the armature for the 13+ foot tiger. Though I can twirl the image around in my computer by pressing certain keys, in the real world this sculpture will have gravity and weight to deal with. The foam of the tiger, once togther will probably weight about 170 lbs. Then we add a layer of wax and a fine layer of clay. This will probably add about 400+ lbs to the tiger alone. Having the proper armature to hold this tiger up is imperative. Without it I could have the entire thing fall and, God forbid, be under it when it does. If I had a measuring tape in zbrush I could be making a schematic for my carpenter to build my base and armatures. I am also looking at a way to create the sculpture separately cutting the pieces in 1/2 so that I don’ t have to carve 15 feet in the air. Oh I wish I had a measuring tape.
Work around.
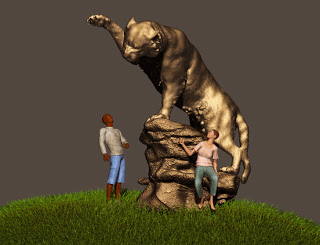
Yes there are probably ways to work around this. For example, I know the man in the scene if 6 feet, I can make a long flat piece that measures 6 feet and work with that. But being able to give one element a size, the man is 6 feet—and then able to click anywhere else on the sculpture to see what that size is in relation to the given size of the man- this would make my life a lot easier. So how about it Pixologic? Can I please have a measuring tape in the next version?
These are only a quick few ways I can see that having a measuring tape in a program like ZBrush or Mudbox would really help my work flow, and might even help to extend the buyers of these programs. In my speaking engagements I often tell my audience that I turned to the use of digital tools to extend my career. Pushing around clay with my hands has caused some great aches and pains over the years. Most of my audience wants to learn these processes as well, for just these reasons. Please give a listen Pixologic and Autodesk lets see how you measure up!
_______________________________________________

Bridgette Mongeon is a sculptor, writer, illustrator and educator as well as a public speaker.
Her blog can be found at https://creativesculpture.com.
She is the vice chair of the planning committee for 3DCAMP Houston 2012 http://www.3dcamphouston.com
She is also the owner and creator of the God’s Word Collectible Sculpture series http://www.godsword.net
Follow the artists on twitter twitter.com/Sculptorwriter and twitter.com/creategodsword
Listen to The Creative Christian Podcast or the Inspiration/Generation Podcast
Click on Podcast Host Bios for a list of all podcasts.
Waxes- Cleaning
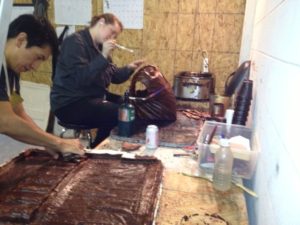
or with larger molds they brush it in. Then because the molds
are in two parts each wax must be cleaned. Blemishes from
the pouring process and seams are removed.
Today was a day at the foundry. Once again, most artists don’t go to the foundry and look at their waxes. I suppose it is because I’m a perfectionist, or maybe I have a hard time letting go. I tell everyone it is because I might want to tweak something in the wax. Today I only had to do a little bit of tweaking. Here is the foundry process of waxes.
I’m headed back on Tuesday, maybe they will be able to take pictures of the next stage- gating up.
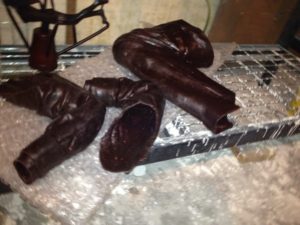
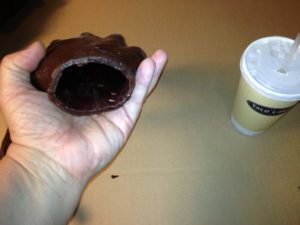
of the bronze- more on that later. Many people think that
when they see a bronze it is solid. It is not. This will all
make much more sense once you see the rest of the process.
