Technology
3d Printing In Ceramic!
I’m looking forward to working with Solheim Rapid Prototyping/ Rapid Manufacturing Lab at the University of Washington’s Mechanical Engineering Department, collaborating and certainly want to add their process to the new book that I intend to write, my articles and a lecture. I love seeing video and am certainly glad that this was created. I will be trying to contact them on their process and new technology and will be sure to let you know what comes from that.
I’m A Genius! 3D Printing Of The Human Organs?
I’m a genius, or maybe my brain just thinks such radical thoughts that now and again I think like a genius. For those of you who don’t know, my graduate study at Goddard College consists of research that bridges the gap between the traditional studio and new technology. For a sculptor, such as myself, this technology is based on something that I call tradigi sculpting which utilizes both traditional and digital means to create artwork. My research is evaluating digital milling. Digital milling is taking my artwork, scanning it and then enlarging or reducing it to be milled out in foam, wood or stone. Digital printing is another resource and a technology that is quickly growing and changing. It is when a computer and a digital printing machine slowly prints, layer by layer, in 3d. What you end up with is a physical object. Yes, I know it sounds like the replicating machines on Star Trek, but this is not science fiction.
Recently I uncovered the work of both Sebastien Dion from the Center for Applied Technology at Bowling Green University in Ohio and Solheim Rapid Manufacturing Laboratory at the University of Washington in Seattle. Both have been researching and printing in ceramic. Solheim has even printed their ceramic “recipe” in the Ceramic Arts Daily, February 1, 2009, article “The Printed Pot.”
As my research continues, I thought, “It appears that 3D digital printing is all about having the right “recipe”. It is just coming up with the correct binder and the correct material to fuse.” This is where my brain started to go into genius mode and my research landed on what I’m about to share. I know that Science is using 3D printing to help them visualize scientific data. For example space physics simulations or molecular models that help scientists visualize proteins. This allows scientists a way to examine information in a physical way that has never been available to them prior to 3D printing.
Science is also using 3D printing to print a medical implant that fits perfectly with a patient. The reason is that it is created from MRI scan data of a patient. ) Surgeons can also use 3D printing to help them with their surgeries. By having the physical replica of a patient they can practice surgery or see complications. 3D prints are also used in education. How about printing skin in a 3D digital printer? Just think what this would mean to a burn victim. Or how about replicating a bone with 3d printing? And doing so out of bone material to replace a patient’s own shattered bone? Because our bodies are symmetrical a left arm bone could be recreated by using images of the right arm.
If all of this technology and 3D printing is not fascinating enough, I thought, “If it takes just the right binder and recipe, is it possible to print organs?” I was afraid to even say it out loud to my husband, a medical illustrator, who I knew would at least hear my crazy idea and not laugh too hard. But with further research, I turned out not to be so mad after all. Indeed 3D organ printing is happening or at least being studied. Here are some journal articles and videos to prove it. This is absolutely fascinating! Just check out the video with Dr. Gabor Forgacs, University of Missouri-Columbia. He talks about how the bio printer prints out living cell clusters drop by drop that fuse together to create tissue structures. Have a damaged organ? One day they will be able print out the organ needed and do it using your cells! Perhaps the printer will print within your own body cavity. Yes, there is still some headway to be made with this technology, but the technology is here and on it’s way. My crazy thinking is actually genius!
by Bridgette Mongeon
https://creativesculpture.com
At and Technology Podcasts coming April/May 2010
If you would like to use this article on your website you may. Please include the authors name and URL.
3D Printing In Ceramic! So Cool!
Too cool, 3D printing in ceramics! Yes. I love this idea. I love where the technology is going. Check out Ceramic Arts Daily article The Printed Pot. Solheim is on my list for interviews.
3d Printing In Sand And Metal!
I was invited by Bob wood to the proMetal shop here in Houston. We have another engagement for Bob to come to the studio as soon as my schedule frees up a bit.
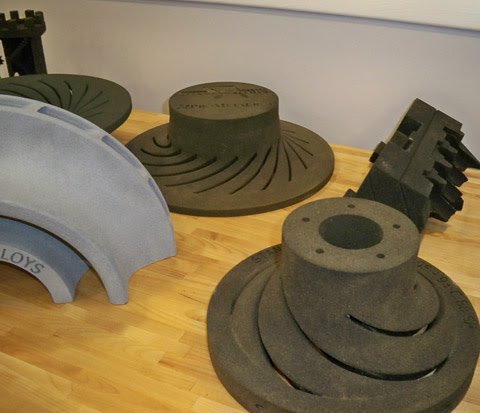
I was thrilled to be able to see the process of printing in sand. Yes, there you have it… 3D printing in sand! As usual this technology was first developed for manufacturing as you see by this casting of this fly wheel thing.
I’m also putting some pictures up of their 3D digital printing in metal. This is another part of of the company. The skull was created that way. Yes, they say they can print in bronze or gold! I’ll be describing this process in an up and coming book.
The sand is like the investment cast on the mold. and it is printed in this huge machine that Bob Wood and I are standing in front of. If this process can be perfected to get smooth surfaces it can really take over the investment casting of bronze casting. The lost wax method would literally be history, and there would be no more storing all of those molds! YEAH TO THAT! plus once the art is computerized it could be made to fit piece to piece. In other words, the seams would be put together like a puzzle. in the computer aiding in the welding together. So cool. The possibilities of this are incredible.
I have to get through the Mudbox book first. But am chomping at the bit about starting this other book. It will cover all of the new technology of output from the computer, as well as getting items into the computer— Digital scanning. So excited!
Mud.. What?
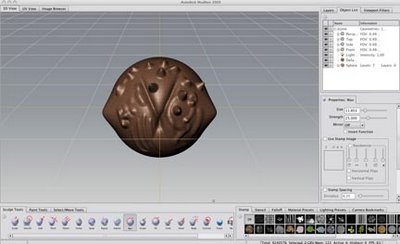
What is Mudbox? It is a digital sculpting tool. Just in case you have not deducted that from my previous posts. Yes it is like sculpting in real physical form, but… it is in my computer.
here is a photograph of what the program looks like. You can see the sculpting tools on the bottom and you can work in layers as well. There are also textures that can be used. I wish I could write more, but for now I hope this suffices. I’m on a deadline for writing this Mudbox book and need to get back to my chapters.
Check out the gallery on the Mudbox forum to see some spectacular work created in Mudbox.
Check out Bridgette’s book Digital Sculpting with Mudbox
A Few Questions Answered
Someone who was reading my posts and may be interested in Mudbox had a few questions. I thought I should probably answer them publicly. If he had a question than others may as well. The questions are as follows.
“You mentioned having problems with Mudbox and your Mac. You added RAM, changed the graphic board, and then said something about the problem was the OS version 10.5.7. Were all these necessary to have the program run correctly or was it just the OS? If so, were you able to go back to 10.5.6?”
I suppose I should mention some of the history of Mudbox. We should go back to late 2007 when Autodesk, one of the leaders in 2D and 3D design and engineering software purchased Mudbox from the New Zealand company Skymatter.
The biggest competition for Mudbox is Pixologic’s Zbrush.Z brush Demo came out in December 2002. It is a good program but in my opinion, not as intuitive or easy to learn as Mudbox. Even so, once I have tackled this book project I do intend to devour Z Brush as well.
Autodesk is a big company and having Autodesk behind a program is a huge thing. Both my co-author and myself feel that Mudbox is something to watch. I’m thrilled to be in on the ground floor with our book. Digital Sculpting with Mudbox: Essential Tools and Techniques For Artists Publisher Focal Press.
I have to give Mudbox commendations for quickly making a Mac version. It took Z brush a long time to come out with a Mac version. It was released in June of this year. Mudbox mac verions came out in May.
Needless to say there will probably be some bugs in a new version, but really there has been very little. My biggest difficulty was a graphics card. There seemed to be little suggestions offered on the Mudbox site concerning a desktop computer running mudbox. But finally, I changed my card and feel confident.
Unfortantely the biggest problem with my card seemed to have nothing to do with Mudbox. But may instead be something with the operating system, as another person reported that the same thing happens with him using different software. The problem when using another program, say photoshop or and clicking on that with my mouse, and then going back to Mudbox and turning my model which is a option>left mouse key, the model would flip upside down and my other program would hide. It was infuriating at first and when I got my new graphics card and it sill happened I was so mad. But the work around is simple. I just need to remember to tap on the Cintq tablet anywhere before pressing down the option key and turning my image. Once I do that, No problem!
Much has transpired in the last few months concerning this project and working in Mudbox. We have a deadline with the publisher and no software. That was frustrating. How do you write a book without software for the Mac? For a while I was able to run Mudbox on the PC side of a Mac using bootcamp, but it was a little frustrating for me. Different keys etc. So, yes Mudbox is running fine on my Mac with 10.5.7
When mudbox for the Mac began to ship in May, I was elated. I’m not sure how many Mac users there are but there are definitely some at Autodesk as I have been speaking to them.
RAM
I didn’t really need the extra ram that I bought to use Mudbox. The specs say that Mudbox can run on 1 gig but 2 is recommended. It is very important for both my co author and I to be able to write a book with instructions on a program that any one can use. Sure everyone would like to ramp up their computers and push the program to the limits. But we are keeping the average user in mind. Not the studio designer.
My basic reason for getting more ram is that I am also doing audio and video, and really wanted to begin to do video tutorials using such programs as Mudbox or zbrush. with that… well I needed a little more.
Graphics card
Here is a stickler and there does seem to be more cards for PC’s than Mac’s. But this new card was not terribly expensive, and I am glad I got it.
I do hope that has answered some of the questions. Be watching for what happens with Mudbox. Thanks for the questions, and keep them coming.
For those interested my present configurations are.
Mac Pro Mac OS X 10.5.7
2 x3 GHz Dual-Core Intel Xeon
12 GB 667 MH DDR2 FB-DIMM
Was using ATI Radeon X1900 XT- it was buggy
NOW WITH NEW CARD ATI radeon 4870
Dual displays
20 ” display
20″ Cintiq tablet
Studio Is a Buzz!
The contract came in for the new newsboy. I’m not sure I can divulge where it is going. Something for which to look forward.
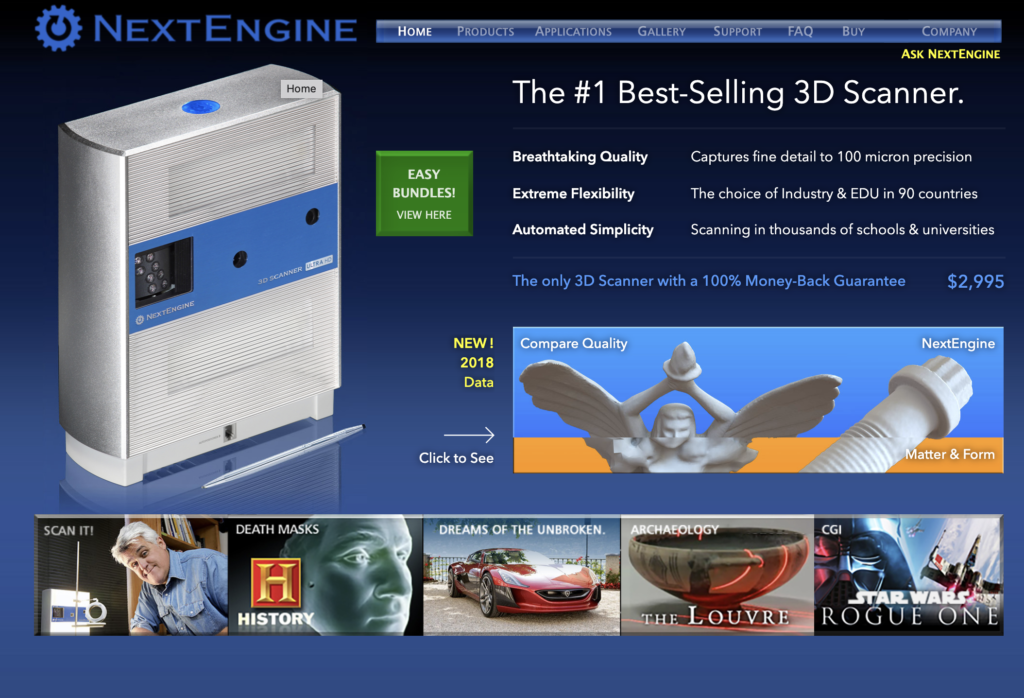
Meanwhile I’m reviewing and learning to use the Next Engine Scanner. Be prepared to see some video coming up on this process in the near future. Yes, the price tag looks hefty, however you must remember that sending one sculpture out for scanning can cost about $1,000.
This tool has so many applications for the studio. I just can’t wait to share it with everyone. I’m working on an article for my column at Best of Artists and Artisans website. I’ll let you know when it is up.
Fooling Around- in Mudbox
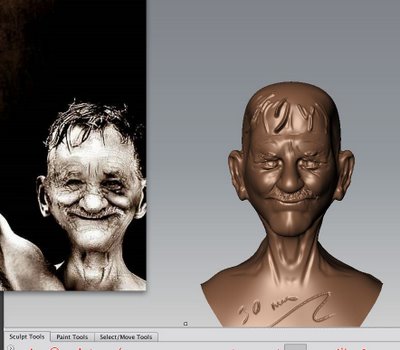
A very good exercise in traditional sculpture is to set a timer and sculpt something as quickly as possible. It keeps you form getting bogged down in the details. As I begin to work in mudbox I gave myself that same exercise. Of course I always like working from funny photographs and I love people, so here is one I found to work from. It felt good to put “gram” aside and work on something fast. I may do a couple more of this one and then it is on to a little child or baby funny face. the first one was done in 28 minutes( I had to go to church) the others 30 minutes.
A Picture Is Worth A Thousand Words
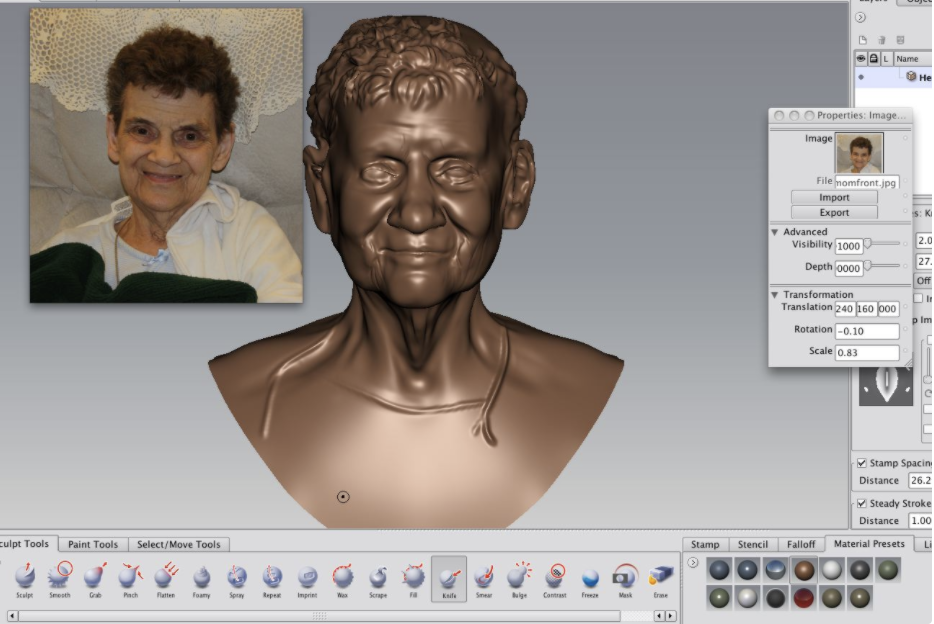
I thought I would share this with you. As usual maybe you can follow along. This is Mudbox. I am working on my first portrait. Here is mom. Yes, the wonderful woman that is found on our podcast, and is known as “gram”. Anyway, it is a long drawn out process of sculpting in Mudbox but she is coming along.
This is what all my fuss has been about in the last few weeks, needing more RAM, new graphics card. And now to find the one thing that was bugging me may actually be a bug in OS 10.5.7. But, today I can use Mudbox again, and I am thrilled to be able to do so.
Mudbox For The Mac!
I now have Mudbox for the Mac. I’m thrilled and can’t wait to see how it works. It will be great to run this in my native operating system instead of on bootcamp. Yes, bootcamp is nice, but when you have to log off and on to do other things that is a pain. Now, lets get busy on writing this Mudbox book “Digital Sculpting with Mudbox: Essential Tools and Techniques For Artists.”
I am excited about working in mudbox, but the sculptor in me has a few concerns.
I want to be able to have a blob of clay- push and pull it until I “feel” what I want.
Doing this in mudbox can change the topography to something that is unworkable. So. I either need to learn another program and bring in what I want, or… perhaps retopologize what I create. But where does one find the retopologizing tools? That is the part of the learning curve as traditional sculptor goes digital.


