3d printing
Looking For A 3D Jump Suite-Sculpture Presentations
Working on a new project presentation and could really use a jump suite that looks similar to this or can be modified in a sculpting program to look like this. Not a real one, a 3d model that I can use with a daz or poser model
If you are interested in seeing how I use these 3d models, it is a bit different from most. I use them in presentations for life-size bronze sculpture, and sometimes in my process. Check out this You tube video or some of the other documentation of my projects on this blog by searching for daz or poser or check out one of my project blogs such as the Evelyn Rubenstein sculpture blog or the Panther Project.
My husband, who also works in 3d, said to post on the daz forum. He raved about how helpful they were. Wow, was he right. Within 20 minutes someone replied and gave me these two suggestions. I labored over which one to buy when my husband came in, peered over my shoulder and said, “Buy them both, they are real cheap.” So, thanks to the daz forum for all of their help. M4 air Crew Set by Daz 3d is $12.95 and Toolboi is $24.95
More on this presentation later.
To learn more about this project of Neil Armstrong visit the United In Space Website.

Sculptor, Writer and Speaker
Bridgette Mongeon is a sculptor, writer, illustrator and educator as well as a public speaker.
Her blog can be found at https://creativesculpture.com.
She is also the owner and creator of the God’s Word Collectible Sculpture series
Follow the artists on twitter twitter.com/Sculptorwriter twitter.com/creategodsword
Facebook http://www.facebook.com/bridgette.mongeon
Listen to The Creative Christian Podcast or the Inspiration/Generation Podcast Click on Podcast Host Bios for a list of all podcasts.
Listen to the Art and Technology Podcast
Foam For An Armature For Bronze Sculpture
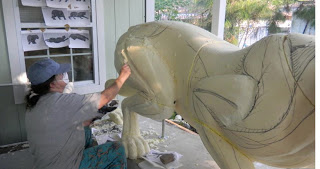
I am so excited to have my foam pieces created by Synappsys Digital Services so that it will expedite my process of creating the sculpture of Evelyn Rubenstein for the Evelyn Rubenstein Jewish Community Center. There is still some work to do on the foam before I can cover it with clay. I can revise the piece and create deeper cuts into the sculpture. This give the sculpture depth. I love the sweater that Evelyn is wearing in this piece and I can hardly wait to put the texture into it in the end, but that is a long way off.
You can follow along with this entire process of creating a life size bronze for the ERJCC on the Evelyn Rubenstein project blog located at http://erjcc.blogspot.com/
Exporting ZBrush File For Milling
I have been on the phone with Synappsys Digital Services trying to figure out the best file, size and format that my digital sculpture of Evelyn needs to be in for them to work. This sculpture was created in the computer, will be milled out in foam and then created as a life size bronze. Synappsys Digital Services will be milling this out for me, but first I need to get them the file.
I have already decimated the individual files, with Decimation Master in ZBrush and I talk about this in a previous post. An important thing to remember is that ZBrush can create some very large files. Many companies that create output, for either milling or digital printing may not have the capability to handle such high resolution meshes. I have spoken to Synappsys Digital Services and they can handle 5 million or less.
To upload the file I have called Synappsys Digital Services and asked them to provide server information to upload my files. I must be able to upload them via Ftp. I use Fetch on my mac, which works just fine. With my FTP information ready, now all I need is the proper type of files.
Synappsys Digital Services can work with many different types of files. They can work with obj’s but their file of preference is STL Binary.

of all of my
subtools I can
merge them
down to create
one tool that
has all of its parts.
Obtaining OBJ’s are simple. While your Z tool or sub tool is selected go to Export and several file formats are available in the drop down menu. I need to export this sculpture in 4 pieces-both arms, the body , and the base. I will also want to combine the pieces and send it as one file. This way Synappsys Digital Services can see how each piece goes together. The reason why I want to separate the pieces is that if I combined all of them I will lose part of her hand as I realize that as it is placed on the digital sculpture the thumb is inside her body. I want to work with these hands more closely once I have them enlarged and sculpted. I need them separate and I need a thumb. They may also be milled at a different percentage to the rest of the body. They are more defined and so the hand/arm will probably only receive a minimum of clay on top.
Where as, the rest of the sculpture needs work.
To get an obj of all of my pieces I simply duplicated all of my subtools and then merged down these duplicated subtools together as one tool. Now I have both the subtools apart and one piece put together.
I have exported each an uploaded them up to Synappsys Digital Services but let’s see how the 3d Print Exporter plugin works in ZBrush.
Working On Preparing An Armature
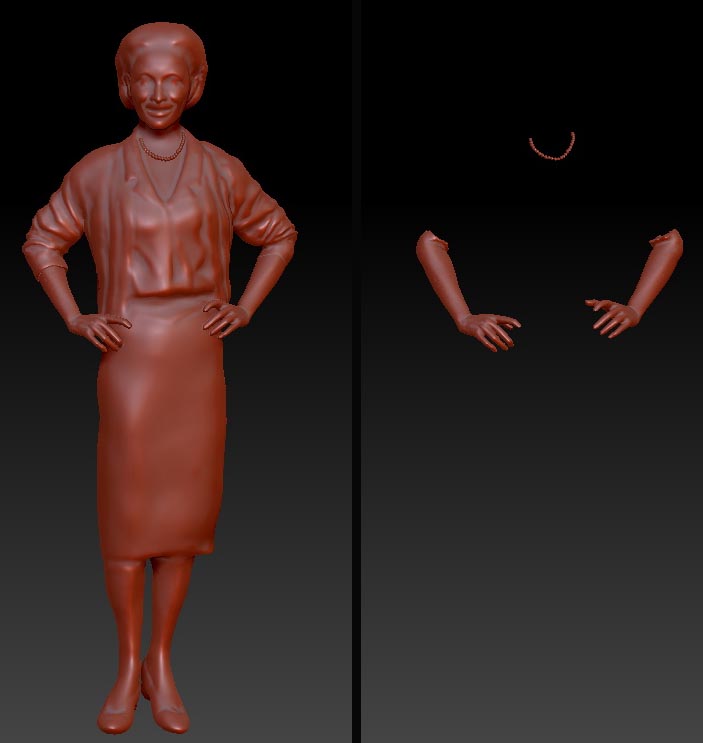
I have been using zBrush to create an armature to send to Synappsys Digital Services for milling.
This is similar to what I wrote about in Digital Sculpting With Mudbox: Essential Tools and techniques for Artists, and what I have done with the panther project; however, I feel I’m pushing the process a bit more.
Here is the digital sculpture almost ready for the milling process. I believe I am going to send it to them but would like to separate the arms from the sculpture. The reason for this is that in the digital sculpture if the hands are sent with the body as one file they get lost in the clothing. I would like to determine their placement without losing details. Synappsys will separate them anyway within the process of getting the pieces ready for milling.
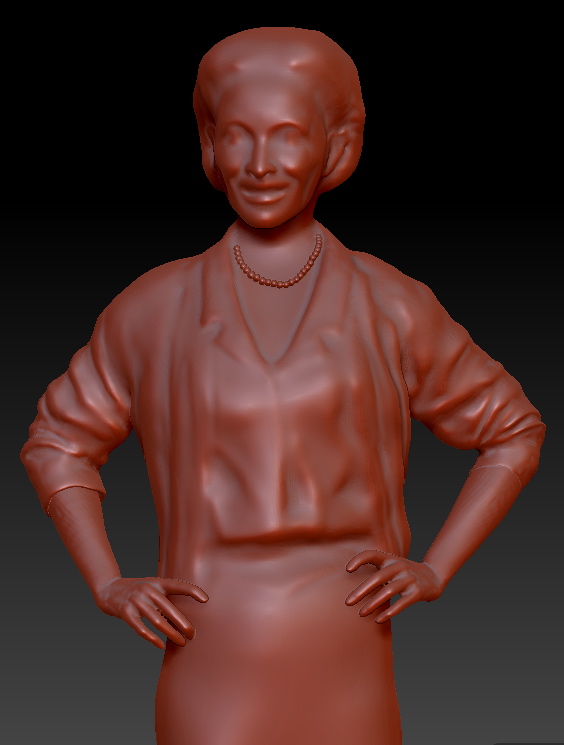
I’m not sure what will happen with the pearls. I doubt these can be done, and might actually be better for me to sculpt them on her. In fact, I’m leaning in that direction. Having them on the sculpture while working digitally has helped me with size and proportions. I have a few more things to do to the sculpture, and am anxious to hear what Synappsys thinks.
I SPOKE WITH SYNAPPSYS
Here are some of the things we discussed. As mentioned in my previous post, this Dynamesh is acting similarly to what Synappsys’ program will do when it lowers resolution. I have been requesting that Synappsys to mill out several heads that show either different resolutions of milling or different reductions. I am hoping to include this in my up and coming book, 3D 2012 digital art in a physical form. This will be a very important visual for artists to understand this entire process.
Some thoughts as Synappsys and I spoke
- The arms are created as what zbrush calls a “sub tool” I can separate them for milling , but I should probably be sure that they are cut and align evenly with the arms. Presently they sit within the sleeve. If they are a clean cut, and can match up, preferably somewhere in the arm where the sweater is, where I will have more design wiggle room, that will be better.
- It is almost paralyzing to try and figure out what size to mill this out at. There are several variables. If I want to add a lot of clay in the traditional studio , I have to allow for that mass. This may mean that I want to reduce the size. I may want to add little clay to the arms and hands, and up to 1″+ amount of clay to areas like the sweater, skirt, hair etc. So, I might have the pieces milled at different sizes.
- But the size problems don’t end with milling. In the traditional process of bronze casting of a life size person, it is known that artwork shrinks. My foundry indicates that I could lose up to an inch in size. But often times, the foundry can make this up as they are welding the many pieces together. Another aspect of casting in bronze is that “some pieces can shrink in the center, or look skinnier,” says Scot Yoast of Art Foundry Houston.
The entire concept is frustrating for an artist who goes through great lengths to sculpt a perfect or near perfect sculpture and have such deformations. My heart gets excited when I think about how digital processes are infiltrating the lost wax method of bronze casting and how this will change in the near future. A subject that I have discussed quite often on this blog, and I will go into great detail in my new book For now, I’m having to work this tra-digi art in any way that I can to get the results I desire.
UPDATE- COUNTDOWN BEGINS!
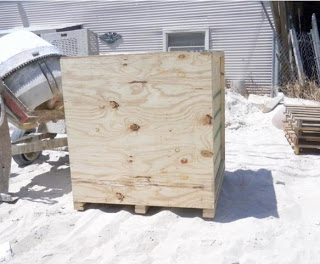
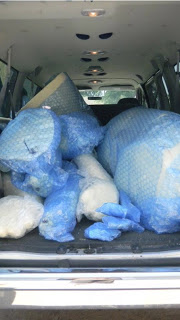
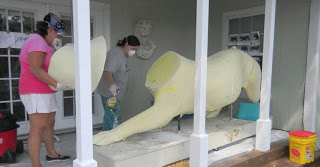
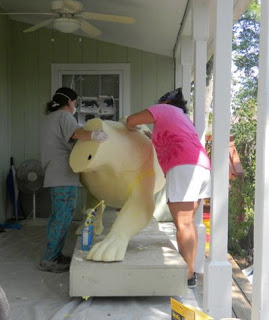
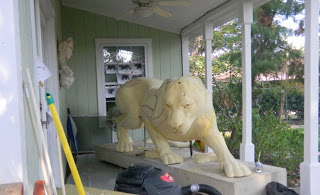
* The Sculpting process begins. The foam is soft and allows me to carve into it before we add the clay. The foam piece becomes the armature that the clay will be added to. Muscles are sketched in and now I begin the process of roughing in the body. Friday 3 people are schedule to put the two layers on the foam. one is wax to seal the foam the other is clay. I hope I can be ready. These are long gritty days. I could use some Prairie View A & M cheers here. Just 16 days before I am hoping to get approval.
This is a sculpture for Prairie View A & M University in Prairie View, Texas of their mascot the Prairie View Panther. The entire process is being recorded on a special blog designate for this project and can be found at http://www.prairieviewpanther.blogspot.com/
ENLARGEMENT BEGINS!
The file is off to my vendor in Oklahoma- introducing Synappsys Digital Services. They will take my digital file and enlarge it using foam and a milling machine. I wrote an article about this process in the Winter 2007 issue of Sculpture Review.Here is a pdf should you like to read the article and see the process.
This is from the Prairie View A&M Blog created for this project.
The Process – The Reason For A Digital Model
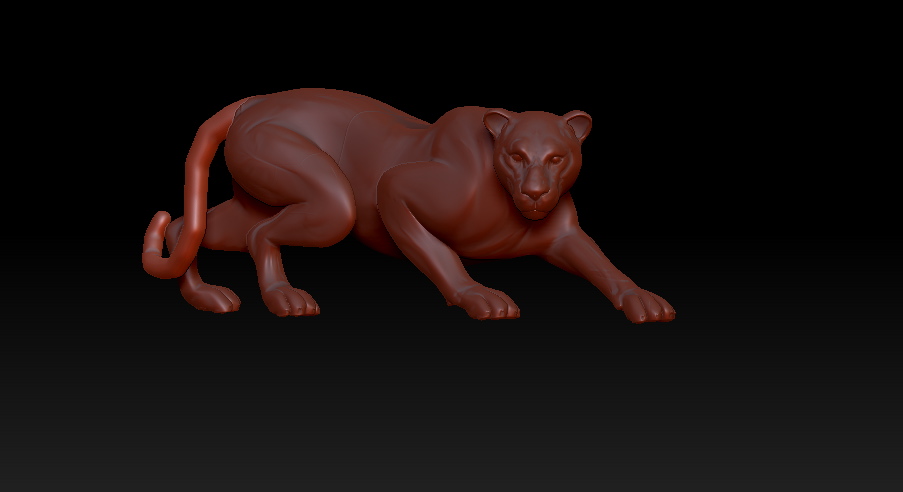
In traditional sculpting process a sculptor might present pencil sketches to a client to approve a design. Instead we sent digital models. The reason for these models are that we can see what a sculpture will look like from all directions. Sculpting is not like painting, you have to walk around the sculpture and have it present well from all sides. Digital models help us to do that. Another aspect of the digital model is that I can sculpt on it in the computer adding some detail before sending it off for enlargement. The digital model will really aid us in enlarging this sculpture as you will soon see. Before sending this off for enlargement the university requested I change the shape of the tail. They are concerned with breakage. We tried different tails with the pose and settled on something similar to this. Of course these are only digital sketches, of the direction we are going.
This is from the Prairie View A&M Blog created for this project.
Solar Sintering? Wow, 3D Printing is Even More Cool
Markus Kayser talks about SolarSintering Project on his website.
He states
“In a world increasingly concerned with questions of energy production and raw material shortages, this project explores the potential of desert manufacturing, where energy and material occur in abundance.
In this experiment sunlight and sand are used as raw energy and material to produce glass objects using a 3D printing process, that combines natural energy and material with high-tech production technology.
Solar-sintering aims to raise questions about the future of manufacturing and triggers dreams of the full utilization of the production potential of the world’s most efficient energy resource – the sun. Whilst not providing definitive answers, this experiment aims to provide a point of departure for fresh thinking.”
Markus Kayser – Solar Sinter Project from Markus Kayser on Vimeo.
Ceramic Extrusion And Homemade 3D Printer
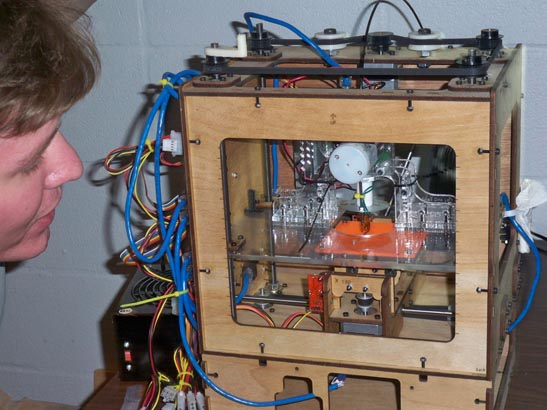
I had heard it rumored that the home made 3d printer called Rep Rap was adding an extruder so that a ceramic mix could be pushed through the printer. I want to start watching this much closer and look at possibly doing this in my own studio.
I know that several universities have been working with this entire topic. The leading university in this is Solheim research laboratory . They are however using a very expensive machine. They have even made their recipe public, and are supporting and interested in other individuals endeavors into the research of this area.
My curiosity is in being able to use something in my own home studio.
Some posts on a rather new blog called Unfold-fab I am absolutely going to have to watch more closely.
Open3DP is Solheim Additive Manufacturing Laboratory in the Mechanical Engineering Department on the University of Washington campus blog. It describes their progress in ceramic printing in 3d.
Colbert Has His Head Created As A 3D Print
Makerbot talks about scanning and creating a 3d copy of Colbert. For those who are not aware of the Maker bot here is a link to them. The other leading 3d homemade printer is RepRap.
I have seen the cup cake which is the baby Makerbot in action. Sure would like to get one of these, but I’m holding out. I think the Reprap is now offering a ceramic 3d extrusion attachment. Now we are talking.


