Sculpture
Newsboy- The Dip
March 1-7, 2005
Sculptor Bridgette Mongeon has documented the entire process of creating a figurine of a newsboy and a life-size bronze sculpture. Watch the artist work through these posts. In this blog, she has also included information for students and teachers. In the previous post, we learned a little about cleaning the waxes that we got from the foundry.
If you are lost and want to go back to the chronological running list of posts, follow this link.
The sculptor went through great
pains to create an entire sculpture
and it is cut into pieces for bronze casting.
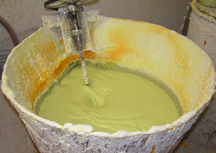
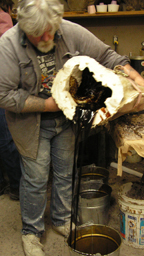
Now that the waxes that we worked on have been gated up by the foundry, and degreased, they are ready for the dip. There are two slurries, a thick and a thin one. The first dip is in the thick slurry. The color of the slurry is just something that is added to help the foundry craftsmen see the drying process of each dip. Once the piece is dipped in this liquid it is then sprayed with fine sand. These first two coats of dip and sand are to hold the detail of the piece. The dip room is kept at a certain temperature. If the temperature fluctuates in the dip room it could affect the shell that is being built, and then when they try to pour metal into this shell it could crack. You can only imagine what a problem that would be, molten bronze going everywhere.
Two coats are not enough; there must be several more coats of shell. The latter coats are for strength and have stucco in them. There are a total of 5-12 coats with 1-2 dips per day. It took a week to dip our entire sculpture.
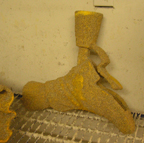
shows the pouring cup.
Each of the wax pieces
has gates that help
the gases escape and
the metal pour properly.
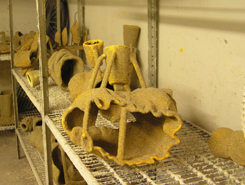
To the left you can see the upper torso and several pieces of the newsboy on the shelf. These photos give you a good look at the pour cups and the gating. Do you see the shoe? You can see how the bottom of the shoe has been cut as well. The photo to the left shows the upper torso. It appears they have cut off the newsboy’s head and arms as well. These photos show only the beginning of the dip. Once these dip pieces are ready. They will go to the furnace to be burned out and the metal will be poured.
Newsboy- Working the Waxes
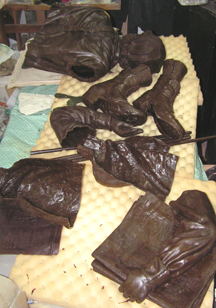
All of these will be made into metal.
February 22-28, 2005
Sculptor Bridgette Mongeon has documented the entire process of creating a figurine of a newsboy and a life-size bronze sculpture. Watch the artist work through these posts. In this blog, she has also included information for students and teachers. In the previous post, we learned a little about pouring the wax at the foundry.
If you are lost and want to go back to the chronological running list of posts, follow this link.
The steps to the bronze process never cease to amaze me. Here are some of the many waxes that came from the molds, of the newsboy sculpture. Over the years, whenever I pour in bronze, I have always worked my waxes. Not all artists do this. Many times the foundry will do the basic work. Now I have my assistant do that part, but I always like to add my own touches to each wax. You can imagine that even though this life size newsboy is an edition of 10 and the smaller newsboy sculptures are editions of 100, each number sculpture in the edition may be a little different. Because there are many pieces to put together for each finished bronze the finished sculpture will have its own nuances to it.
My assistant, Miguel, and myself spent hours making sure that each wax seam was cleaned up and that each piece not only fit to the other wax piece, i.e., front to back but also to each other, i.e,. leg to foot. Though we do a lot of fitting in the wax, some fitting will also be done in the metal.
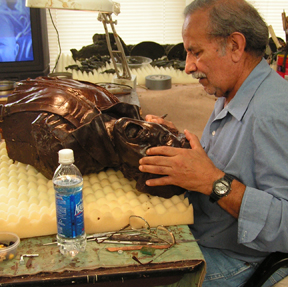
the studio. We need to clean up all of the waxes.
You can see by the many pieces placed upon the egg crate foam, the lower torso was cut up into several smaller pieces. This is done for several reasons. You will see later that the foundry will cut up the sculpture even more. It is important that these pieces should not be too cumbersome through the next steps of the process. Weight and ease of handling will be an issue when the pieces are being dipped or when the metal is being poured.
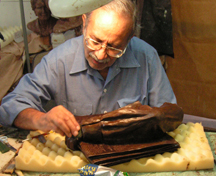
When I finish this part of the wax I will bring the many body parts back to the foundry for the foundry to gate up. Gating up is the process of adding wax vents and pour cups. The master foundry craftsmen want the molten metal to pour very smoothly so they add these vents to facilitate that process.
So, it is back to the foundry for gating up and making the shells.
Newsboy- Pouring The Wax In The Mold
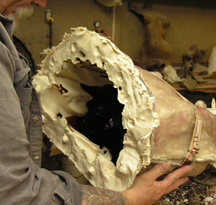
mold and rolled around.
A thin layer of wax is
all that is needed
for the sculpture.
February 15-21, 2005
Sculptor Bridgette Mongeon has documented the entire process of creating a figurine of a newsboy and a life-size bronze sculpture. Watch the artist work through these posts. In this blog, she has also included information for students and teachers. In the previous post, we learned a little about the making of the mother mold in fiberglass.
If you are lost and want to go back to the chronological running list of posts, follow this link.
It is taking us some time to make all of the mold for the Newsboy. We took several of the mold pieces to the foundry to pour waxes. Once they are poured, we will be able to take these waxes back to the studio to work on them a bit more. Within the next few weeks the entire wax will be at the foundry, and at that point it will be ready to go into metal.
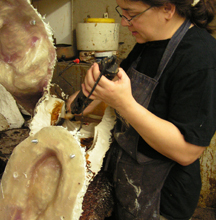
Here we are at the foundry pouring the wax into the upper torso. The wax is very hot. It is poured into the mold and carefully turned to cover the entire upper section. It must be just the right thickness. Any excess wax is poured out before it cools. Not only do we have to pour the wax upper torso, but we also have to pour the right arm, the paper that the newsboy holds in the right hand, the left arm and paper, the brim of the hat, and the papers that will sit on the ground. The lower part of the body will not be poured; instead it will be brushed on. Once the sections, front and back of the lower half, have cooled they will need to be put together.
into the mold and swirls
it around and pours it out.
They will do this several
times to get the right
thickness of the wax.
The metal will be as thick
as the wax.
Now that the waxes are poured, it is time to clean up the studio. That way we can be ready to bring the waxes back to work on them. The platform was taken off the floor this week, and it felt so good to be able to have a little more space. I danced through the area. What is left of the newsboy sculpture is lying in a heap on the floor. The original sculpture is lost in the mold making process. I’ll soon disassemble him. The clay body parts will be going into a big bin to be melted down for the next projects, a six year old ballerina a two year old little boy holding his truck or Patsy a woman sitting on a park bench. Yes it is a little strange to see a hand melting in the crock-pot, but it is always good to be able to reuse material.
With everything cleaned up in the studio we are ready for the next step, to get the waxes from the foundry so we can make them perfect.
Newsboy- Rubber and Fiberglass
fiberglass mother mold is added
to the mold. It is created in parts.
February 8-14, 2005
Sculptor Bridgette Mongeon has documented the entire process of creating a figurine of a newsboy and a life-size bronze sculpture. Watch the artist work through these posts. In this blog, she has also included information for students and teachers. In the previous post, we learned the first part of the mold making process.
If you are lost and want to go back to the chronological running list of posts, follow this link.
Making molds is grueling work. We have just finished doing the rubber. Now on to the next stage of the mother mold. The days have been long and the nights even longer. Many nights I have worked until 1:00 a.m. I am glad the difficult part of this sculpture is almost over. I am exhausted, and I am finding that I need to rest my hands every few days.
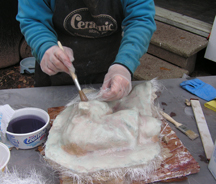
fiberglass. This is called the
mother mold.
The mold is complete now; however, there are a few things for which I am working to make it perfect. Here is a little more about how the process went.
THE PROCESS CONTINUES
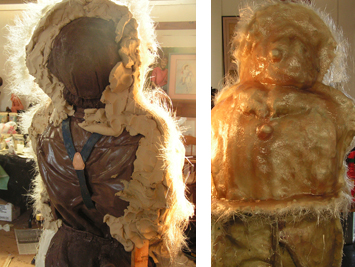
To the right you can see the rubber on the front of the mold. After the rubber, the fiberglass mother mold is applied.
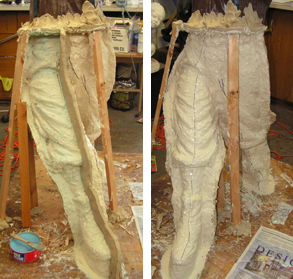
Making a fiberglass mother mold is an itchy, smelly process. Remember I have decided to create a fiberglass mother mold because it will store easier and will be lighter. I had to complete the front part of the rubber and create the mother mold section in several pieces. The photo in the upper right shows my marks on the rubber where I am going to make the fiberglass seams.
Soon that will harden and the seams will
be taken off so we can do rubber and clay on the back.
When creating the mother mold, sometimes it needs to be divided up into sections, as you can see with the front of the mold. These sections are so that the mother mold can be pulled from the rubber without hurting the wax that will be poured inside.
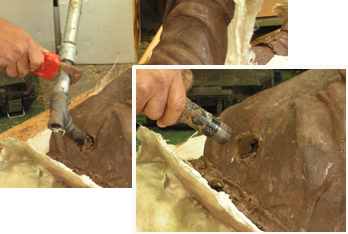
support out of the sculpture. Then the area will be
sculpted before the artist makes the rubber
mold with a fiberglass mother mold.
I worked on the entire front of the newsboy. Here you can see the fiberglass mother mold from the front and back before the edges are trimmed up.
Once the front of the sculpture was done, it was sturdy enough for me to lay the sculpture down. You might remember there was a pipe armature in the newsboy’s back. This was to hold up the entire sculpture while I sculpted. I could not make the mold around this pipe so we unscrewed the pipe from the base, laid him down and the unscrewed it from his back. Then I filled in the hole before we preceded with the lower half of rubber and mother mold.
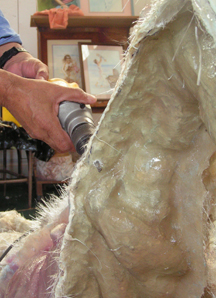
Once all of the rubber was brushed on the sculpture, and then each piece of the mother mold applied over the rubber then we had to drill holes in the seams. That connected the pieces. Later nuts and bolts will hold the sculpture together. These will not only secure the sculpture, holding it together, but will assist in quick demolding. Trying to pull apart the mold for the first time, after all the rubber and fiberglass are done, is a job that requires some muscles. My fancy white suit protects me from the pieces of fiberglass.When all of the pieces are off the original sculpture, the edges are ground down to form a smooth edge and each piece is sanded. The rubber needs to be cleaned before wax can be poured into it. Everything is reassembled for our trip to the foundry and to pour the waxes. The original sculpture is lost in the demolding process.
On to the foundry and pouring the waxes.
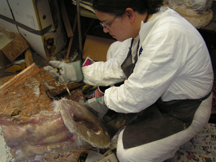
to work in fiberglass.
Newsboy- The Mold Making Process
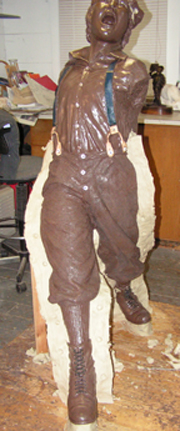
pieces and a mold is made.
Clay seams are put up each
side to divide the sculpture in half.
January-31-February 7, 2005
Sculptor Bridgette Mongeon has documented the entire process of creating a figurine of a newsboy and a life-size bronze sculpture. Watch the artist work through these posts. In this blog, she has also included information for students and teachers. In the previous post, we rejoiced that the sculpting is complete.
If you are lost and want to go back to the chronological running list of posts, follow this link.
Now that the sculpting is complete, let’s move onto the next portion of this process. The mold-making portion of the sculpture is underway. It is a lot of work and very physical. First, we cut off both of Dusty’s arms. This will enable us to pull the mold off of the sculpture. I also cut off the brim of his hat. I probably could have left it on, but I felt more comfortable cutting it off.
The process of making this mold is similar to the small newsboy sculpture mold. We are making a mold so that we can pour a hollow wax newsboy. To do this we sprayed the sculpture with a sealant, and then with a mold release agent. Layers of rubber are carefully painted on the sculpture. When they are dry, an outer mold called the mother mold is placed over the rubber. It is called a mother mold because it holds the rubber in place. If we just had rubber, then when we pour wax into the mold it would become distorted. The mother mold helps to keep the form.
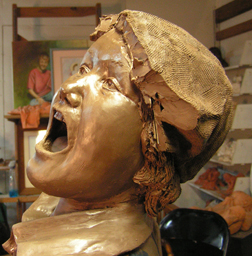
This will make it easier for the
artist to get a good mold of his face.
The head is prepared to go
into the mold making process.
I have documented another mold making process on my web site. The Kipper Mease mold is different than this one. Kipper’s mold was done with a plaster mother mold. This newsboy mold will be done with a fiberglass mother mold. Fiberglass mother molds are difficult to make, but they are lightweight and easy to store.
Once I have the mold, I will take it to the foundry and together we will pour waxes. I still don’t like to let go of the project yet. I will take the waxes back to the studio and work on them as well. When I am sure they are ready, they will go back to the foundry, and then my workload and long days will slow down for a bit. But just a little while. I still have some commissions that I have not been able to finish in the rush of completing the newsboy, and I have two more life size pieces that need to be started in the next few weeks.

THE PROCESS
The sculpture is divided up into sections by what is called “claying up.” The the clay is carefully put on the sculpture. The front of the sculpture is what we are going to focus on first. You can see most of the seams of the lower half in the photo above. It does not; however, show the seam that will divide the torso in half.
Once the claying up process is done, I will coat this first section with coats of rubber. Each layer of rubber must cure to the correct consistency before another layer is put on. There is a total of 4-5 layers of rubber.
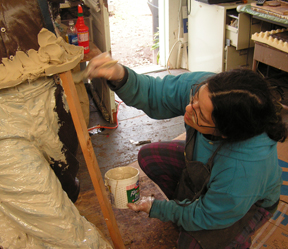
The rubber on the main sculpture is divided up into 4 pieces- front lower torso, front upper torso, back upper torso, and back lower torso. Each front section must be clayed up, and sprayed with mold release. Rubber must be painted on and then finally a section of mother mold applied to the top of that. Once one section is complete, then I can start on another section. It is a long process. While the rubber cures, I will work on other parts of the sculpture. The stick next to the sculpture, in the photo to the right is to help hold up the seam of clay.
Remember, I have several pieces that I have cut off the sculpture. Each of these needs to be clayed up and then rubber painted on each side. The left arm with the newspapers is shown in the photo to the left. Knowing how to clay up a piece takes a lot of thought and practice. You must be able to think ahead to the next steps that the piece will go through— the wax, dip and casting. Now, let’s move along in our process of making this sculpture into a bronze. On to making a mother mold with fiberglass.
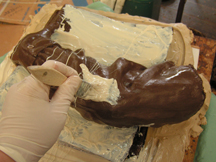
clay. And a mold is made of both
newspaper and arm
Newsboy-Sculpting Is Complete On The Life-Size Newsboy
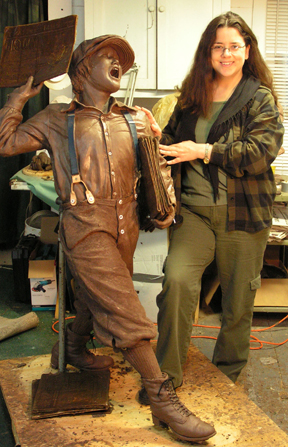
newsboy sculpture. Now the sculpture
will be taken into the bronze casting.
January 22-29, 2004
Sculptor Bridgette Mongeon has documented the entire process of creating a figurine of a newsboy and a life-size bronze sculpture. Watch the artist work through these posts. In this blog, she has also included information for students and teachers. In the previous post, we learned a little about adding a hand and newspaper.
If you are lost and want to go back to the chronological running list of posts, follow this link.
Looking back over the journal of this project, it has been almost three months since the start of the life-size newsboy. I began the life-size sculpture on November 8, 2004 and it is now six months since the beginning of the project – August 2004. The weeks between August and November were spent on research, finding a pose, learning about clothing of the period, finding an original pattern and sewing outfit of the time period, finalizing photos for reference, and creating the small newsboy sculpture in bronze.
sculpture and the likeness
that will forever be in bronze.
It is wonderful to see the sculpture in such a state of completion. Although it is said, “artwork is never finished, only abandoned.”
Artistically, there are still some things I will do with the sculpture; however, I will do them in the next step, as I get the sculpture ready for the foundry, either as I prepare for the wax or in the wax. Most artists that I know send the sculpture off to the foundry at this stage; however, we will be doing the mold, and I’ll go to the foundry to do the wax so you will be able to watch that process as well. After that I’ll be sure to document the foundry process for the web site.
in his image. Bridgette Mongeon has
completed the clay sculpture for a
bronze newsboy. Now we move to the
mold making process.
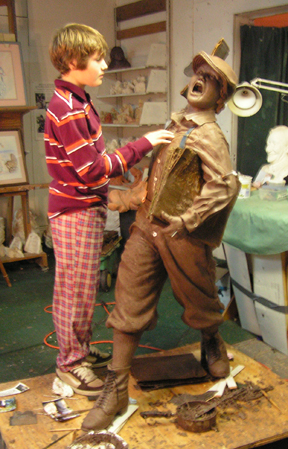
DUSTY SEES HIMSELF
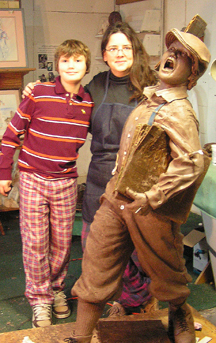
It was so much fun to have Dusty come in and meet the sculpture in person. When I gave Dusty a hug, I couldn’t help but pull back and feel his shoulders. For a moment there I wished he could somehow have been in the studio the past three months, holding the pose, so I could see him when I needed to.Next week we will be working on the mold and waxes. According to our schedule we have until the end of the month to get the waxes to the foundry. That will give the foundry two months for the metal work. I’m hoping to have the final product by May 1st. The unveiling is May 19th.
With those extra 19 days, it gives us time to solve any problems that may occur and also to install the sculpture on our target date.
THE LEGISLATION PROCESS
We still don’t know when the Texas legislators will discuss our newsboy. Senator Whitmire prefiled the bill in December. The Texas Press Association, my client, is staying on top of that. I’ll be sure to post as soon as I hear something.
Now, we are going to enter the foundry process. It is a huge amount of work that starts with The Mold Making Process.
Newsboy- Adding Hand And Newspaper To Life-Size Sculpture
January 18-21, 2005
Sculptor Bridgette Mongeon has documented the entire process of creating a figurine of a newsboy and a life-size bronze sculpture. Watch the artist work through these posts. In this blog, she has also included information for students and teachers. In the previous post, we learned a little about how the details on the life-size sculpture come together.
If you are lost and want to go back to the chronological running list of posts, follow this link.
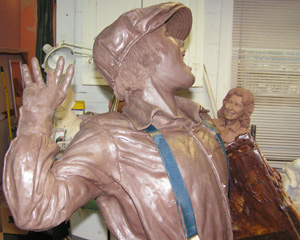
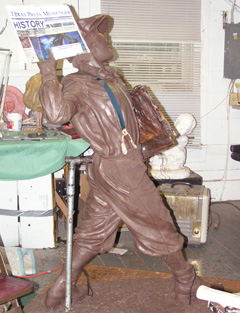
This week I finished the right hand and put it on the sculpture. I was thrilled to see it come together. The left hand is another story. I can’t put that one on until I have the papers sculpted. The paper is seen both under the left arm, in the right hand, and on the ground. I need to have one good paper with headlines, and then I’ll make a mold of it and cast the others in wax. That way they will all be the same, and it will save me a tremendous amount of sculpting time.
SCULPTING THE PAPER
To sculpt the paper, I printed out the masthead of the paper and the headlines. I dipped a real paper in several coats of wax, smoothed it out and then placed these headlines on the wax paper. To transfer the letters, sometimes I cut them in or pinprick the outside edges, and then cut them out with an Exacto knife. It is very time consuming. The cuts in each letter must be done on an angle and then cleaned up with solvent and several tools. Each column of type is “greeked” in with scribbles, but even that is time consuming.
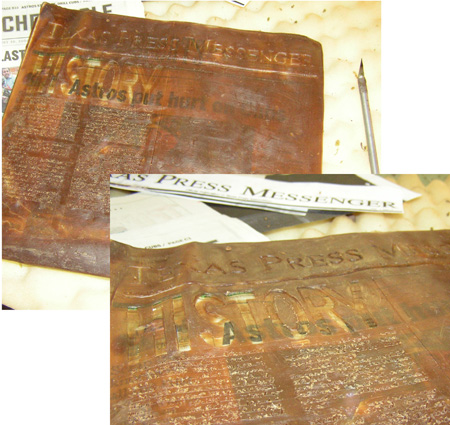
We are getting close to the finish line. Let’s see the Sculpting Complete in th next blog post.
Newsboy- It Is All In The Details.
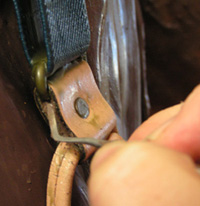
filling in the undercuts.
January 10-17, 2005
Sculptor Bridgette Mongeon has documented the entire process of creating a figurine of a newsboy and a life-size bronze sculpture. Watch the artist work through these posts. In this blog, she has also included information for students and teachers. In the previous post, Now We Are Getting There, we saw a lot of progress.
If you are lost and want to go back to the chronological running list of posts, follow this link.
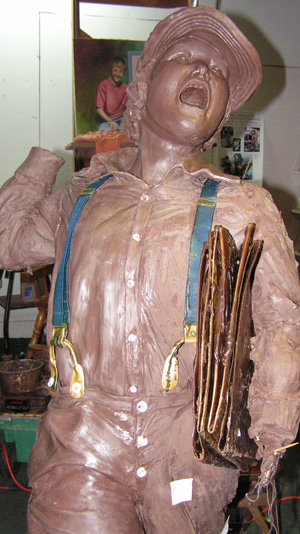
The small newsboy came together in the last post, and we also began to see the large newsboy take shape. Now, let’s get down to some details.
I have decided to cover papers in wax to put in the newsboy’s hands. I set up a clothesline system for the papers to drip into as they cured. I still have to sculpt the headline in the papers. That will come next week. Meanwhile, I have a bundle of papers for Dusty’s left arm. I’ll clean them up later. Having them in place is important in sculpting the left arm.
With a trip to Houston Leather for brads for the shoes and another trip to The Way We Wore Vintage Clothing store, I finally have the leather suspenders that I was looking for. I have dipped them in wax and added them to the sculpture. Dipping them in wax stiffens them up for the mold.
Because I have decided to cast the sculpture with these real suspenders, I must prepare them for the mold making process. Every place where there is an undercut, a deep area like behind the suspenders or in between, it must be sealed. This is a place where rubber can get caught during the mold making process. That is our next step, and I hope to get to it in the next few days. I’m filling in the gaps very carefully. I can still show depth in between the suspenders, but it won’t go all the way through. Just a few more things to add to get this together.
We are getting there. Keep reading to see how the newspaper is sculpted and his hand is added in the next blog post Adding the Hand to the Life-Size Sculpture And Sculpting the Newspaper.
Newsboy- Now We Are Getting There!
January 3-10, 2005
Sculptor Bridgette Mongeon has documented the entire process of creating a figurine of a newsboy and a life-size bronze sculpture. Watch the artist work through these posts. In this blog, she has also included information for students and teachers. In the previous post, we learned a little about making huge strides in the creation of the life-size newsboy
If you are lost and want to go back to the chronological running list of posts, follow this link.
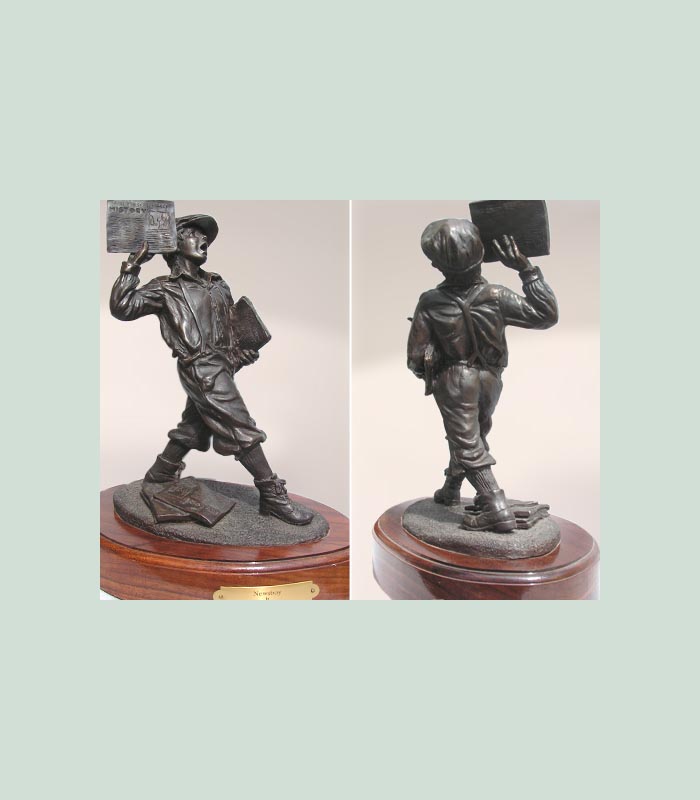
I was so excited to pick up the first small bronze newsboy sculptures from the foundry. The foundry did take photos of the process, but I will wait and post those later.
The life-size sculpture is coming along well. It feels so good to have the head attached. We put a rod through the head and into the torso to secure it. You can still see the rod in the photo. Now that the head is attached, he is coming to life. I can hardly wait to get the arms more refined and add the hands. The excitement continues.
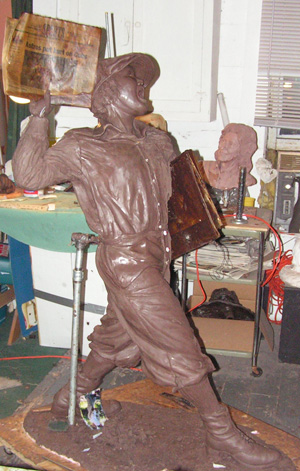
will soon be approved.
I have, however, lost one assistant to be replaced by another. My daughter, Christina, worked with me over the holidays, and I think that Miguel, who is now helping, is probably as frustrated with me as she was. No sooner does my assistant get done smoothing the sculpture, which is quite a bit of physical work, and I take one look at the sculpture and the changes needing to done jump out at me. Then, there I go again, carving and adding clay. The assistant comes in the next day and has to smooth it all over again.
THE DETAILS
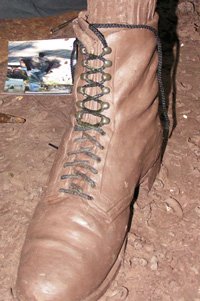
I had to stop sculpting the shoes, because of the old fashion brads on the shoes. I could not figure out how to fabricate them, so I have opted for trying to find real brads for the shoes. Houston Leather says they carry them.
It looks like I will have a few “real” things on the sculpture. The buttons are staying, and because I am running out of time, I will most likely cast real suspenders. The white suspenders that I have now are not really what I want. I would prefer the ones with the leather at the buttons.
My deadline of getting this life size sculpture completely sculpted is quickly approaching. I want to leave myself plenty of time for foundry work, including mold making and working the waxes.
I can hardly wait to get going on the hands.
I attached his unfinished hand and put a paper in it just to see how it might look all put together. I had to snap the picture very quickly because the hand was not secure.
It is moving along, now let’s go see the Details on A Life Size Sculpture.
Newsboy-Huge Strides In The Life-Size Sculpture
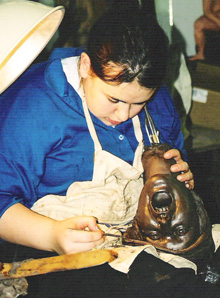
me in the studio.
December 28, 2004- January 3, 2005
Sculptor Bridgette Mongeon has documented the entire process of creating a figurine of a newsboy and a life-size bronze sculpture. Watch the artist work through these posts. In this blog, she has also included information for students and teachers. In the previous post, there was a lot of working through the holidays.
If you are lost and want to go back to the chronological running list of posts, follow this link.
What an exciting week it has been. We have made tremendous progress on the sculpture this week. It started with the shoes. They are defined, and now we are just getting to the fine detail. We are moving up the leg to the socks and pants.

Throughout the week, Christina and I have taken turns working on the head, adding clay, taking away, smoothing and then adding clay, taking away, smoothing. The last day of the week I asked Christina to finalize her work on the face and then hand it over to me. I just wanted to spend an hour or so with it before securing it to the body. Doing any of the detail work on Dusty’s face after it is on the body is a job for an acrobat. It is much easier to work on his face when I can hold it in my own hands.
When we are not working on the head, we spend a lot of time working on the floor, lying on pillows and blankets, making ourselves as comfortable as possible as we refined and defined the shoes, the socks, and under the knickers. There is still much to do in that area. The last day of the week, Chris was beginning the long process of cutting shoelaces and threading them into the clay, like we did with the small sculpture. We also must spend a great deal of time closing up any undercuts in this area. An undercut is an area that you can pass something through or a deep grove. So we fill the little areas under each shoelace with clay. If we did not do this, the rubber would get stuck around the shoelace when we start making the mold and would tear the rubber.

Before we entered the New Year I wanted to attach the head, a milestone of the process. I had to hold off with defining the upper torso until the head was attached. Though I did surprise myself. I “eyed” the space between the buttons on his shirt by using the photos. Then I remembered I had the shirt to look at, and don’t you know I was right on with my measurements! The head was added on the last day of the year.

To attach the head we had to be very careful of placement, a very tricky thing. You don’t want too much neck or too little, and then we had to make sure it was secure to the torso. We did so by hammering a threaded rod through the head, neck and deep into the torso. It was such a great satisfaction to see him put together. It is also exciting to know I am getting to a new stage in the process. It renews the creative energy inside. I am hoping to have the sculpture finished within the next three weeks and ready for approval by the client.
Monday, January 3rd, I am picking up the first small bronze sculptures from the foundry. I can hardly wait to see them.
Stay tuned next week to see the sculpture complete with head and torso and photos of the small bronze in the blog post, Now We Are Getting There.
