
Looking For A 3D Jump Suite-Sculpture Presentations

Working on a new project presentation and could really use a jump suite that looks similar to this or can be modified in a sculpting program to look like this. Not a real one, a 3d model that I can use with a daz or poser model
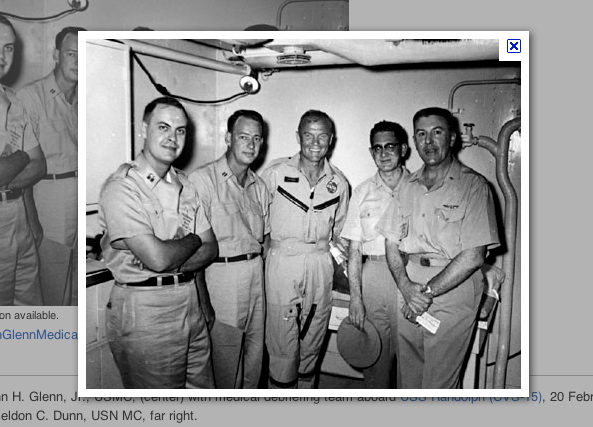

If you are interested in seeing how I use these 3d models, it is a bit different from most. I use them in presentations for life-size bronze sculpture, and sometimes in my process. Check out this You tube video or some of the other documentation of my projects on this blog by searching for daz or poser or check out one of my project blogs such as the Evelyn Rubenstein sculpture blog or the Panther Project.

My husband, who also works in 3d, said to post on the daz forum. He raved about how helpful they were. Wow, was he right. Within 20 minutes someone replied and gave me these two suggestions. I labored over which one to buy when my husband came in, peered over my shoulder and said, “Buy them both, they are real cheap.” So, thanks to the daz forum for all of their help. M4 air Crew Set by Daz 3d is $12.95 and Toolboi is $24.95
More on this presentation later.
To learn more about this project of Neil Armstrong visit the United In Space Website.

Sculptor, Writer and Speaker
Bridgette Mongeon is a sculptor, writer, illustrator and educator as well as a public speaker.
Her blog can be found at https://creativesculpture.com.
She is also the owner and creator of the God’s Word Collectible Sculpture series
Follow the artists on twitter twitter.com/Sculptorwriter twitter.com/creategodsword
Facebook http://www.facebook.com/bridgette.mongeon
Listen to The Creative Christian Podcast or the Inspiration/Generation Podcast Click on Podcast Host Bios for a list of all podcasts.
Listen to the Art and Technology Podcast
Starting From The Ground Up! Process Writing For The Evelyn Rubenstein Sculpture

I guess I’m starting from the ground up. Or putting my best foot forward. I had the foam legs and feet with heels on and thought it might be good to start here. I found a pair of my own high heels as reference and have been sculpting for the last few days. It is funny to have the feet almost done and the rest of the body has not been started.
There are other motives for sculpting the the feet off of the main body of the sculpture. I have worked on them for about 2 days and it is much easier having them on a table than to be scrunched down on the floor.
Now that they are done I have wrapped them in saran wrap to prevent any foam from getting on them when I put the entire piece together. I have created a pipe armature that will enter Evelyn’s back. This way the weight of the sculpture does not have to set entirely on the foam legs and ankles. It would be great if there was a pipe going through her leg and heel, but I’m not sure that can work. I can’t wait to put the foam pieces together and see her as a whole. First, to hem that skirt a bit.
You can follow along with this entire process of creating a life size bronze for the ERJCC on the Evelyn Rubenstein project blog located at http://erjcc.blogspot.com/
Bridgette Mongeon is a sculptor, writer, illustrator and educator as well as a public speaker.
Her blog can be found at https://creativesculpture.com.
She is also the owner and creator of the God’s Word Collectible Sculpture series
Follow the artists on twitter twitter.com/Sculptorwriter twitter.com/creategodsword
Facebook http://www.facebook.com/bridgette.mongeon
Listen to The Creative Christian Podcast or the Inspiration/Generation Podcast Click on Podcast Host Bios for a list of all podcasts.
Listen to the Art and Technology Podcast
What Does Milled Foam Look Like As It Is Being Milled?
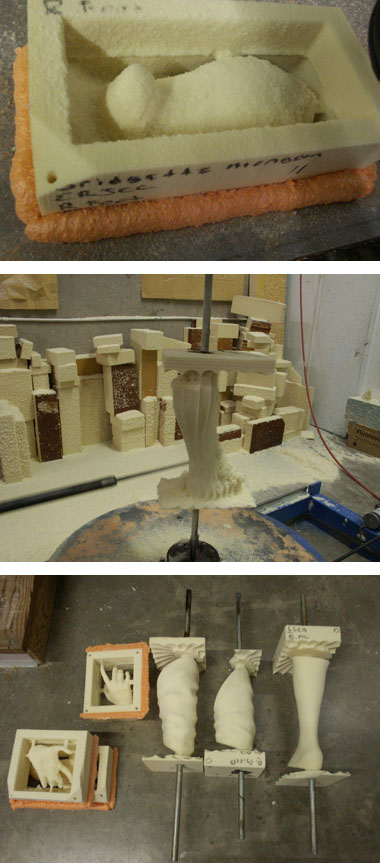
Synappsys Digital Services sent me photographs of the milling of Evelyn. I’m including them here so others can see.
You can follow along with this entire process of creating a life size bronze for the ERJCC on the Evelyn Rubenstein project blog located at http://erjcc.blogspot.com/
Bridgette Mongeon is a sculptor, writer, illustrator and educator as well as a public speaker.
Her blog can be found at https://creativesculpture.com.
She is also the owner and creator of the God’s Word Collectible Sculpture series
Follow the artists on twitter twitter.com/Sculptorwriter twitter.com/creategodsword
Facebook http://www.facebook.com/bridgette.mongeon
Listen to The Creative Christian Podcast or the Inspiration/Generation Podcast Click on Podcast Host Bios for a list of all podcasts.
Listen to the Art and Technology Podcast
Foam For An Armature For Bronze Sculpture

I am so excited to have my foam pieces created by Synappsys Digital Services so that it will expedite my process of creating the sculpture of Evelyn Rubenstein for the Evelyn Rubenstein Jewish Community Center. There is still some work to do on the foam before I can cover it with clay. I can revise the piece and create deeper cuts into the sculpture. This give the sculpture depth. I love the sweater that Evelyn is wearing in this piece and I can hardly wait to put the texture into it in the end, but that is a long way off.

You can follow along with this entire process of creating a life size bronze for the ERJCC on the Evelyn Rubenstein project blog located at http://erjcc.blogspot.com/
My Recent Sculpture Is In Pieces

If you have been following this blog on the Evelyn Rubenstein Poject you have seen how the 3d image was created in the computer and then sent to Synappsys Digital Service for milling. This gives me my armature. However the foam armature comes to me in pieces. Now I must put these together. I do this using Spray foam and secure the pieces with skewers. Some pieces I might not put together yet, such as the arms/hands. I may want to play with their placement a bit after the clay is put on the armature.

It is good to keep the foam away from the edges.
However, I feel confident in putting together the skirt with the bodice and I can begin to see how she is coming together. The hands are very fragile and I also attach broken fingers and sand the foam. We are a long way from completing the sculpture, but I’m excited to get my hands dirty and I look forward to meeting Evelyn in the process.

This time they are glued with foundry wax.

You can follow along with this entire process of creating a life size bronze for the ERJCC on the Evelyn Rubenstein project blog located at http://erjcc.blogspot.com/
Sculptor, Writer and Speaker
Bridgette Mongeon is a sculptor, writer, illustrator and educator as well as a public speaker.
Her blog can be found at https://creativesculpture.com.
She is also the owner and creator of the God’s Word Collectible Sculpture series
Follow the artists on twitter twitter.com/Sculptorwriter twitter.com/creategodsword
Facebook http://www.facebook.com/bridgette.mongeon
Listen to The Creative Christian Podcast or the Inspiration/Generation Podcast Click on Podcast Host Bios for a list of all podcasts.
Listen to the Art and Technology Podcast
My Armature Is Delivered To My Door

Love when an armature is made for me.
I had been away and out of the studio for a week and while gone I was happy to see that Synappsys Digital Services, took the digital work that I had done and created and milled out my pieces. Here is a bit of technical information for any artists seeing this blog post. Synappsys has two CNC milling machines, a 21inch z axis, and a custom one that they designed and built— a 3 axis- with a 8′ rotary axis. besides milling Synappsys Digital Services, offers 3d rapid prototyping. They are in Norman Oklamoma which does not pose that much of a problem for me as a Texas artist as I can send them my files and foam pieces are light and will fit in a wardrobe box.

The process
Foam is put on the milling machine and the machine mills out the digital file that I have sent to them. The entire reason for this process is that it saves me time in creating an armature. I also can figure out some details of the process, and design which has been discussed in previous posts.
______________________________________________________________
You can follow along with this entire process of creating a life size bronze for the ERJCC on the Evelyn Rubenstein project blog located at http://erjcc.blogspot.com/
Sculptor, Writer and Speaker
Bridgette Mongeon is a sculptor, writer, illustrator and educator as well as a public speaker.
Her blog can be found at https://creativesculpture.com.
She is also the owner and creator of the God’s Word Collectible Sculpture series
Follow the artists on twitter twitter.com/Sculptorwriter twitter.com/creategodsword
Facebook http://www.facebook.com/bridgette.mongeon
Listen to The Creative Christian Podcast or the Inspiration/Generation Podcast Click on Podcast Host Bios for a list of all podcasts.
Listen to the Art and Technology Podcast
I Was a Non Traditional Student! Graduating With A Masters At My Age?
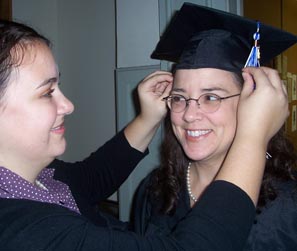
I have been a nontraditional student for quite some time now. I went to Vermont College to finish an undergraduate degree when my own child was going to college. I loved their form of progressive education. Then I went to Goddard College for my a Masters of Fine Arts in Interdisciplinary Arts degree. I’m graduating on Sunday!
This was not something I had to do, but something I wanted to do. It was a very fullfilling and wonderful journey.
Both of these schools are very different then your traditional education. Designing your own study was fascinating and a perfect fit for me. I am thrilled to graduate with my Masters of Fine Arts with both a focus in sculpture, especially as it pertains to digital technology in the studio, and writing.
On superbowl Sunday I will be making a huge touchdown, but it won’t be in sports.
For those interested, I was interviewed on our podcast by my daughter concerning this entire process. Here is a link for the podcast. Just click and the podcast will come up in your browser.
For those of you considering such a challenge, I have documented my entire process from undergraduate school to graduate school on my Perpetual Learner blog. Read my process, struggles, concerns and achievements. It seems strange to think, that way back when i was applying I was first figuring out how to find out what shots I had in high school.
Remembering When…
Many years ago Houston PBS came to my studio and created this documentary on me and my artwork. It won an award. I have always wanted to put these up on the web but never had time, slowly I will add more of the tv media coverage. Until then… here is
Making a living while living a dream.
Exporting ZBrush File For Milling
I have been on the phone with Synappsys Digital Services trying to figure out the best file, size and format that my digital sculpture of Evelyn needs to be in for them to work. This sculpture was created in the computer, will be milled out in foam and then created as a life size bronze. Synappsys Digital Services will be milling this out for me, but first I need to get them the file.
I have already decimated the individual files, with Decimation Master in ZBrush and I talk about this in a previous post. An important thing to remember is that ZBrush can create some very large files. Many companies that create output, for either milling or digital printing may not have the capability to handle such high resolution meshes. I have spoken to Synappsys Digital Services and they can handle 5 million or less.
To upload the file I have called Synappsys Digital Services and asked them to provide server information to upload my files. I must be able to upload them via Ftp. I use Fetch on my mac, which works just fine. With my FTP information ready, now all I need is the proper type of files.
Synappsys Digital Services can work with many different types of files. They can work with obj’s but their file of preference is STL Binary.

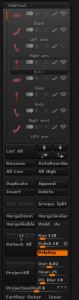
of all of my
subtools I can
merge them
down to create
one tool that
has all of its parts.
Obtaining OBJ’s are simple. While your Z tool or sub tool is selected go to Export and several file formats are available in the drop down menu. I need to export this sculpture in 4 pieces-both arms, the body , and the base. I will also want to combine the pieces and send it as one file. This way Synappsys Digital Services can see how each piece goes together. The reason why I want to separate the pieces is that if I combined all of them I will lose part of her hand as I realize that as it is placed on the digital sculpture the thumb is inside her body. I want to work with these hands more closely once I have them enlarged and sculpted. I need them separate and I need a thumb. They may also be milled at a different percentage to the rest of the body. They are more defined and so the hand/arm will probably only receive a minimum of clay on top.
Where as, the rest of the sculpture needs work.
To get an obj of all of my pieces I simply duplicated all of my subtools and then merged down these duplicated subtools together as one tool. Now I have both the subtools apart and one piece put together.
I have exported each an uploaded them up to Synappsys Digital Services but let’s see how the 3d Print Exporter plugin works in ZBrush.
Preparing ZBrush File For Digital Milling

I have worked diligently with this model. For ZBrush users or traditional sculptors entering the digital field, here are some things that I had to do near the end.
Perspective
Be sure that I was viewing this entire project in the perspective view. We traditional sculptors are not used to having to push a button to see in perspective, but these digital programs do. This should be done in the beginning to be sure you are sculpting correctly. This is basic, but check before you output.
Will my cut foam pieces align?
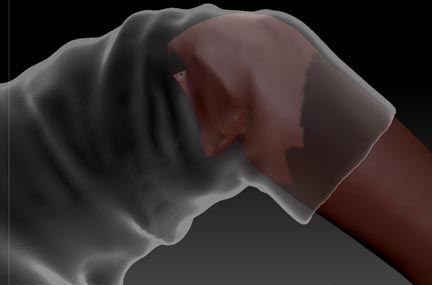
I had to fix the arms, as mentioned in the previous post. I need to fit these arms on the body and they will be milled at a higher resolution. I also plan to use less clay on them. I had sculpted them way under the sweater, instead I cut them off at the sleeve. I did this using Transparency to see through the sleeve.
Preparing Files
I will be sending this as 4 separate files- the base, the body, and the two individual arms. I might also combine them and send them as one file so that Synappsys can see how they go together. Though I do want them milled separately.
Before I can get these pieces ready there is another step I must do. Right now the files are very large for each. ZBrush has something called Decimation Master. Decimation master lets you hold your detail, but brings the file of each of the pieces down considerably
For example:
Before Decimation Master After Decimation Master
34% OF DECIMATION)
Right Arm
Active points 326,954 127,188
Left Arm
Active points 296,078 140,452
Body
Active points 7,751 mil 3,329mil 1,149 mil
Base
Active points 87,202 37,468
I can export the entire project and individual subtools, ie. arms, body and base as individual obj’s and then combine them as one obj . However, ZBrush also has a plugin that allows me to collect for output in the preferred .stl file for digital printing. Which means that I will have a different type of file for the vendor. In the next post I’ll talk about my experimentation with this plug in.