
Ready To Send Sculpture For Enlargement

used as the armature f
or the life-size sculpture.
I have been working hard, looking at reference and learning about my new subject—Evelyn Rubenstein. I am documenting this process on a blog created for the Evelyn Rubenstein Sculpture for the Evelyn Rubenstein Jewish Community Center. I’m also posting some more detailed, technical information on my own Creative Endeavors blog. I have been using some of the new tools in Zbrush. Such things as Dynamesh which made my work much easier. The final sculpture will be milled in foam by Digital Sculpture Enlargement and Reduction and then sent to me. I will put clay on the foam and finish detail so that it can go through the bronze process. I thought I would give you a little 3 dimensional tour of this new piece before finalizing it for output.
Working On Preparing An Armature
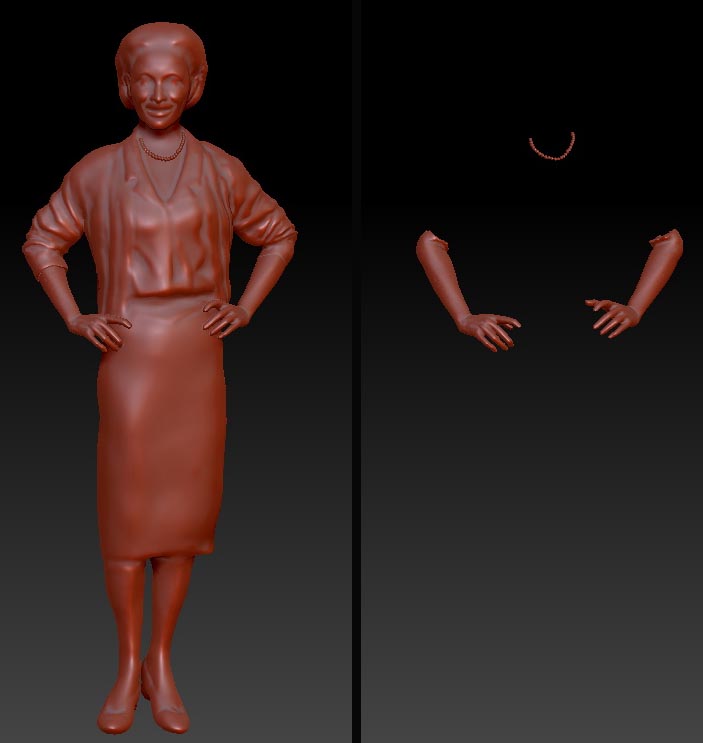
I have been using zBrush to create an armature to send to Synappsys Digital Services for milling.
This is similar to what I wrote about in Digital Sculpting With Mudbox: Essential Tools and techniques for Artists, and what I have done with the panther project; however, I feel I’m pushing the process a bit more.
Here is the digital sculpture almost ready for the milling process. I believe I am going to send it to them but would like to separate the arms from the sculpture. The reason for this is that in the digital sculpture if the hands are sent with the body as one file they get lost in the clothing. I would like to determine their placement without losing details. Synappsys will separate them anyway within the process of getting the pieces ready for milling.
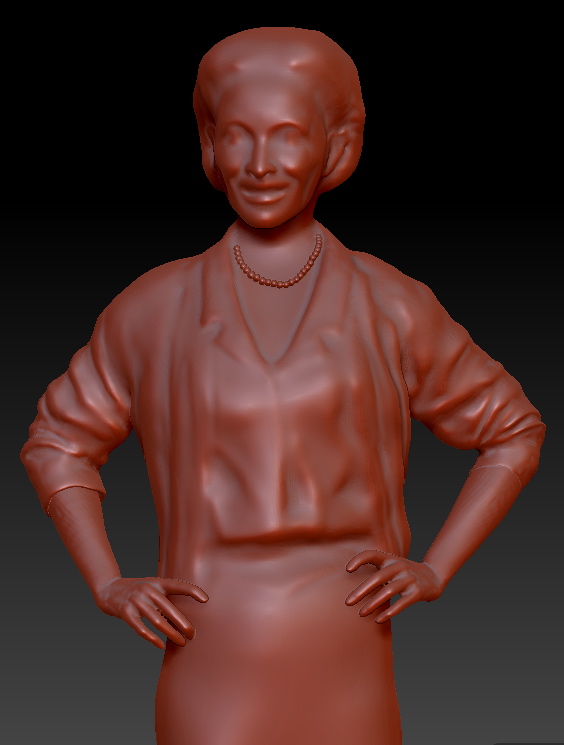
I’m not sure what will happen with the pearls. I doubt these can be done, and might actually be better for me to sculpt them on her. In fact, I’m leaning in that direction. Having them on the sculpture while working digitally has helped me with size and proportions. I have a few more things to do to the sculpture, and am anxious to hear what Synappsys thinks.
I SPOKE WITH SYNAPPSYS
Here are some of the things we discussed. As mentioned in my previous post, this Dynamesh is acting similarly to what Synappsys’ program will do when it lowers resolution. I have been requesting that Synappsys to mill out several heads that show either different resolutions of milling or different reductions. I am hoping to include this in my up and coming book, 3D 2012 digital art in a physical form. This will be a very important visual for artists to understand this entire process.
Some thoughts as Synappsys and I spoke
- The arms are created as what zbrush calls a “sub tool” I can separate them for milling , but I should probably be sure that they are cut and align evenly with the arms. Presently they sit within the sleeve. If they are a clean cut, and can match up, preferably somewhere in the arm where the sweater is, where I will have more design wiggle room, that will be better.
- It is almost paralyzing to try and figure out what size to mill this out at. There are several variables. If I want to add a lot of clay in the traditional studio , I have to allow for that mass. This may mean that I want to reduce the size. I may want to add little clay to the arms and hands, and up to 1″+ amount of clay to areas like the sweater, skirt, hair etc. So, I might have the pieces milled at different sizes.
- But the size problems don’t end with milling. In the traditional process of bronze casting of a life size person, it is known that artwork shrinks. My foundry indicates that I could lose up to an inch in size. But often times, the foundry can make this up as they are welding the many pieces together. Another aspect of casting in bronze is that “some pieces can shrink in the center, or look skinnier,” says Scot Yoast of Art Foundry Houston.
The entire concept is frustrating for an artist who goes through great lengths to sculpt a perfect or near perfect sculpture and have such deformations. My heart gets excited when I think about how digital processes are infiltrating the lost wax method of bronze casting and how this will change in the near future. A subject that I have discussed quite often on this blog, and I will go into great detail in my new book For now, I’m having to work this tra-digi art in any way that I can to get the results I desire.
ZBrush And Dynamesh

this photograph for a better view of resolution.
As I prepare a digital model in the computer that will be enlarged and milled in foam by Synappsys Digital Services I am playing with settings. At this point the sculpture is in Zbrush and I’m working on creating the mass where I want it. I want to do a mjority of my sculpting in the traditional clay, and not have it totally milled in foam in great detail.
I like being able to spend time on the body shape and head shape and flip it around in my computer, comparing my phtogoraphic referece to the shape I’m creating in the computer. This is much easier than standing on my head downstairs in the traditional sculpture studio.
I’m also playing with a new feature in zbrush called Dynamesh. I have mentioned this elsewhere on this blog. Dynamesh is a button that remeshes the entire sculpture to fix any problems with the mesh. It is a good thing to have, but because it is new, I’m trying to learn how to use it.
Double click on the photo on the right and you will see the top photo is my head in the original, the second from top remeshes using Dynamesh at 648 resolution, the next at 904 and the last at 1024 the highest setting. I’m wondering if this is what is done at Synappsys. It is hard for an artist to visualize how much of their form will not show up depending on the resolution and the size they ask Synappsys to mill in.
If you are interested in reading more about Dynamesh at Pixlogic- here is a link
HAIR using new tools
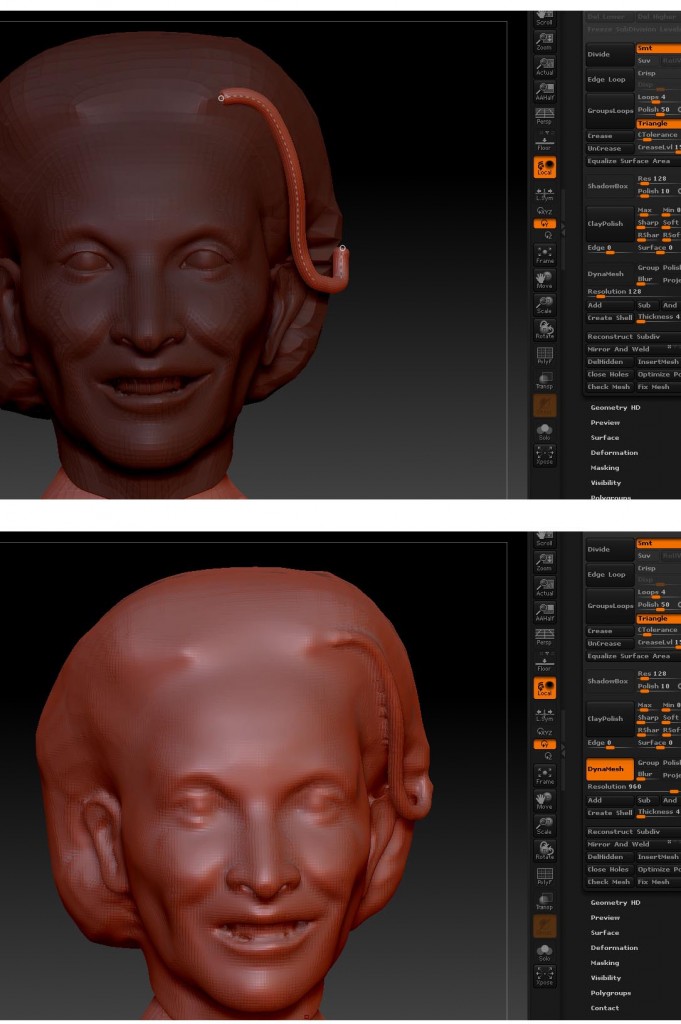
Another new tool in zbrush is a curve tube. I wondered If I could use this curve tool along with Dynamesh to get a better form for my subjects hair. Seems like it will be highly possible, if I want my sculpture remeshed. Here is an example of using curve tube and dynamesh. Notice
you have control the tube while it has the dotted line, then simply smooth it into the hair once it has been added to the original mesh with Dynamesh.
Getting to Know Evelyn
This is from a blog I am doing for my client on this project. The Evelyn Rubenstein Jewish Community Center Sculpture Blog.
Reference

Yesterday, my client was kind enough to take time with me and allow me to thumb through old photo albums. It is interesting… I’m looking for photographs of my subject, but it is seeing the family photographs, hearing the stories, this is what makes me feel bonded to my subject.
I’m trying to not only capture a likeness, I’m trying to find Evelyn. Watching her playful side in photographs, some that I have never even taken as reference, hearing about her parents, my clients and the relationship to them, even talking about death. All of these things add an element to a sculpture that you can’t get by just “doing the work.”
I once heard an artist say, “posthumous sculpture is just another commission.” It is so much more to me. This is a life lived. It is someone’s mother and wife. It is a person whose life made a huge difference and will continue to make a difference. How can I honor that? Who are you Evelyn?
My client also took time for me, and posed in a similar sweater like Evelyn is wearing in the key photograph. I needed to see folds all around. Folds are so important. In a recent sculpture of a young man playing ultimate frisbee I hired a young man of similar size to be my model. He spent an hour jumping up and down in the yard of my studio while I took video. Photographs were impossible as I could never catch the folds I needed when he was at the high point of his jump. So I filmed him, and then took stills to use as reference.
I could have had a friend pose for me, in a sweater like Evelyn’s, but even this little detail of having someone she knew and love pose, this makes a difference. We are cocreating. This is not just “my” artwork it becomes “our” artwork.

I’m becoming intimately familiar with the stature and physical nuances of Evelyn. I study the photographs. There are photograph from many different ages. Some are taken at 20- 50 even 70 year of age. This process is much easier at this age. Once I had to do a sculpture of a little boy who had passed away, the reference photographs I had spanned from ages 1-4 and 7. A child has huge changes in facial and body structure at that age. This is not so much with a grown person.

helps me to see elements without a
lot of visual distraction.
I’m spending time today tracing some of these photographs. I can set them over my digital sculpture image the way I would use them comparing them to shape and form traditionally in the studio. Again this process is giving me the general shape of Evelyn, so that I can have it enlarged for an armature to put on the clay. Tracing these images helps me to see the basic shape without a lot of visual disturbance.
Length of Skirt
My client helped to confirm the length of the skirt. We changed the length and, as mentioned in a previous post, the height of the figure. Much more to do on this model before sending it off. My goal is to have it to the enlarger before I leave town at the end of the month. That way, if I am lucky, the armature will be waiting for me upon my return.
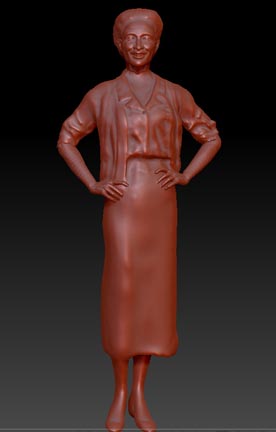
on details for my armature and model.
I can’t wait to get my hands dirty.
All of the digital preparations are nice,
but I long to be with the piece physically.
Thinking
I’m looking at the pearls and wondering, where did she get them? My husband gave me pearls. I don’t wear jewelry, not even my wedding ring. It is hard to wear jewelry when you have your hands in goo most of the time. But pearls are all I wanted, a simple strand to wear when we go out. So, I think about these intimate details as I work on the sculpture.
Some of my thoughts, broad back, slight overbite, questioning her earrings, thinking about how she brushed her hair, who did it for her?
This is the Christmas Card From the University
How nice. Thanks for sending it to me Dr. Talley

Detailed Description of The Process of Tra-digi Art
POSER, DAZ 3D and Zbrush- Creating of digital armatures
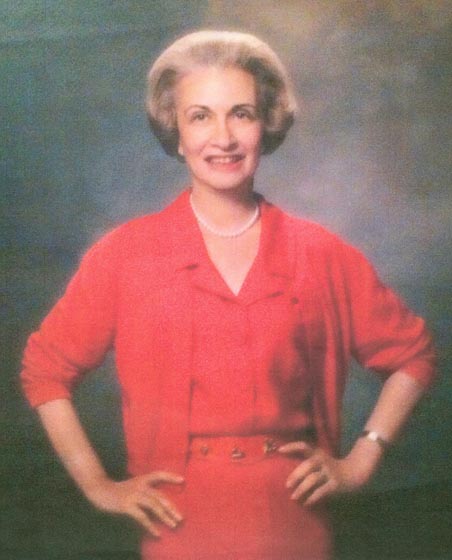
Evelyn Rubenstein Jewish Community Center.
This is a rather long and detailed explanation for a process that I use called tra-digi art. It is copied from my sculpture blog, and is intended to not only show the process, but help other individuals who are learning these processes. Tra-digi art is incorporating traditional processes with digital processes for artwork that is realized in a physical form.
In this project I’m trying to obtain an armature that I can use for the new life-size bronze sculpture of Evelyn Rubenstein. I know my pose, so I don’t need a tradition sculpted maquette to show my client. The pose is from a photograph that my client has of Evelyn in a suit. I am, however, missing some information such as the position of her legs. And I need to create a 3d model of this pose because I intend on having it milled for me. In other words, Synappsys digital services will take my 3d model enlarge it and mill it out in foam, instead of me having to go through the tedious process of welding medal, using spray foam and making a life-size armature as I used to do before the tra-digi process. This process is very similar to what I did with the 11 foot panther project.
So. using the provided picture and a program called Poser along with Daz 3d models and 3d clothes I can expedite my process by creating a similar pose to the one in the photograph.
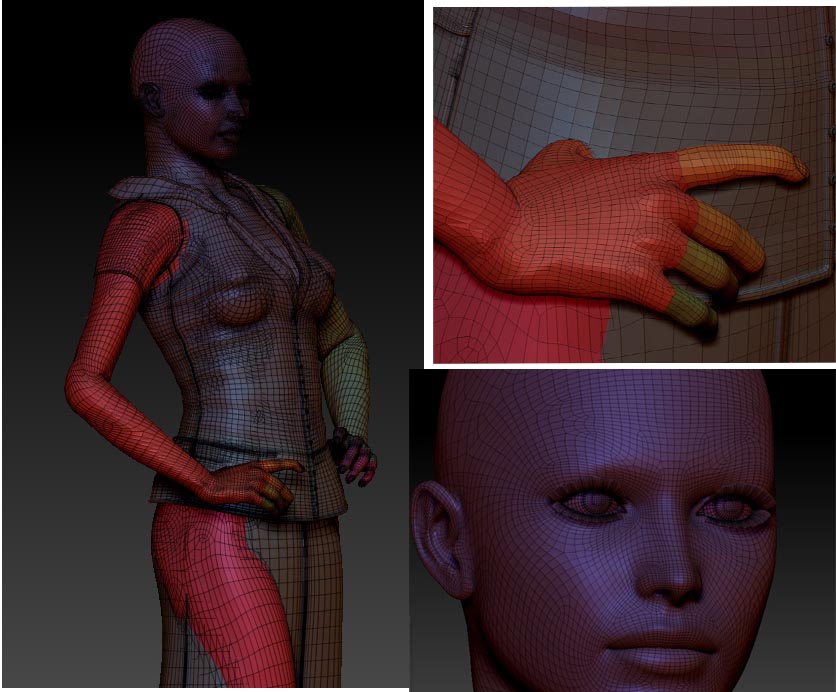
It helps me to be able to see and I can create the information that I don’t
have in the photograph, like her legs and feet
I really like working in Poser, though Daz 3d does have a free modeling program that does the same thing, I wish I had the time to learn it. Poser, feels very intuitive for what I am trying to do, I can push and pull, repose, try different things- meanwhile seeing my figure from all sides and getting to “feel” the pose. I’m not using Poser to “create my art,” instead it is just as one would use their clay, or how we used to use an old wooden maquette to get a feel for the pose and try out different elements. I have done this before and have a video of the Jenna project that shows this process in more detail.
In the picture of the Poser model on this page, it is showing the mesh, or underlying structure. I need to see this to be able to know how things will work as I continue on the sculpture. For example, this model has eyelashes. I would not want that “milled” out and so they must be taken out before I can bring it into zbrush.
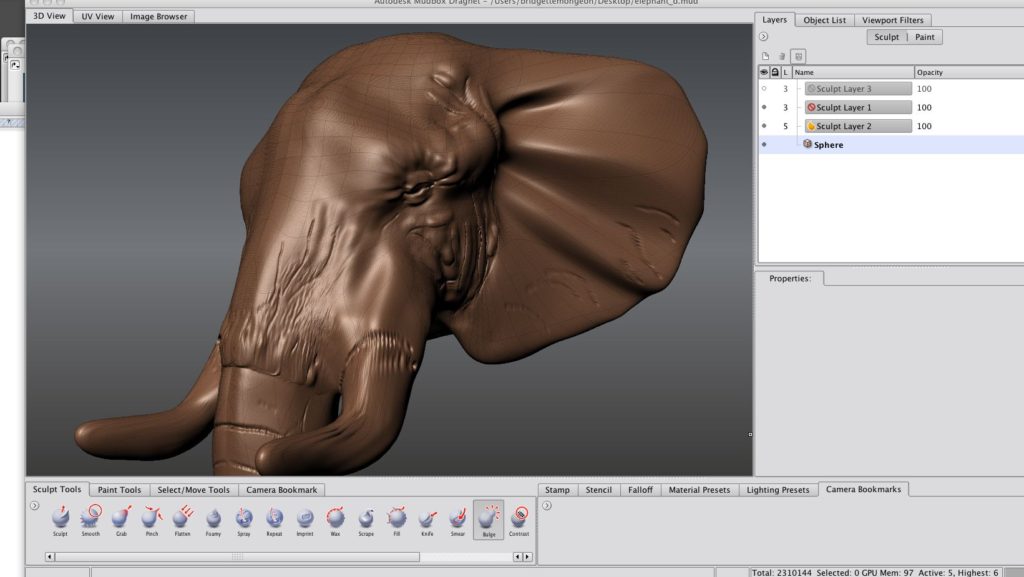
the underlying mesh or geometry. Then when you tried to sculpt
on the piece it would be deformed.
Zbrush by Pixologic, is one of the digital sculpting program that I use. It has quite a few new features. Dyanmesh being one of them. Usually Dyanmesh is used to sculpt from a blob, pull things out and then it remeshes the 3d model so there is no pulled or deformed geometry. This pulled gemoetry was one of the things I hated about digital sculpting, when I started years ago. Basically what this means is that behind every computer generated sculpture there is an underlying mesh.
If you double click on the elephant sculpture you will see a larger photograph that demonstrates the pulled mesh that I am speaking of. See how the squares are not uniform but some are bigger and further apart? Now, the digital tools are improving. It makes it more and more like traditional sculpture. For example, with Dyanmesh in Zbrush- just pull and push and add digital clay and then press a Dyanmesh button and the program magically creates your sculpture into an overall good workable mesh.
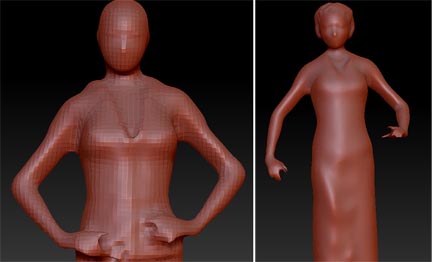
So far my workflow has been, Poser, and Zbrush, but I have had to do this in parts. When bringing the entire figure back into Poser I am using Dyanmesh to remesh the underlying structure so that I can revise it.
I had to experiment with a few different resolution settings. But I was able to get a pretty good mesh that I could work on. Problems with dynamesh with my process- holes. I found that I had some holes in the geometry in my piece when I remeshed using dynamesh in Zbrush. Just use the inflate tool and then remesh using dynamesh and this usually fixes the problem. Remember you are trying to get a basic geometry to work with. You can’t do details when using dynamesh.
Still needs some work.
I believe I will shorten her legs
a bit as well as her skirt.
I also will add her pearls.
The back of the sculpture
needs work, I’m off next
week to take some pictures
of her daughter-in-law
with a sweater on
so I can see the folds.
Yes, I could have started from scratch and sculpted Evelyn in the computer from a ball of clay, but this way expedites my process. I can see what a mesh will look like coming from Poser and remeshed. I think this may work.
I worked on the head, which in this view still needs more hair and is not a true likeness of Evelyn, but has a good form to start with. Much of the final detail is done in real clay down in my sculpture studio. I also worked on her arms separately. Now that I have gotten her this far here are the problems I have to work out.
Height. I believe my original model used in Poser is too big, and after confirmation I find that the Victoria 4 base model is 5’10.5″ tall. My subject evelyn is 5’6″. This confirms some of the visual things I was noticing with this sculpture. The other thing is that I believe the skirt in this view is a bit too long. Call me a stickler but I’m going to shorten it a bit, or try different lengths to see what I like. Back to the drawing board. I’ll update more later.
If you are new to 3d sculpting and want to learn about topology, a wonderful video is created by Guerilla CG Called Subdivision Topology: Artifacts. It is a good thing to realize what is going on behind the scene, but I am thankful that the sculpting programs are making it easier for artists to sculpt without having to deal with the mundane but necessary topology.
Armature-Part 2
I have been using digital processes with my traditional sculpting processes for a while. A process I call tra-digi art. I was thrilled to create a book on part of this topic called Digital Sculpting In Mudbox: Essential Tools and Techniques for Artists.
It still feels strange to do so much work on a sculpture and not getting my fingers dirty in clay. But here I sit in my office, above my studio, working out details of Evelyn. The pose has been decided on, but there are some details of this pose that need to be worked out.
1. In what position are her feet? What is the missing information that I don’t have in my reference photograph?
2. How will she stand within her placement at the Evelyn Rubenstein Jewish Community Center? She is going in the lobby, but we need her to work well in the lobby design and, still be secure. That means she has to be secured to the floor and perhaps a third point. I’m considering hiding that 3rd place of securing in her right elbow sweater folds.
I will not be creating this armature in the traditional process as mentioned in part one, instead I will be creating the basic armature of her within the computer and Synappsys Digital Service In Oklahoma will take my 3d file and then mill out an armature in foam. Then, I will cover the foam with clay and add my details. You can see this milling part of the process in the video showing Jenna in the previous post. You can also see how we used a foam armature if you take a look at the Prairie View Panther Project Blog. The Prairie View Panther was a large 11 foot panther that was created in bronze for Prairie View University in Prairie View Texas.
In the next post you will see my process of working up the digital sketch of Evelyn for her armature.
Creating an Armature- Part 1
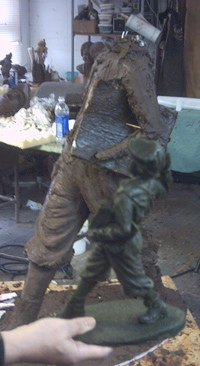
to the enlarged Newsboy sculpture
piece, point by point. This will
not be the process used to
create the armature of Evelyn.
Instead new digital process
will be used by the artist.
Traditional sculpture has changed for some over the years. When it comes to creating a sculpture for a client, many start with a small maquette, or small sculpture. This is usually done to try to obtain a pose and work out the movement of a piece. An example of creating a maquette can be seen in my Newsboy blog, and is shown on this page.
In the case of the Evelyn sculpture we are not going to create a maquette. Instead, we are going right to a large sculpture. The reason for this is that we know the pose. It has been decided on, and there is little to figure out in this sculpture project.
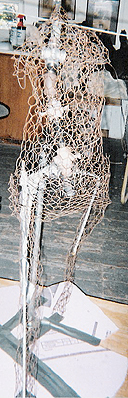
life-size sculpture
of the newsboy.
Going from a maquette to a large sculpture in the traditional process can be very, very time consuming, and up until adding digital technology to my process, it was one of my least favorite things to do. There is some detail about this traditional process in my journal of creating the newsboy. The process consists of measuring up the sculpture, point by point, creating an armature, made up of rebar, and or pipe, chicken wire, spray foam and then of course clay. It is time consuming and not a very creative part of the process, but it is necessary.
New part of my creative process
Over the last few years I have been incorporating both traditional process of sculpting with digital technology. You will see this in the up and coming posts about the armature. I call this tra-digi art. I love it, it expedites my process, gives me more control over my tools, and when these tools are used to help to create a pose, as the example of Jenna in the video below, it helps my client to visualize the piece.
Here is a video that describes how I have used tra-digi art in the past. Check back to see how we are using this with Evelyn.
The Pose
The pose of the sculpture to be created for the Evelyn Rubenstein Jewish Community Center- Houston has already been decided on. It will be the exact pose that you see of her hands on hips, sweater, suite and pearls. This pose was already decided on by my client before I came into the picture, but I love it. I think, it has a personal meaning to me as well.
I didn’t know Evelyn, I wish I had. I hope I can as I work on this project. Some tell me I develop a relationship with the deceased through my posthumous sculpture. I know it sounds a bit strange, but in hindsight, I guess that is what I do. I learn so much about them. It is important to me to do this, as I want more than a likeness, I want their essence.
What this pose tells me….
Back in the 80’s I was reprimanded for this pose. Yes, a man once told me a woman never puts her hands on her hips. I disagree. This pose says, I’m confident of myself, I’m friendly, but… don’t cross me, I know what I am doing. Perhaps, back in the 80’s with the man who said it to me, it was threatening to him. I’m overjoyed to see this pose that demonstrates not only strength but grace at the same time. Wow, how she does that is so impressive. I hope I can transfer that to the clay.
Often, when working on posthumous sculpture I get a “feel” for the person. This is most likely drawn by the comments I hear from others. That is why I count on the stories of others, and visiting with others about Evelyn.
What I feel about Evelyn today
Empowered.
Strong
Creating a legacy
I’m honored to work on this sculpture, and look forward to getting to know Evelyn a bit more.
A Wonderful Project For 2012- Finding Evelyn Rubenstein

I am very pleased to announce that I have been asked to create a life-size sculpture of a very influential woman of Houston. The Jewish Community Center has been renamed as the Evelyn Rubenstein Jewish Community Center. It is my job to capture not just the likeness of this woman, but the spirit and essence of someone I have never known. I’m up for the challenge, but unlike many of my other posthumous sculptures, it is difficult to find information on Evelyn. I count on family and friends to assist me with this process. For me posthumous sculpture is a cocreation between myself and those who know and love my subject. It is their stories that assist me with that etherial part of posthumous portrait sculpting. So if you knew Evelyn, please share your stories. You can do so through comments or by contacting me directly
The life-size sculpture will greet individuals as they enter and leave the ERJCC.
Here is an article in the Jewish Herald Voice describing the entire new renaming.