
A Contest In 3D Printing? Your Work Printed-Thoughts
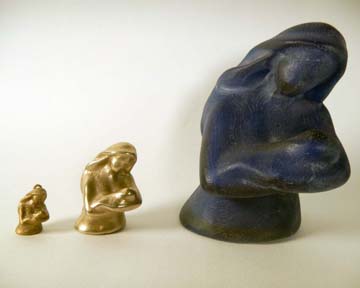
Tools and Techniques for Artists- Chapter 7
on scanning printing and milling”. Artwork by Bridgette Mongeon
I have been working diligently on 3DCAMP Houston planning committee. We are still working out all of our sponsors and exhibitors and we have a couple of exhibitors/sponsors specializing in rapid prototyping. I thought it might be a good idea to work out a contest, this would not be just for those attending 3DCAMP Houston, but for anyone. I’m posting this to see how others feel about the contest and to find some suggestions in putting this contest together, and if this is a viable endeavor?
The contest would be open to everyone, and not just those attending 3DCAMP Houston. That way, we promote what we are doing at 3DCAMP Houston and our sponsors, while talking about the contest. It is a win, win situation.
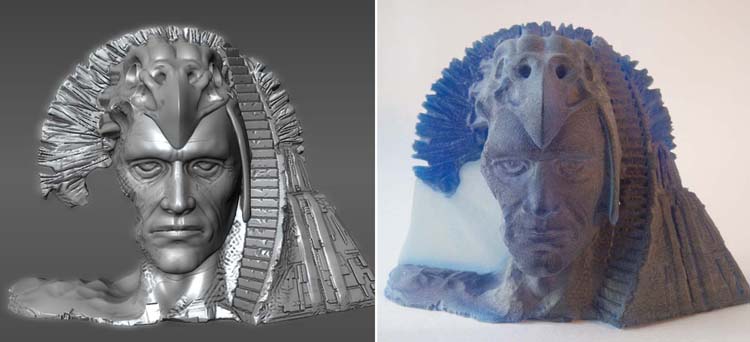
The thought is that individuals would send images of their 3d work ( I figure requesting jpg images from 2-3 sides would be sufficient. We would have to designate the file size.Then if they are chosen they can send us the designated file.)
Then our committee will pick from the designs and then the 3DCAMP Houston visiting sponsors could print out the design. The winners can be displayed in our art show scheduled the day before the conference and stay up through the conference. A copy would be sent to those who have won. ( That same print that is displayed could be sent to the individual, but I’m not sure if we would need it, perhaps we would like to display it again next year?)
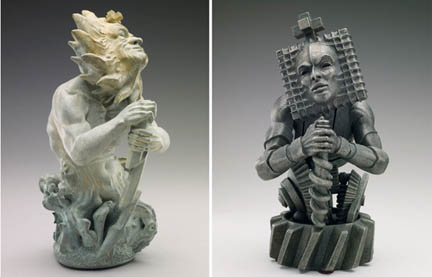
Techniques for Artists- Chapter 7 on
scanning printing and milling. “Artwork by Gil Bruvel
I’m just wondering how others would structure such an endeavor, and some of the guidelines. I’m sure that the equipment of some of our sponsors will dictate which piece is printed by which sponsor? For example a piece in color or pieces that move. We are still finalizing our sponsorships and so I can not say what type of machines or who the sponsors are at this moment, as we will be finalizing this in the next few weeks. Just writing to get some general information and thoughts about the idea.
About 3DCAMP Houston 2012
3DCAMP Houston is working with a not for profit organization to educate individuals in everything 3D. The event is for 2- 3 days. beginning with an art show on Friday the 28th of September, an all day symposium with speakers on the 29th of September, and possibly workshops in different software on Sunday for those who register. There is also an exhibitors space. Our event this year is being hosted by The University Of Houston College of Sciences and Mathematics along with the School of Art. We are incorporating STEAM an educational initiative that support Science, Technology, Engineering, Art and Math. For more information please see our press release on the 3DCAMP website. Therefore, perhaps we have categories of participation in the contest that represent different fields? I’m open for suggestions. Any thoughts out there?
______
The photographs in this post are from my book “Digital Sculpting with Mudbox: Essential tools and techniques for Artists” Chapter 7 Scanning, Printing, and Milling.
I am presently working on another book that extends chapter 7 of the Mudbox book and focuses on the work of artists and their process of using 3D, for artwork realized in a physical form, as well as the process and pitfalls of these tools. It will also be a source book of resources and vendors for those interested in extending their tools set to include this type of work.
_______________________________________________

Bridgette Mongeon
Bridgette Mongeon-Sculptor, Writer and Speaker
Bridgette Mongeon is a sculptor, writer, illustrator and educator as well as a public speaker.
Her blog can be found at https://creativesculpture.com.
She is deeply engrossed in the planning committee for 3DCAMP Houston 2012 http://www.3dcamphouston.com
She is also the owner and creator of the God’s Word Collectible Sculpture series
Follow the artists on twitter twitter.com/Sculptorwriter twitter.com/creategodsword
Listen to The Creative Christian Podcast or the Inspiration/Generation Podcast
Click on Podcast Host Bios for a list of all podcasts.
3DCAMP Houston Returns In 2012 With The Collaboration Of The University of Houston to Build STEAM

Press Release (Houston, TX—June 24, 2012) 3DCAMP Houston, a local organization supporting education in all things 3D, is proud to announce its return scheduled for Saturday, September 29. The University of Houston College of Natural Sciences and Mathematics and the School of Art will host 3DCAMP Houston 2012, featuring a number of expert speakers who will discuss 3D technologies and how they are impacting new and existing disciplines. This year the camp will also feature an art exhibition to showcase the impact of technology on art.
3D technology, once reserved for the likes of sophisticated science fiction films, has advanced to now include a myriad of artistic and scientific disciplines. This year’s camp will showcase these advancements with presentations exploring innovative technologies. From holographic paintings that tantalize the viewer to 3D printers that produce completely formed sculptures, there is something amazing for everyone to experience.
The goal of 3DCAMP Houston 2012 is to encourage and educate individuals about the use of 3D in various disciplines; therefore 3DCAMP 2012 is returning with STEAM, an educational initiative that supports 3DCAMP Houston educational goal of incorporating and encouraging the blending and education of Science, Technology, Engineering, Art and Math (STEAM).
“The College of Natural Sciences and Mathematics at the University of Houston is pleased to help further the community’s appreciation and knowledge of the many aspects of 3D applications in our modern world. The rapid evolution in visualization technology is playing a critical role in advancing many important areas, from medical and surgical techniques to new methods of energy realization and information transmission,” said Mark A. Smith, dean of the college. “With the university playing a critical role nationwide in these developments, it is satisfying as well as natural to help bring this understanding to our community through 3DCAMP 2012.”

Rex Koontz, director of the university’s School of Art added, “Technology, art and design are converging into a significant force on our cultural and economic landscape. The School of Art welcomes the opportunity to work with the cast of 3DCAMP to further the goal of creating synergies between art and technology.”
3DCAMP Houston is an all-day event and is open to the public. It features lectures and presentations from professionals in the arts, architecture, engineering, science and much more. Online registration will open in July at www.3dcamphouston.com
Vendors will be on hand to demonstrate the possibilities and uses of some of the most interesting and mind-blowing 3D technology. “The Third Dimension,” an art exhibition comprised of 3D art, will be open to the public on Friday, September 28.
For more information concerning 3DCAMP Houston 2012, the art exhibition, and volunteer opportunities please visit www.3dcamphouston.com.
Media Contact:
Bridgette Mongeon
Please feel free to repost this press release, with photo credits.
Summer Sculpting Internship
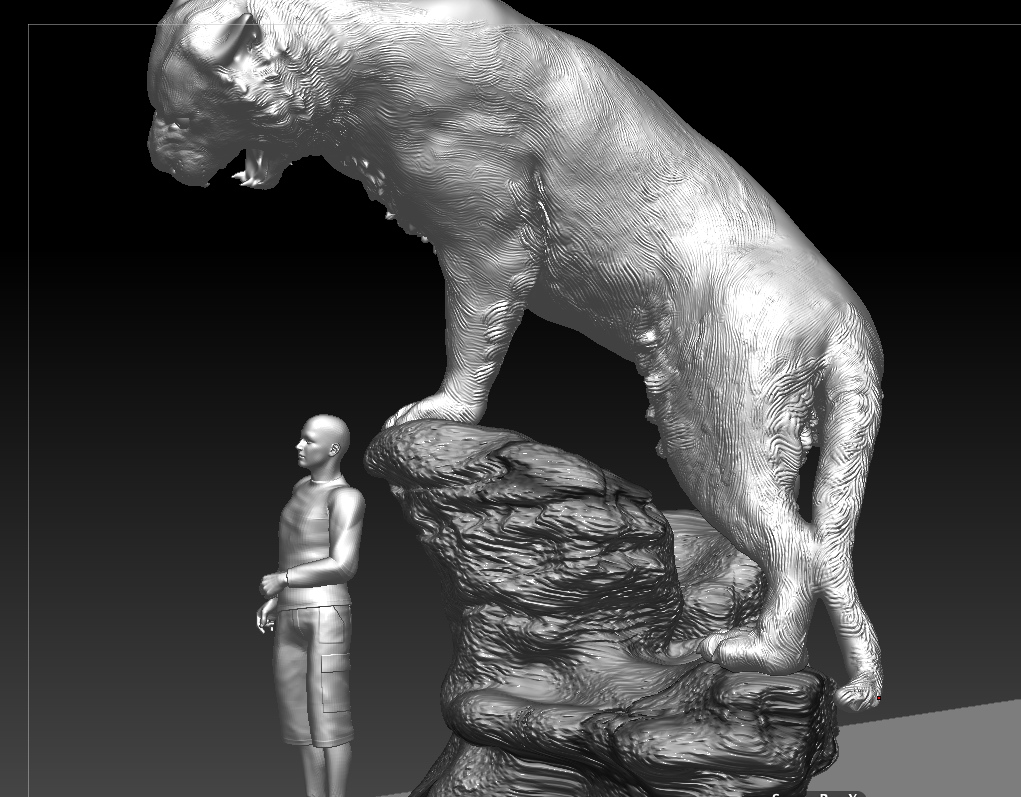
Bridgette Mongeon is searching for individuals interested in learning to sculpt. This is an internship creating a monumental bronze sculpture of 13+ foot tiger climbing a rock ledge. In this internship you will assist sculptor Bridgette Mongeon, along with other interns in the armature building, sculpting and mold making process. You will also be trained in the foundry process of casting and the artists digital process for creating presentations and armatures. The project should beginning the first weeks of July and go through August- hours are flexible. Knowledge of sculpting is helpful but not necessary, what is required is a passion for creating and a desire to learn and get connected in the Houston arts. Because of the massive size of the sculpture the sculptor will be relocating her studio to temporary space in a rented warehouse in the central part of Houston. If you are interested in more information on internships check out the artists blog post “What is an internship?” You might like to check out the project blog created for the artist’s last sculpted mascot project created for Prairie View A & M University of a large panther, or the last internship job creating the sculpture of Evelyn Rubenstein The Evelyn Rubenstein project is still a work in progress as the foundry finishes up the sculpture casting.
If you are interested please contact the artist directly concerning your intent and availability.
Bridgette Mongeon-Sculptor, Writer and Speaker
Bridgette Mongeon is a sculptor, writer, illustrator and educator as well as a public speaker.
Her blog can be found at https://creativesculpture.com.
On the planning committee for 3DCAMP Houston 2012 http://www.3dcamphouston.com
She is also the owner and creator of the God’s Word Collectible Sculpture series
Follow the artists on twitter twitter.com/Sculptorwriter twitter.com/creategodsword
Listen to The Creative Christian Podcast or the Inspiration/Generation Podcast
Click on Podcast Host Bios for a list of all podcasts.
Teaching Myself And Learning From Others Part 3
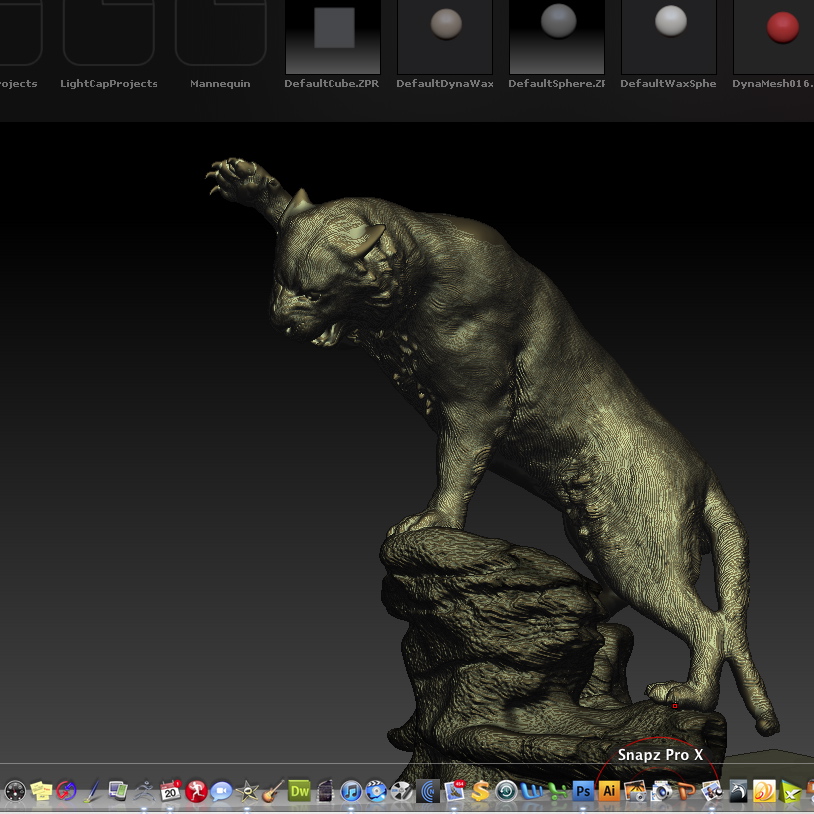

This is a post/tutorial that has been continued from Teaching myself and learning from others part 2. I’m continuing on with my progress of getting this to work on my project. (Please note this is a WIP)
Well… Kevin and I cheated. I got the bronze color by uploading his material. Because my sculpture has so much texture, as compared to his in the video it automatically makes the sculpture look different. (I’m kind of known for my textures and with the traditional process it also changes the color of the patination.) When sculpting on the real clay I believe I will really emphasize the stripes by carving the fur differently where the stripes are. I’ll probably give it more texture or more strokes. Because, unlike the digital process, weather will change my traditional sculpture patination. Even if it goes dark, I will need the stripes to show. But for now, it is back to the digital model.
A little too green, so I bumped down the color diffuse on the blue, hey it almost sounds like I know what I am doing now. I now want to change my specular but my curve looks all wonky. Not sure how to get it to do what I want it to do.
—Mental note- remove unwanted dots on specular curve by dragging them off. And there is a tiny reset button under the shift if it gets really out of control. Kevin confirms that his too is a little wonky at times.
I also must remember to do a quick render ( shift R) because the digital model looks way different with the render than it does just working on the screen.
Now I’m on to part 5.58 on Kevin’s 14 minute video made for me for this tutorial. So on to making a darker color of the material for the stripes.


So instead of Kevin’s green of 72 red, 116 green, and 93 blue, I oped for a darker brown 109 red, 59 green, and 33blue. Maybe I’ll lighten it just a touch using the mixer that Kevin has introduced me to.
I also decided I would play with the noise slider. I have never been one to see differences in this type of thing. Often my husband Mike de la Flor will work with photoshop and say, “see this?” and well, I just don’t see it. I think it is because I don’t work with color and have not for years. Of course I work with the color terra-cotta, longhorn white, as it pertains to clay and bronze. I really, really want to learn color and rendering with zbrush. I have some illustrations I would like to do. So maybe I can talk Keven into doing some more of these tutorials with me.

I’m posting both of these renders. One is at noise level of 10 and the other 129. Though I can’t say what the difference is, if there is any, I m gravitating to the higher noise level than the lower. I don’t know why, to me it looks like the bronze has been bead blasted instead of sand blasted. Bead blasting feels softer.

On to stripes.
I wish it would be so easy. Kevin says to copy the material and then paste it so I have a duplicate. It took a couple of tries but I managed to do it. I actually feel good about the process. On to rendering.
Stay tuned for part 4 of ?

Bridgette Mongeon-Sculptor, Writer and Speaker
Bridgette Mongeon is a sculptor, writer, illustrator and educator as well as a public speaker.
Her blog can be found at https://creativesculpture.com.
On the planning committee for 3DCAMP Houston 2012 http://www.3dcamphouston.com
She is also the owner and creator of the God’s Word Collectible Sculpture series
Follow the artists on twitter twitter.com/Sculptorwriter twitter.com/creategodsword
Listen to The Creative Christian Podcast or the Inspiration/Generation Podcast
Click on Podcast Host Bios for a list of all podcasts.
Teaching Myself And Learning From Others Cont Part 2 of_____

This is a post/tutorial that has been continued from Teaching myself and learning from others part 1. If you are following along, this is a wonderful video tutorial explained by Kevin Salki . You can find the video in post 1. I’m continuing on with my progress of getting this to work in this blog post. (THE SCULPTURE IS NOT FINISHED YET)
STEP ONE- applying double shader- when I did this I had a mess which looked something like this.
What I discovered was that I just had my lights switched off and my color was set to black. I’m really not sure which of these fixed the problem but I’m on target. My black painting that I did on the tiger, shown in previous post, also seems to have disappeared. It would be nice if it stays gone. DUH! so I fixed that and now mine looks just like the video.
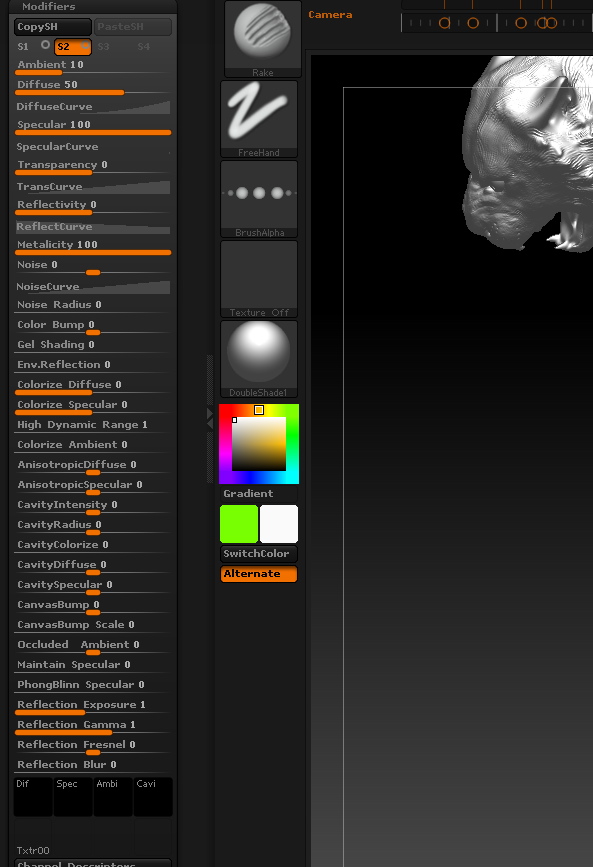
I used subtool master found in the Zplugin menu and now have what Kevin has. ( I am on .41 of his instructional video created especially for my project, the video is located in part 1 of Teaching myself and learning from others part 1. I owe this man a debt of gratitude for walking me through this.)
I’m so glad this is a video and not written because as he proceeds and I see all of the things in the modifiers of materials menu, my eyes glaze over. I am a traditional sculptor entering this digital process a few years back. I still don’t know what half of this stuff does. And I
probably know enough to be very dangerous with ZBrush. When 3D guys talk about things like ambient occlusion or speculators or whatever, well, they might as well be talking Greek. But this is how I learn best, show me and let me try. The terms I hear Kevin say just before 1.36 are “Diffuser,” “Speculator,” and “Cavity.” I have made a mental note and this blog post to remind myself- look this up. Maybe I can figure out what these actually do. But now to follow the video and see what happens.I have picked my base color and indeed it comes up in the little box marked diffused. he sayed that is my base color, so even though I don’t know why they call it diffused, I’m head somewhere.
I adjust my specular as he states, again, no idea what I am doing, nor what specular is but Kevin says “this is what determines how glossy the material looks ” Indeed, I’m seeing this as well. But I think, even when I am doing patination at the foundry I turn to the foundry man and say, “Give me a little more brown, kick it back here, can you do some more highlights there.” Even so, when at the foundry I tell the person doing the patination, hit it with water, because as they apply the chemicals I can’t really tell what it will look like in the end when it is waxed. The water helps me to do that. No, won’t be hitting my Wacom with water, but I guess, I’m doing my own patination. I’m beginning to get a little giddy.
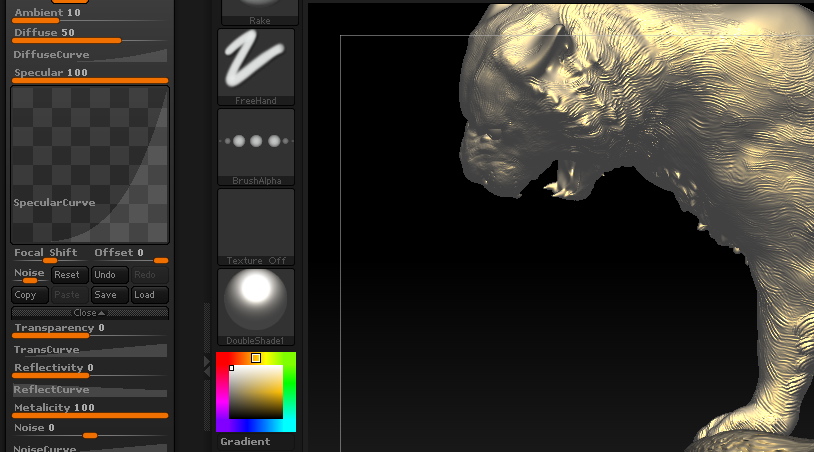
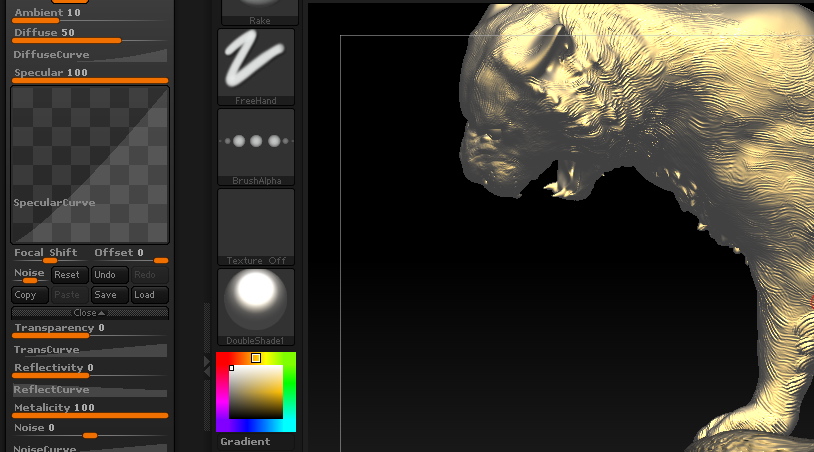
Yes, I’m only at 2:02 of this 14 minute video. And he says to drop down the ambiant and crank up the diffused? Following along master.
Dropping down the ambient makes if feel richer. I like where I am going. The hardest part about watching this video is I can not see the numbers. My ambient is set to 2. I have no idea what the diffused should be set to I did mine at about 44.
On to the “second property of this material.” 2.14 of the video found in the previous post Teaching myself and learning from others part 1.
Here I am stuck! I assume that the S1, S2, S3 and S4 are channels of color that I am mixing to create my bronze material. I think I actually did mine backwards and my S2 was the gold and my S1 is the green. I don’t suppose that matters. Remember, I am in a place I have never been before. So clicking around on things, I realize that the little circles next to S not sure what it does. however, I can’t see the secondary color. I do notice that as I click around on these little dots the color turns off and on, but still my green is not turning on. Perplexed. Little grasshopper runs to the master to see what he says.
Facebook is a wonder and Kevin Salki who has created this video for me, has looked at my screens shot to the right that says “woops” and notices a few things. His reply “Crank your “Colorize Diffuse” to 100 Also, at the top of the properties you can play around with your ambient and diffuse numbers, in the video I set the ambient to 2 and diffuse to 88″

I follow as a little grasshopper should to the ZBrush master, and now I get something like this.
I ask Kevin a few questions.
ME: “Out of curiosity, if I don’t like how these look blended can I go back and change them?”
Kevin: “Yup, nothing is really ever permanent in zbrush, you can readjust the look of your material on the fly. I recommend doing the “mixer” option on the second color rather than the first (how I did it in my video). If you want to have the oxidized look of the green be the dominant color, and the original bronze in the cavities.”
ME: “ok so switch them? Gold as S1 and Green as S2? or is this something that you do in the mixer pallet?”
Kevin: “So after 2:22, I had just finished setting the second color. It really doesn’t matter which one is where, just so long as you remember that the one you do the mixer on will cause the other color to come through more. So if green is on S2 and you use the mix by Cavity option (as in the video) you are telling zbrush that you want the green to be confined to the cavities mainly, therefore the bronze will bleed through as the green is pushed into the cavities of your model.”
Kevin: “Oh, and clicking on the little circles in the S1 and S2 buttons will disable that section. So if you are seeing black, its because you’ve temporarily disabled that part of the material.”
On to the mixing. OR NOT
I tried to create channel 1 and 2 as Kevin said, I had many questions and in the end I ended up making my s1 gold and my s2 green. Still my results don’t look the same as his. Is it a mac/pc thing? Well I still have some sculpting to do on the piece. So, I’ll finish sculpting and try this again later. I will get to the point of presenting in the next day or so. I must. I’ll continue to document my progress with Kevin’s video.
For those watching this blog, after presenting the sculpture as a bronze in zbrush it will be modified and sent to Synappsys digital services. Here Synappsys will enlarge my file and mill it out in foam so that I can create this larger than life-size bronze. There is a blog on a similar project that I did for Prairie View A & M here. The same process is documented in this photo album on my personal facebook page. Soon this tiger project will be documented in a blog.
Stay tuned for part 3 of ?
_______________________________________________
Bridgette Mongeon-Sculptor, Writer and Speaker
Bridgette Mongeon is a sculptor, writer, illustrator and educator as well as a public speaker.
Her blog can be found at https://creativesculpture.com.
On the planning committee for 3DCAMP Houston 2012 http://www.3dcamphouston.com
She is also the owner and creator of the God’s Word Collectible Sculpture series
Follow the artists on twitter twitter.com/Sculptorwriter twitter.com/creategodsword
Listen to The Creative Christian Podcast or the Inspiration/Generation Podcast
Click on Podcast Host Bios for a list of all podcasts.
A Quote From Dick Hathaway
Heard this quote from Dick Hathaway, anyone have another?
“I’d rather risk high indiscretion than boredom.”
Teaching Myself And Learning From Others
The title of this blog post is “Teaching myself and learning from others”. This is the entire process of how I learn things. I plug away at a project and search for answers. I got stuck on this recent project and this incredible person Kevin Salki from the Facebook Zbrush forum came to my aid, and he even created a video to help. It is so incredible when you find someone who is willing to go the extra effort to assist you in your learning process. I thought I might take this entire post and document this learning process on this specific subject.
To recap- I’m working in ZBrush trying to put together a presentation for a traditional sculpture project by working digitally. For example -how I did with the Mad Hatter tea party “Move one place on” pitch to a recent client.
“Move one place on” a life size sculpture for a park.
I noticed that when I was working on Mad Hatter sculpture that the Metcap material that I applied to the sculpture to make it look bronze did not interact with the lights, and therefore I had a hard time lighting it. For those of you new to ZBrush , a metcap material can be applied to your sculpture. These are made available in many places. For example check out these metcap materials. However, if I can’t light the sculpture, or put it in a scene, then using a metcap can pose a problem. I have posted this question in numerous places, and until Kevin came along, no one has helped me work through the problem. I’m sure this is not going to be as easy as pushing a few buttons, so I thought I would document how Kevin Salki and I work through it.
Here is my post on the forum
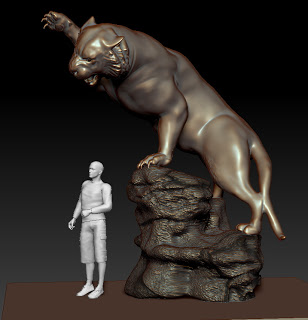
man is placed to show the massive size of this life size sculpture.
ZBrush question. I’m posting everywhere I hope someone can give me guidance, I’m on a deadline.
Any Zbrush users out there? Question- I am creating presentations for a larger than life-size bronze and I am using a metcap bronze that I found on the internet. I like the look, however, if I understand it, metcap materials are not affected by lighting in the final rendering? If this is the case, how would I get the bronze look that I need in my presentations without the metcap?
Being that I will try and take the digital sculpt presentation and put into a photograph of the area that the client has provided, lighting will be essential.
And, In the case of the tiger, I need to add some darker bronze stripes. Now I’m very puzzled. Another problem. How can I add these stripes to the metcap or other solution that I’m sure you guys know, but I can’t figure out?
I had entertained using GoZ but I was not sure if that would work with the metap and I have never used GoZ with anything. If that is a solution, is there a good tutorial on using GoZ and photoshop? I looked everywhere. However, that still does not solved the problem with lighting and a metcap.
I’m posting a picture but it is very much a work in progress. This is a regular part of my workflow as a traditional artist and I would be very thankful if you could help me figure this out.
I can hardly believe that Kevin Salki went to all of the effort to record a video to walk me through this process. So, in light of his educational efforts. I’ll document my process of doing this with him on this blog post. It may be a long one, nothing ever goes smoothly with this sort of thing, in fact, I might have to make it my next couple of posts.
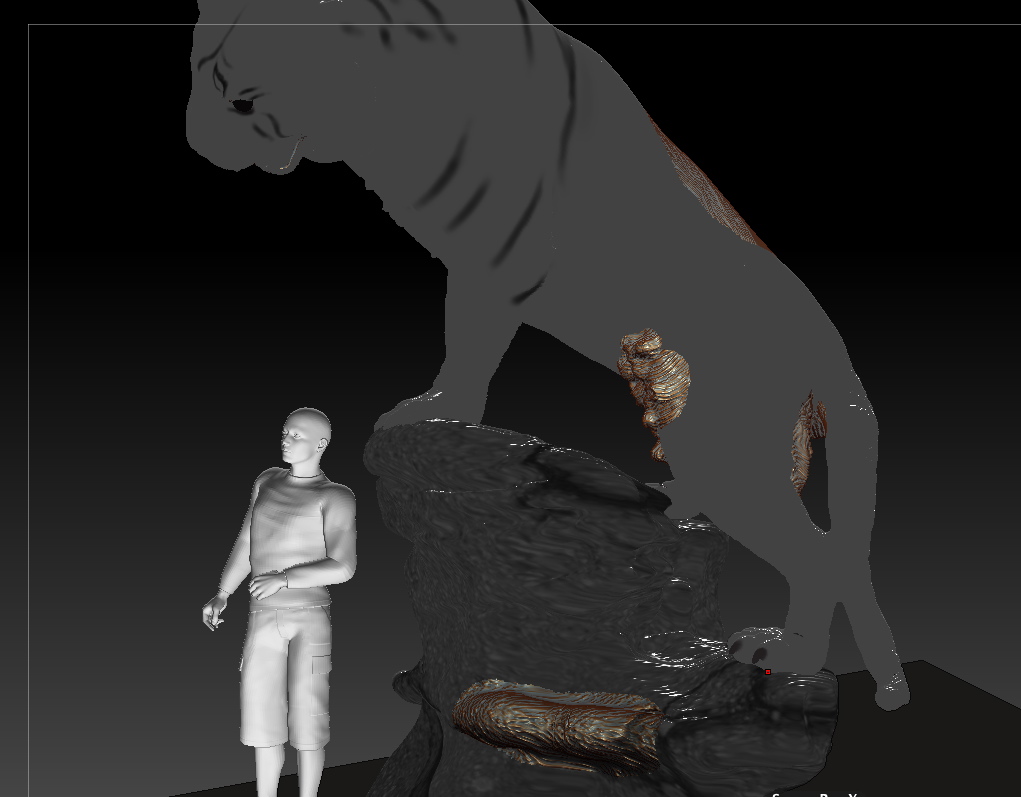
STEP ONE- applying double shader- as I expected- I have to undo the stuff I have done before I can do what Kevin has asked me to do. As I apply a double shader (doubleshade1) in zbrush, this is what I come up with. Also, I started to paint the stripes in and hated it. Should have done it on a layer, but did not and so, I may have to backup to a previously saved version before I did this. Which means a ton more work, but hey that is all about learning. FYI- always save incremental versions of your work. Unfortunately, I have written over my incremental versions and will have to figure out how to undo all of this stuff. or erase the part of the gier where the strips have been put and start again. Now Kevin, do you have any ideas how to make my image look like yours when saying apply double shader?
Stay tuned as we figure out this problem
_______________________________________________
Bridgette Mongeon-Sculptor, Writer and Speaker
Bridgette Mongeon is a sculptor, writer, illustrator and educator as well as a public speaker.
Her blog can be found at https://creativesculpture.com.
On the planning committee for 3DCAMP Houston 2012 http://www.3dcamphouston.com
She is also the owner and creator of the God’s Word Collectible Sculpture series
Follow the artists on twitter twitter.com/Sculptorwriter twitter.com/creategodsword
Listen to The Creative Christian Podcast or the Inspiration/Generation Podcast
Click on Podcast Host Bios for a list of all podcasts.
In The Mouth Of A Tiger

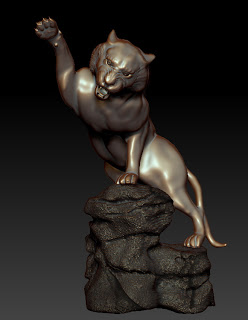
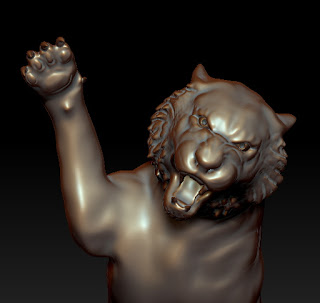
Bridgette continues to work diligently on the digital model of the Grambling tiger. Using ZBrush she will sculpt the 3D Model for approval. This model will then be used for creating the armature enlargement. More on that later. Sculpting the inside of the mouth is just as important as sculpting the Tiger. Seeing the inside of the mouth is a bit difficult. With a google search of Tiger yawn, which is much different than a growl, Bridgette obtains reference for the mouth.
Luckily while working in ZBrush, parts of the mouth can be hidden from view. The artist can hide the lower jaw to sculpt on the roof.
Working On The Final Digital Presentation
Checking in with sculptor Bridgette Mongeon to see the progress on the Grambling Tiger digital presentation.
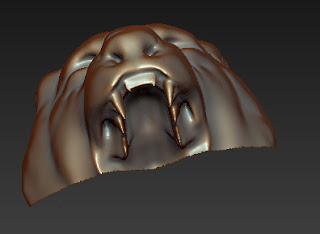
of the model to sculpt hard to reach places.
It is coming along much slower than I had hoped. I’m working diligently with the ZBrush program to come up with exactly what I want, however, it is important to note that this is a digital sculpture, the real sculpture will very much resemble the digital model but will also look different.
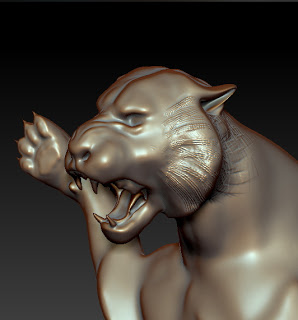
the tigers attitude. The different parts of the Tiger can be
hidden, as mentioned above. The eyes are turned off or hidden
in this view.
With sculpting in ZBrush I also have the opportunity to sculpt inside the mouth. I can actually hide portions of my model, for example the lower jaw, to sculpt the inside and roof of the mouth. I wish it were this easy in traditional clay.
the stone into the design.
I still have such a long way to go. I’m working out the muscle structure of the big cat, the pose and last but not least the stripes will be added. Then I will place the 3d model into the photographs that I received of the area. It does not look like I will have it ready for the schools Monday Meeting.
Here are some screenshots of the work in progress.
size and the height of this big cat. Bridgette works on the
design of the stone and ledge. She wants it to have the “feel”
or general shape of the state of Louisiana,
She also want to add ledges that people can sit on for
Photo opportunities.
INTERNS NEEDED!
Bridgette Mongeon is in the process of looking for interns for the Grambling tiger project. If you know of anyone who would like to be a part of this magnificent sculpture project please contact the artist immediately. If you want to know what an internship is this post is from Ms. Mongeon’s my personal blog and defines an internship. You will see pictures of some of the interns working on the Prairie View A & M Panther with the artist.
Grambling Alumni?
Are there any Grambling Alumni or Alumni family members out there wanting to put their passion for Grambling into a physical form? You will be a part of creating something for your university that will last a very, very long time.
Artist?
Any Houston area artists interested in gaining some experience in this process? If you are a high school students and would like a college letter of recommendation upon the completion of the project, please let the artist know in advance.
Dates and Times
The project will last about 6-8 weeks, or at least your part of the project will last that long. The dates are _____________ ( this will be listed as soon as the date from Grambling is confirmed. Expected dates the first of July through August.) If you can’t work the entire time of the project you are certainly welcome to come in for 2 weeks at a time. Hours are flexible but a commitment to a defined amount of hours is needed in advance. It is hard work, but great fun. You don’t have to be strong or a sculptor to work, however having a passion is nice. Ms. Mongeon can’t teach you passion, she can teach you everything else. The days will start early, to beat the heat, and most often there will be a second shift working late. Ms. Mongeon also works weekends. If you are only available on weekend or evenings that is fine. Just sign up and commit to whatever you can do.
What is expected?
The blog post talks about some of the things that an intern does. All interns are required to sign a release form. If you are a minor you will need your parents permission and they will need to sign a release form. Note interns work with: hot wax, hot clay, they will be climbing scaffolding and ladders, working with power tools and torches.
Location
The location of the project will be confirmed in the next week. It will most likely be in a warehouse in the center of Houston. We are trying to secure a facility that has a large enough ceiling to accommodate the sculpture, it will be about 12 or more feet high when completed, and the sculpting base adds height to that.The warehouse will most likely not have AC, but we will have plenty of fans going.
Paid or Unpaid?
Most of my internships are unpaid, however, Ms. Mongeon has been known to give generous “thank you’s” at the end of the project, if you know what I mean. The rewards for art students far out way any monetary bonus given at the end.
Our beginning agenda
- Move all necessary tools and equipment to rented warehouse space from artists Houston Studio.
- Prep rented warehouse space
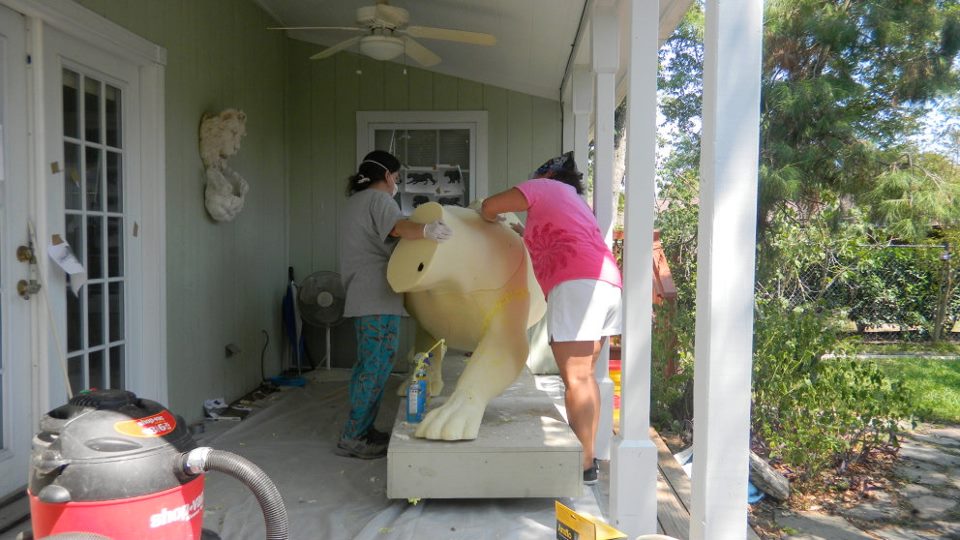
- Put together foam pieces of CNC enlarged digital model.
- Put together armature for boulders. Sculpt boulder foam, cover with wax then cover with clay.
More to come.