A Review of New Technology For The Traditional Studio at the SIGGRAPH Convention
Writings by Ms. Mongeon
Created for Best of Artists and Artisans web site
By Bridgette Mongeon © 2008
Using technology in a traditional art studio can, at first, feel like cheating or it may bring a fear that the technology can somehow overtake the craft and creativity. I mentioned these fears and my introduction to this topic in a recent article titled Exploring Digital Technologies as Applied to Traditional Sculpting– Sculpture Review Winter 2007. In the article, I explored incorporating digital scanning and milling in the traditional sculpting studio. My research alleviated my original concerns and fears as I realized that digital enlargement, though a little intimidating at first, can be combined with traditional techniques offering another tool to use in my creative process, a tool that has the added benefit of providing me with more time to create.
I continued my research into utilizing technology in the traditional art studio while attending the 2008 Siggraph Convention this past August. Siggraph is short for Special Interest Group on Graphics and Interactive Techniques.
I once considered Siggraph as a convention for those working in graphics since it relates to illustration or computer generated special affects for movies. I have watched with curiosity over the years as the technology that has been introduced at Siggraph has infiltrated the 3D world outside the computer and into traditional sculpture studio. Those at Siggraph also seemed to be embracing the idea of bringing technology into the art studio. Three prime areas, besides the main floor of exhibitors, displayed this same exploration.
THE STUDIO
The Studio section hosted six established and emerging resident artists, along with hands on participation for learning and creating in 2d, 3d, and 4d (fourth dimension is time.) Though The Studio contained quite a bit of resources, two visiting artists captured my attention.
Matt Shlian calls himself a paper engineer, creating elaborate sculptures through the use of folded paper, which is not to be confused with true origami because he cuts and glues. My intrigue with the art was that many of the forms generate movement, changing shape with the interaction of the viewer.
It is interesting to point out that many of the artists I researched who were working with technology in their art also crossed over into the area of science. A segment of Matt’s website states this.
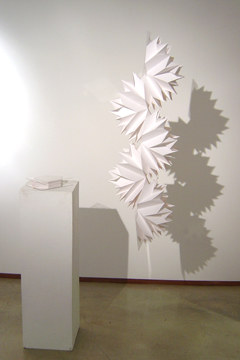
“As a paper engineer my work is rooted in print media, book arts and commercial design. Beginning with an initial fold, a single action causes a transfer of energy to subsequent folds, which ultimately manifest in drawings and three-dimensional forms. I use my engineering skills to create kinetic sculpture, which have lead to collaborations with scientists at the University of Michigan. We work on the nanoscale, translating paper structures to micro origami. Our investigations extend to visualizing cellular division and solar cell development. Researchers see paper engineering as a metaphor for scientific principals; I see their inquiry as basis for artistic inspiration.”
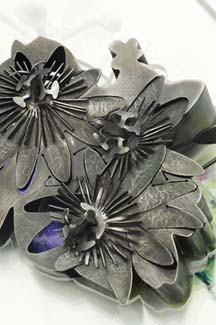
Another person that caught my eye was metal smith and jeweler, Sondra Sherman. I told Sondra that my goal as media at Siggraph was to find artists who were bringing technology into their studio, and she made sure that I knew that her present designs were created by hand, but that learning about the technology that would apply to her art studio was also her goal while at Siggraph. “I believe artists in craft media are always curious about means or materials which might enhance or facilitate their creative expression and which seduces the viewer to engage with the work. I am not interested in the ‘novelty for its own sake’ quality, which the use of technology might bring to my artwork. I am interested in how I might use the attention given to novel forms/materials to attract the viewer to consider what I might be trying to express with that form, as they would with work created in any media or by any means.”
SLOW ART
Slow Art was a juried exhibition. Artists were asked to “reconsider the paradigm of speed and instead consider the concept of “slow art.”’ The questions that were raised— how do you employ speed afforded by technology, how does it affect the work, and the process of creating slow art?
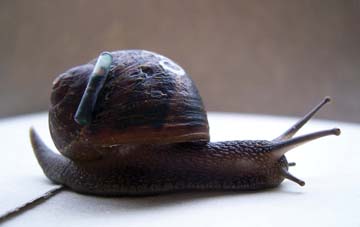
There were a variety of pieces of art in this section that peeked my interest. One of mention was an interactive piece that is the literal description of slow, titled —RealSnailMail. In this exhibit you send an e-mail on a designated computer in the slow art exhibit. It is then sent to a server in the UK. Here the e-mail is in a holding pattern along with the many other e-mails as it waits for a snail equipped with a transmitter in a tank at Bournemouth University, UK, to slide into range of a hot spot that can pick up your message. It then must move to another area of the tank to send it.
I could not help but wonder just how long my snail mail would take to get to a person. I emailed Bournemouth University in the UK using the regular fast e-mail and they quickly replied. “We have done a bit of calculating this morning. As of the 8th of Sept. 2008 we have 8,977 emails waiting. Based on this, if you sent an email today, it would take 24 years, 217 days before it gets to the front of the queue. It then may take a further 69.87 days (average snail transfer time) before being forwarded to its final destination. Therefore, a RealSnailMail sent today should arrive approximately by Thursday 16th of June 2033. Please note times may differ dependent on snail behavior and usage.” Now I am wondering how many people will have their same e-mail address twenty-four years from now.
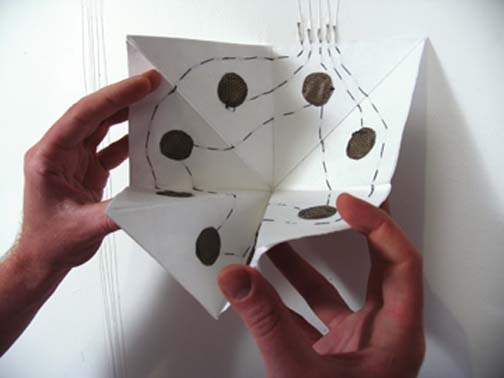
Interaction seemed to be the theme through the entire Siggraph convention. The question was, which sense was going to be stimulated or interacted with, by the art or new technology? Another one of my favorites in the Slow Art integrated vision, touch, and sound. Joo Youn Paek’s Fold Loud was a visual of large sections of tapestry incorporating origami shapes that could be folded, and in doing so, they opened circuits made of conductive material creating harmonic vocal sound.
It was difficult to truly appreciate the Taoist principles intended with this soothing art while standing in a noisy convention hall, and I was glad to see you could hear the work by visiting the Fold Loud website. I loved the opportunity to interact and touch the sculpture and while doing so to also create my own meditation.
DESIGN AND COMPUTATION
The third area depicting art and technology was the Design and Computation section of Siggraph. Here artists, designers, architects, and mathematicians created artwork, images and structures utilizing technology in both design and digital fabrication.
I had many favorites. The two pieces I choose to focus on were not figurative at all but instead were once again patterns and shapes.
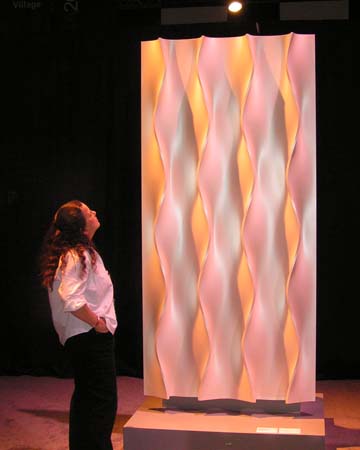
It might seem strange to see the work of a traditional veteran sculpture like Erwin Hauer in the technology exhibit at Siggraph. Hauer created works of modernism that began in 1950 and can be found, not only in museums and collections but also in architecture. The patterns in Hauer’s work held the same intrigue that Shlians paper cutting held for me in The Studio section of Siggraph. Each modular constructivism sculpture of looping forms change as the viewer interacts with the piece, light bouncing off form, shadows moving and blending, creating an entirely different piece of artwork from every angle.
A book of Hauer’s work titled CONTINUA was published in 2004, but it is said that by that time of publishing many of the existing screens had disappeared or were in disrepair, and the laborious task of making molds and casting these screens had not taken place in nearly 40 years. In 2003 computer technologist Enrique Rosado began working with Hauer creating digital files of Hauer’s original work, CONTINUA. Utilizing the new technology of digital files and Computer Numerically Controlled (CNC) milling machines, the team is working to recreate the works of this master.
The journey of translating the designs into the new technology was not easy for Rosado. He found what I have found in my research; often you must push the technology to do what you need it to do, and then wait until it can catch up and become affordable. In a wonderful magazine article about Hauer’s work in Metropolimag.com it states, “These subtleties of balance and proportion were difficult to translate into the software. ‘The computer wants to do what it wants to do,’ Rosado says. ‘And if you’re fastidious, you really have to beat it into submission.”’
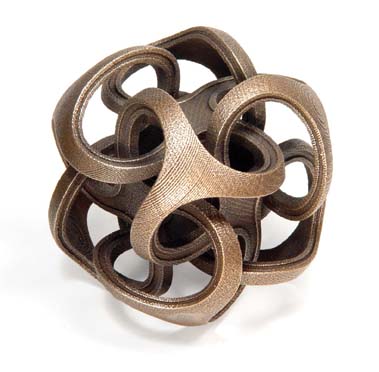
My other choice in Design and Computation was actually a student of Hauer. Bathsheba Grossman says that she was an undergraduate at Yale studying math when she first saw Hauer’s work. It was life changing; this is what she wanted to do. After graduating with a degree in math she went on to study sculpture at University of Pennsyvania. Bathsheba transfers math and science into wonderful sculptures utilizes 3D printing in metal and 3D laser etching as the output. She reports that her “traditional” studio has been reduced drastically, as she creates most of her work in the computer. It is because the complexity of her work cannot really be done any other way. She creates in a space that is inaccessible to traditional forms. Immersed in technology, for years she has watched as some traditional artists like jewelers begin to gravitate to working on screen instead of through tiny loops. It is not without its sacrifice, as she admits there is a tactile experience that is the reward of creating manually.
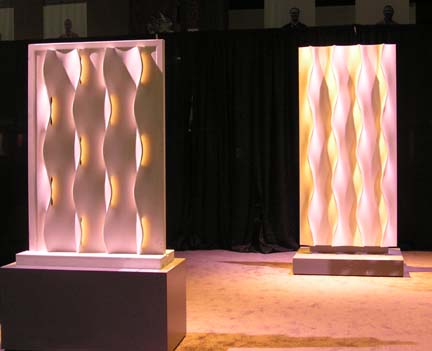
She waits patiently for technology to catch up to her needs as an artist. I learned that the “rough” texture created in the very intriguing process of digital printing in metal is a result of the technology and not part of her design. She is waiting for technology to improve. For those artists pursuing technology in the studio, it may sometimes feel like it progresses at the pace of RealSnailMail.
There were many more discoveries that I have found at Siggraph, which I hope to share in this column in the coming months, along with some wonderful tutorials on the advances in digital technologies as it pertains to the traditional artist. I myself have decided to embrace the technology and share it with as many creative people as I know. Maybe this will increase the snail’s pace and create the demand for the advances in technology that will assist us in our future creations. Though technology is improving and it will help us; in closing I would like to leave you with a quote from Hauer,
“It is an important token reminder for the younger generation and their tutors, that above and beyond the abundance of electronic marvels, the human vision and imagination remains the most important element and that its nurture should not be replaced by excessive reliance on devices.”
New You Tube Video – HARO
Sculptor Bridgette Mongeon shares a wonderful resource for marketing and the media. HARO- Help a Reporter Out. www.helpareporter.com
You are welcome to copy this you tube video to your site or blog. I might suggest instead you copy the blip.tv player. It is a better sound and better visuals, and I think the player is nicer. It also has a nice HARO graphic as the cover page for the video. It can be found on my home page. https://creativesculpture.com or on my blip tv site at www.creativeendeavors.blip.tv it is also on my Facebook page.
Or if you look to the left of this page you will see a list of my blip.tv videos and Haro is the first. Click on that icon and it takes you to the creativeendeavors.blip.tv site.
If you want to send someone someplace to view the video you are welcome to send them here. I’d love to have the traffic to my fine art web site!
What Is It Like To Sculpt The Famous?
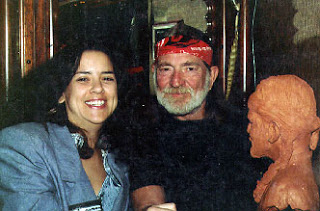 People often ask me what it was like to sculpt someone famous. Really it is the same as sculpting anyone else. Each subject adds their own nuances to the sculpture.
Many of those in the music industry have had people trying to take a piece of them their entire carriers, if that has hardened them to others then it will make my job much more difficult. Because remember, I am trying to capture much more than a likeness, I am trying to capture the essence of an individual.
For example B. B. King was wonderful to work with. Bill Monroe on the other hand was a harder nut to crack. I was able to soften him up a bit, even to the point where he hit me in the arm with his elbow as we were walking from the Grand Ole Opry.
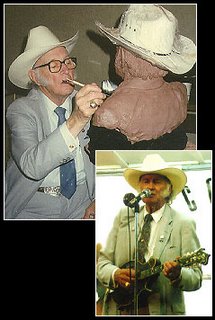
Minnie Pearl was approaching, and Bill said, “Tell er watcha doen, tell er wathcha doen.” It was the first time he showed real emotion over the sculpture.
I have enjoyed not only the sculpting of those who are famous, but also the research about them. I love history, and studying about an individual is a study in history. Especially if they have played roll in shaping that history, either politically, like Jesse Jones, or musically like B. B. King Willie Nelson, and Bill Monroe.
A funny story about B. B. King
I was a sitting, next to B. B. King, calipers in my lap and I said, “Mr. King, I will have to touch you in this sitting.”
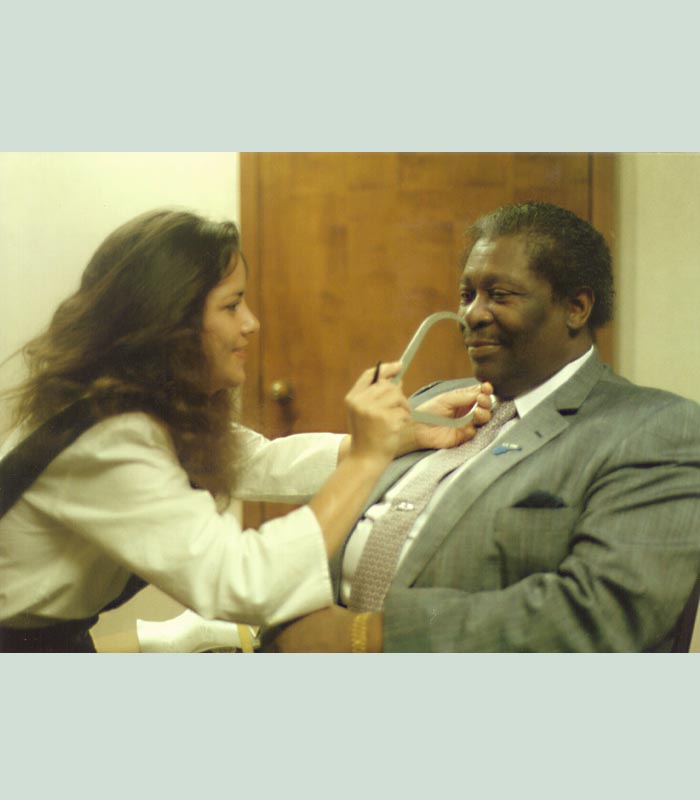
I know some people have a problem with people touching them especially their face, so I thought I should say something.
He replied, “Oh darling, you are already touching me!”
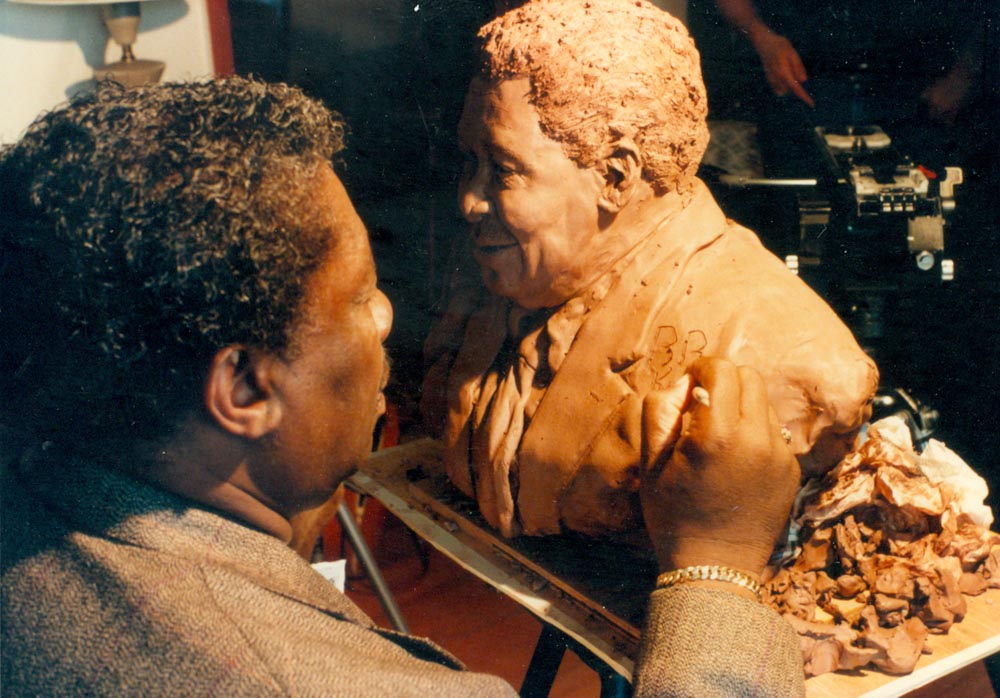
I looked at the calipers in my lap and him and said, “I don’t know what you mean.”
He said, “Your thigh is against my thigh and believe me the thrill is not gone!”
I love my stories about sculpting.
By the way, I equally enjoy sculpting for those people who just think their subject is a star!
Great Resource! Help A Reporter Out!
I have to tell you about this great resource. I’m about to release a video on it, but thought I would share a bit of the script here.
It is called HARO.
HARO? HARO? What the heck is a HARO?
It is simple it is an acronym for Help a Reporter Out. It is another great resource and definitely something to check out.
Peter Shankman, CEO, Entrepreneur, adventurist and cat lover started this simple Face Book page to help out some of his reporter and friends that were looking for sources. Instead of having to cull through his list of names he developed the Face Book page, and well it grew so quickly he moved it to http://www.helpareporter.com.
If you are writer working on a story, or have a podcast and are needing guests maybe you just have an online blog and want to get some real meat into your blogging. Then fill out the form on helpareporter.com.
Or maybe you are a PR firm that has many different clients that you represent. Then you can request to be added to the HARO mailing list and three times a day you will get requests for sources. All you need to do is find some that fit your clients.
Now I’m not a huge PR firm, I’m just a sculptor and writer work on my own public relations for my fine art sculpting, gift line, and speaking engagements that I do on marketing in the arts, and oh yes, I write articles. So I signed up. As of this date I have worked on both ends. I have given interviews on being a caregiver for an elderly parent, a female sculptor and entrepreneur, fostering animals in my home, being a women techy and of course art.
Three times a day I cull through the listings to see if anything fits, I want my reply to be on target. Can I really help this journalist? I need to be very careful. It is just good PR form not to send my stuff to everyone. And we all want to be very careful not to abuse this wonderful resource.
A few weeks ago I used HARO on the reverse end. I had a quick deadline on and article that I was writing and was looking for resources on a subject that I thought no one would be able to help me with. Writing an article about the Orphans work act. I went to the site and filled out the form and a very short time later I was inundated with sources, all in time for my next day deadline. Be prepared to file those resources. I’ll tell you they come fast. It made my job so much easier as a writer.
How much does all of this cost? FREE! Peter Shankman says that it is worth it for him to take time out of his day to put the list together, after all he gets a great deal of publicity out of it. Now if you want to donate remember he is an animal lover he has no problem with you sending a few bucks to such places as Best Friends Animal Sanctuary, or the National Dog Foundation. What a guy GO SHANKMAN! And thanks for HARO.
Pass the word and let others know about the resources. Having the list grow can only help both writer and source!
New Podcast Is Now Up! – Inspirations
As stated in an earlier post, I have been learning about creating podcasts. The podcast series has two channels, one called Creative Endeavors, featuring topics on art and another called Inspirations, about things of spiritual nature. ( creative endeavors podcast is not up yet, I’ll let you know)
I started the podcast for Inspirations to help other people and to help promote my collectible series God’s Word Collectibles. 
I have been focusing on the Inspirations channel which features a show called Generations. Three generations of Christian women sharing their thoughts about different issues and aspects of life. The women… My mom and my daughter, and myself. I has been a great deal of fun, and very interesting to hear what each generation thinks and is going through and how we compare. We have recorded our first 10, and have the first 4 up on the God’s Word Website. You can go to the main God’s Word Collectibles web site front page and click on blog/ forum. Or go directly to the blog
Sure would love to know what other think!
Giving Blood Can Make A Baby Dance!
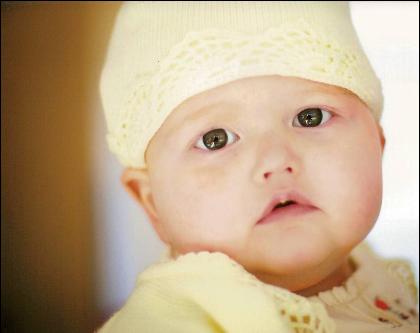
I guess I never had an example of what giving blood can do. It can make a baby giggle, and dance!
My client, in case you have forgotten about this commission, I’ll post another picture here
My client posted this short audio.
In it she describes the fight her little baby went through with childhood leukemia, and just how her receiving blood made a difference. Jenna passed away not long ago and I have created this sculpture that will sit at her grave site. If you have not thought about giving blood, this short audio may just change your mind. When you do give blood, maybe you will have a vision of a little baby, kicking his/her feet up in a dance, just like Jenna.
Deadlines Postponed- Sculpture Is In Pieces!
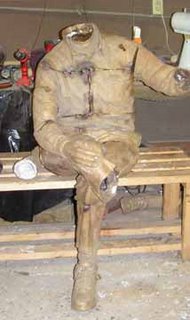
The sculpture unveiling is rescheduled for the end of September. Which will be a great time to visit Vermont, where Dick Hathaway is going. We figured a September unveiling would bring more people. While visiting the foundry the other day I took this picture. I’m creating a video on the casting process and will post it soon. It is hard to believe that the sculpture is cut into so many pieces and put back together again.
Every Creative Person Should Read This Article!

Here is the new article at Best of Artist and Artisans “You Could Lose your Rights” Please do not take my word for what the government is about to do to our rights as an artist, writer etc. Check out the links in this article. I have included many resources.
Mold Making and Bronze Casting- Part II
Created for Best of Artists and Artisans Website
By Bridgette Mongeon © 2008
THE MOTHER MOLD
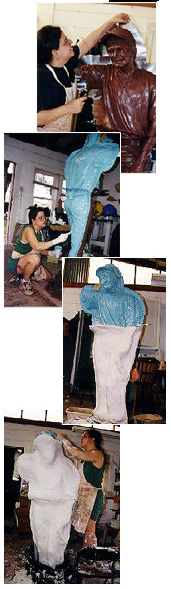
In the previous article Mold Making and Bronze Casting-Part I, we learned about preparing your sculpture for the mold making process and painting rubber on the sculpture. If you want to see a mold being made please refer to the video, The Casting of the Dick Hathaway Memorial. The video has been embedded in the online article Part 1. I will refer to this video often in this article. In Part II, I would like to talk about the process of creating a mother mold. Once this portion of the mold making process is complete, your molds can be cleaned, sent to the foundry, and waxes can be poured into the molds. Your artwork then begins its journey through the foundry process and through the lost wax method of bronze casting.
Mother molds are called mother molds because they hold the rubber in place. Your rubber may have been created in two or more pieces or sometimes one piece with a seam up one side, but a mother mold must be able to be pulled off the artwork, and it will not have the flexibility that rubber has. To be able to take the mother mold off the sculpture, it may entail visually dividing your sculpture up into more sections for the mother mold so that the pieces can be pulled off without any force or prying that may destroy the wax that will be poured into the mold later at the foundry. Drawing with a marker on the cured rubberhelps to define the mother mold sections. You will “clay up” seams, just as with the rubber portion discussed in Part I, claying up the sculpture along these marker lines in preparation for the plaster.
NOTE: You must “clay up” before putting on the mold release, or the Klean Klay will not adhere to the rubber. To make the Klean Klay adhere warm it up in a microwave as in the rubber stage and push it onto the dry rubber. Thicker “clayed up” seams are preferred over thin seams in both the rubber stage as well as making the mother mold seams. There is nothing worse than having a clayed up seam break loose while making the mold.
Mother molds can be made in a variety of different products. Most artist use a type of plaster called Hydrastone. Hydrastone is much stronger than Potter’s Plaster. You may be able to purchase Hydrastone from your art dealer, but most likely it will cost more than getting it from a supplier. I purchase mine from Circle Supply in Houston, Texas. A 100-pound bag of Hydrastone at Circle Supply costs $32.89. I went through three-100 pound bags on the Dick Hathaway sculpture featured in the video.
Mother molds can also be made in fiberglass. If I know I will be creating many pieces in an edition and I will need to obtain many waxes from a mold, I consider the extra effort of using fiberglass. You will be quite surprised how heavy a small mold can be with a mother mold of plaster. Fiberglass has its advantages for larger molds as well, because upon completion the mold is lighter. Fiberglass is, however, I believe, difficult to work with and toxic to use.
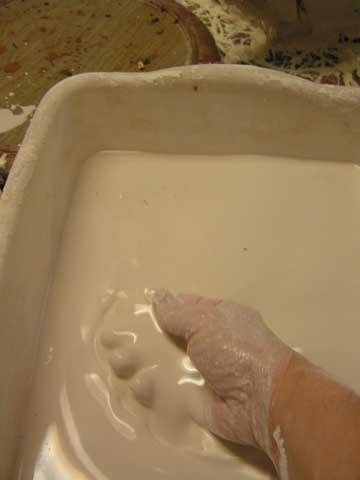
The plaster portion of the mold making process is the messiest part. In the past, I have fooled myself into thinking, “Just let the plaster fall on the floor and it will dry and scrape up easily.” This is just not so, and preparation of my space for making the mother mold is just as important as the rubber. It also makes clean up so much easier.
I usually like the rubber to cure a day before putting on the plaster, and often the plaster is done in conjunction with rubber. For example, if a mold is done in two pieces like the leg or arms in the video, I will paint rubber on one side then put the mother mold of plaster on top of that, and then flip the sculpture to do rubber and a mother mold on the other side.
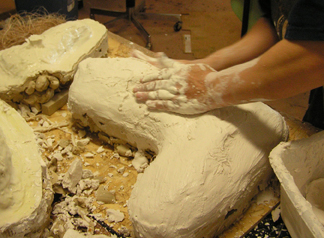
Before beginning to put the plaster on the rubber, you must note there is a process of preparing the rubber so that the mother mold can be pulled off the rubber. I mentioned this in Part I. This step is done in the rubber stage. This part of the process is not shown in the video and is a bit tricky to describe. Pieces of foam, the kind of foam that is in your sofa cushions, have been stuck to the rubber in areas of deep undercuts. Then a skin of painted rubber is put over the foam. The foam offers the “give” that the rubber mold needs to fold back on itself as it is taken off the wax that will be poured into the mold. It also gives a flatter surface with no undercuts for the plaster mother mold to be put on top. I will try to make a video or take detailed photographs of this the next time I make a mold.
Before applying plaster you should cover your rubber with a mold-releasing agent. An inexpensive source for this is simply using shortening such as Crisco or a store brand purchased from your local grocery store. Rub this over the entire surface. Putting your hand inside a plastic bag first helps to coat the rubber without making your hands gooey, an old cooking tip.
I usually have four plastic buckets, one that I am mixing in, one that holds a bit of hemp soaking in water, another that has extra plaster, should I need it, and another for washing my hands.
Mixing plaster is tricky, and you must watch it closely because when it activates there is little time to work. Working on smaller areas is much easier than a very large area. Be prepared to get dirty.
HINT:The Hydrastone makes these containers weak. I figure it must be a chemical reaction. Plus, I will often bang on them with a rubber mallet to get the hardened plaster out. When using the last bit of mixed plaster in the container, or if there is excess, try to scrape to the bottom in the center of the container. Then after the Hydrastone cures in the bottom of the plastic bucket, I can bang on the container freeing the two pieces into the trash can outside my studio and offering me a clean container to use for the next part of the mold. You will have to find just the right spot to bang on the container to loosen the plaster form the container without plunging through and breaking the increasingly brittle plastic. I prefer the rounded edge of the bottom.
HEMP: I purchased a bale of hemp, which will probably last me a lifetime. I might suggest you talk to your foundry or another artist and see if you can purchase some of their hemp from them. Be careful, if you buy a bale and clip those metal straps around the bale, the thing will explode, and you will be trying to figure out where to store all that hemp.
DO NOT MAKE A MOTHER MOLD WITHOUT HEMP. If you break your mother mold you have lost your piece. Hemp increases the strength of your mold, and if you are in a hurry, like I usually am, you are going to want to get this mold pulled and into production as quickly as possible. Molds, just after their completion, can be quite fragile.
Fill your plastic bucket with water to the amount needed for the amount of Hydrastone mixture you will want to use. I am not sure how to tell you how much to use; this knowledge will come with practice. Always mix the Hydrastone into the water. I start by making mounds of Hydrastone and letting them soak. You can get ratios from your Hydrastone supplier, but I really do this part by sight. Usually I add a bit more Hydrastone as I impatiently wait for the bucket to begin to “kick”. I mix all my plaster by hand and don’t use any mixers. This really helps me know the different stages of the plaster. It is something I do by feel. While the Hydrastone is soaking, I’ll take some of the hemp that has been soaking in water and arrange it over the rubber section that I am about to cover in Hydrastone, being sure to put some on the seam area. Then I will take this hemp off and dip it into the Hydrastone mixture and lay it back on the rubber. As the mixture begins to “kick”, I must work quickly, putting the plaster on the sculpture, forcing it into the hemp and building the areas that I need, including the seams. I strive to make the entire mold an inch thick or less.
When you are finishing the Hydrastone mother mold section and the Hydrastone is curing—you will know this is happening because it becomes increasingly warm, go over the section one last time with a wet hand to “polish” the outside surface of the mold, making it smooth.
HINT: When creating a section of mother mold next to another section of mother mold, I also rub the Crisco or cooking shortening on the edge of the completed Hydrastone piece. This will help in separating the pieces and keep splashes of Hydrastone from being stuck to the already hardened plaster.
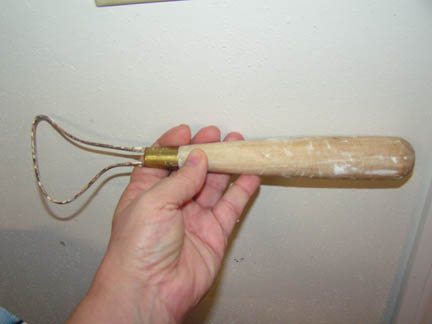
There are a couple of tools that I think are necessary to create the plaster. For example, I love having this large loop tool around when creating my Hydrastone mother mold. It is great when you want to clean up your Hydrastone seams and not make them jagged. This tool also cuts through the Hydrastone, even after it begins to cure, which is helpful, if I feel I have too much Hydrastone in one place.
Once all parts of the plaster are made you will want to separate the mold. Waiting a day or two for the Hydrastone to cure is helpful. It will take longer in high humidity. As the water evaporates from the Hydrastone, it will strengthen and will become a bit lighter.
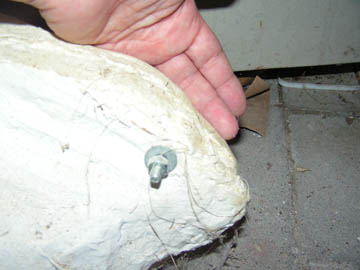
HINT: Small molds are often held together with rubber bands, larger molds may require bolts. Making a seam that comes up at the edge provides room for bolts. These bolt holes can be drilled before pulling apart the mold. Be careful not to jeopardize the rubber underneath. Often there is so much rubber and plaster, it is sometimes hard for me to make out where the sculpture actually lies underneath.
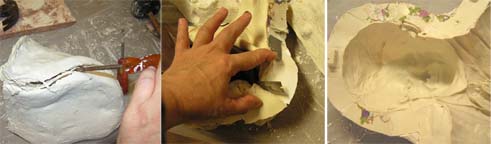
Separating the shell can sometimes feel like an impossible endeavor. I have several screwdrivers that I can shimmy into the seam. Once one is in a seam, I’ll try to move it down a bit and put another in, doing the same thing all of the way down the seam, being careful not to puncture the rubber underneath. More than once I have to struggle with a seam, only to flip the mold over and try another one. As a l ast resort, I may try to scoop out the clay from the open section where the wax will be poured, giving me something to hold on to, and I use this to pry the pieces apart. It takes practice to know when and where to apply pressure and when not to. This part of the process can take a good deal of strength.
NOTE: Be very careful if you are prying one piece of Hydrastone off another. It is easy to shatter a corner or an edge. Go slow and steady, and if you feel frustrated walk away, get lunch, and come back later.
Once the mother mold is separated, you can pull the rubber away from the original art. You will lose the integrity of your original art, but I keep the sections, especially the face. Should the wax come back to me and not look right, it gives me something to compare the wax against. Before sending these molds to the foundry, the rubber will need to be washed both inside an out. This can be done with kitchen soap and a good brush. Sometimes a toothbrush helps to clean small textured areas. When cleaning the inside, be sure that all the clay debris is out of the crevices and details, as this will be picked up by the wax, rendering the wax unusable.
The Crisco should also be washed off the outside of the rubber. Then the rubber is dried and placed back into the mother mold.
HINT: Do not leave the rubber in a heap. Instead let the mother mold do what she is supposed to do, cradle and hold the rubber. Rubber can have a “memory”, and leaving the rubber tossed about outside the mother mold may distort its shape and cause it not to fit back into the mother mold securely.
I would suggest that anyone who is wanting to learn to make molds for his or her own bronze casting, watch the process being done under a master mold maker. Contact a local foundry or artist and ask them if you can intern or apprentice under them to learn this process. They will most likely appreciate your eagerness and the help, especially if you can do it in their time frame. Remember they are on a deadline.
I might also suggest you take your education a bit further and ask the foundry if they will teach you to pour and pull your rubber molds. There is no better education in knowing if you created the mold properly than experiencing how the mold pulls from a wax. Though the process of creating a mold for bronze casting can feel daunting, with a little practice it is possible to begin to create your own molds, and in turn, save yourself a great deal of money in the process of bronze casting.
Pulling My Hair Out

One to one are classes that Apple offers. They are great just $90.00 a year and you can go in and meet with a mac person about anything one to one for an hour. I have learned a lot in the last year, as shown by the former post. Just thought I would give you a photo montage of my session. Notice the sign over my head in the las photograph says, “No pain, all gain.”